Requirements
- You must be an administrator of the machine to complete this guide.
- You need to have at least two network devices.
- One of them needs to have access to the internet and the other one needs to be a WiFi adapter which has
Hosted Network support.
To check if your wireless adapter supports the functionality for Hosted Network, open a Command Prompt and type NETSH WLAN show drivers.
To open the Command Prompt, press the buttons Windows+R on your keyboard.
A new run command prompt will appear.
Type in the input box cmd and hit the Enter button.
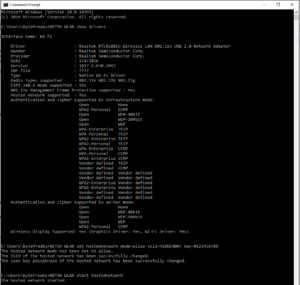
In the new Command Prompt type NETSH WLAN show drivers, the results should be similar to below.
C:\Users\bytefreaks>NETSH WLAN show drivers

Interface name: Wi-Fi

    Driver                    : Realtek RTL8188CU Wireless LAN 802.11n USB 2.0 Network Adapter
    Vendor                    : Realtek Semiconductor Corp.
    Provider                  : Realtek Semiconductor Corp.
    Date                      : 3/4/2016
    Version                   : 1027.4.630.2015
    INF file                  : ????
    Type                      : Native Wi-Fi Driver
    Radio types supported     : 802.11n 802.11b 802.11g
    FIPS 140-2 mode supported : Yes
    802.11w Management Frame Protection supported : Yes
    Hosted network supported  : Yes
    Authentication and cipher supported in infrastructure mode:
                                Open            None
                                WPA2-Personal   CCMP
                                Open            WEP-40bit
                                Open            WEP-104bit
                                Open            WEP
                                WPA-Enterprise  TKIP
                                WPA-Personal    TKIP
                                WPA2-Enterprise TKIP
                                WPA2-Personal   TKIP
                                WPA-Enterprise  CCMP
                                WPA-Personal    CCMP
                                WPA2-Enterprise CCMP
                                Vendor defined  TKIP
                                Vendor defined  CCMP
                                Vendor defined  Vendor defined
                                Vendor defined  Vendor defined
                                WPA2-Enterprise Vendor defined
                                WPA2-Enterprise Vendor defined
                                Vendor defined  Vendor defined
                                Vendor defined  Vendor defined
    Authentication and cipher supported in ad-hoc mode:
                                Open            None
                                Open            WEP-40bit
                                Open            WEP-104bit
                                Open            WEP
                                WPA2-Personal   CCMP
    Wireless Display Supported: Yes (Graphics Driver: Yes, Wi-Fi Driver: Yes)
In the results you need to find the line Hosted network supported and verify that the value is set to Yes, if it is not, then you cannot proceed with this wireless network adapter.
In case you got a permission error on the above command, try to open a new Command Prompt with admin rights.
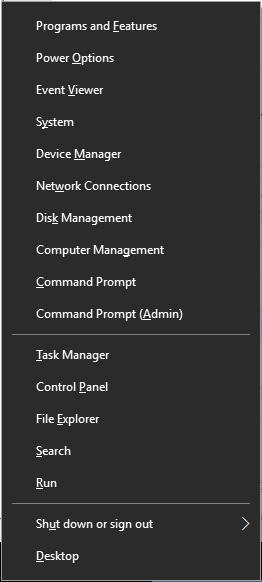
Press the keys Windows+X, in the pop-up menu select Command Prompt (Admin). If your account has enough access rights, a new run command prompt will appear. In the new Command Prompt (Admin) type NETSH WLAN show drivers, the results should be similar to above.
If this failed as well, you cannot proceed with the current account, you either need to sign in with another account or ask your system administrator to perform this task for you.
How to setup the hotspot
In the Command Prompt enter the following command:
NETSH WLAN set hostednetwork mode=allow ssid=BYTEFREAKS key=0123456789
Update ssid=BYTEFREAKS with the name that you want to give your network. e.g. ssid=MY_NETWORK.
Update key=0123456789 with the password that you want to give your network. e.g. ssid=y0m2ZSQ3ng.
The new network will use WPA/WPA2 PSK security policy so your password needs to be at least 8 characters long.
The results will be similar to the following block.
C:\Users\bytefreaks>NETSH WLAN set hostednetwork mode=allow ssid=HIDDEN007 key=0123456789
The hosted network mode has been set to allow.
The SSID of the hosted network has been successfully changed.
The user key passphrase of the hosted network has been successfully changed.
How to activate the hotspot
Once the Hosted Network is created, enter the following command as is to activate it
NETSH WLAN start hostednetwork
C:\Users\bytefreaks>NETSH WLAN start hostednetwork
The hosted network started.
After this step, your network will be visible to connect to but it will not provide its users with internet access.
Please note that due to the lack of commands in the documentation (https://msdn.microsoft.com/en-us/library/windows/desktop/dd815243(v=vs.85).aspx) it is not possible to prevent your hotspot from broadcasting its SSID to everyone. In other words, it is not possible to hide your network from other users, so use a strong password!

How to share internet connection with the hotspot
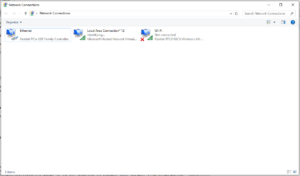
Press on the keyboard Windows+X to open the Power User menu, and select Network Connections.

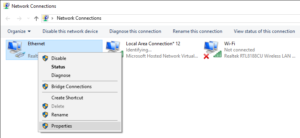
You will notice that a there is a new device in this list. The name of this device will be something line Local Area Connection* 12. That device is the new virtual device you created in the previous step to create the hotspot.

Right-click the other network adapter, that has an active internet connection and select Properties.

Click on the Sharing tab.

Enable the Allow other network users to connect through this computer's Internet connection option.
From the Home networking connection drop-down menu select the virtual device that we created.
Click OK to close the configuration and apply the changes.
By completing this step, all devices connected to your Hotspot will have access to the internet via the connection of the second network device.

