How to Create a WiFi Hotspot in Ubuntu 22.04
Creating a WiFi hotspot on Ubuntu 22.04 is a straightforward process that can be very useful for sharing your internet connection with other devices. Turning your Ubuntu machine into a WiFi access point is a handy solution, whether at home or in a setting where a traditional WiFi network isn’t available. Here’s a detailed guide on configuring WiFi Access Points using the network-manager snap.
Prerequisites
Before we begin, ensure that you have the following:
- A computer running Ubuntu 22.04.
- A wireless network interface on your Ubuntu device.
- The
network-managersnap installed on your system.
Step-by-Step Guide to Create a WiFi Hotspot
Open the Terminal: First, open your terminal. You can do this by pressing Ctrl + Alt + T or searching for ‘Terminal’ in your applications menu.
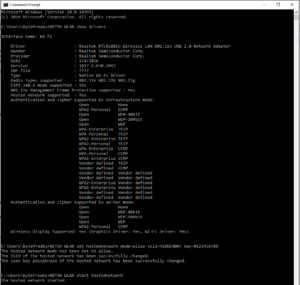
Identify Your WiFi Interface: You need to know the name of your WiFi network interface. You can find this by running the command nmcli device status. Look for the device under the “DEVICE” column that has “wifi” listed in the “TYPE” column.
Configure the WiFi Hotspot: Use the following command to set up your WiFi hotspot:php
nmcli d wifi hotspot ifname <wifi_iface> ssid <ssid> password <password>;
Replace <wifi_iface> with your WiFi interface name, <ssid> with your desired network name (SSID) and <password> with your chosen password. Remember, the password should be between 8-63 characters or 64 hexadecimal characters.
For example, if your WiFi interface is wlan0, your desired SSID is MyHotspot, and your password is MyStrongPassword123, the command will look like this:
Connection Verification: If the command is successful, network-manager will create a connection named ‘Hotspot <N>’, where <N> is a number. This indicates your hotspot is active.
Shared Internet Connection: The created hotspot offers a shared connection by default. This means any device connected to your hotspot should be able to access the internet if your Ubuntu device has internet access.
Connecting Devices: Search for available WiFi networks on your other devices (like smartphones or laptops). You should see the SSID you set (MyHotspot in our example). Connect to it using the password you configured.
Tips and Considerations
- Ensure your device has a stable internet connection if you intend to share it via the hotspot.
- Keep your hotspot secure by using a strong, unique password.
- Remember that using your computer as a hotspot may impact its battery life more quickly if not plugged in.
Conclusion
Creating a WiFi hotspot on Ubuntu 22.04 is a useful feature, especially when you need to share your internet connection quickly and efficiently. Following these simple steps, you can turn your Ubuntu machine into a reliable WiFi access point for various devices.
ncmli device wifi hotspot [ifname ifname] [con-name name] [ssid SSID] [band {a | bg}] [channel channel] [password password]
   Create a Wi-Fi hotspot. The command creates a hotspot connection profile according to Wi-Fi device capabilities and activates it on the device. The hotspot is secured with WPA if device/driver supports that, otherwise WEP is used. Use connection down or device down to stop the hotspot.

   Parameters of the hotspot can be influenced by the optional parameters:

   ifname
       what Wi-Fi device is used.

   con-name
       name of the created hotspot connection profile.

   ssid
       SSID of the hotspot.

   band
       Wi-Fi band to use.

   channel
       Wi-Fi channel to use.

   password
       password to use for the created hotspot. If not provided, nmcli will generate a password. The password is either WPA pre-shared key or WEP key.

       Note that --show-secrets global option can be used to print the hotspot password.
       It is useful especially when the password was generated.