Monthly Archives: January 2018


Fedora install JDK (OpenJDK) 2

As we were setting up a machine that would be used for software development, we came to the need of installing a Java Development Kit (JDK).
There are two popular choices on the web between the OpenJDK and the Oracle JDK, we decided to go with the OpenJDK option which is a free and open source implementation of the Java Platform and it is part of the official Fedora repositories.

To install the OpenJDK along with all the needed libraries for development we used the following command:


sudo dnf install java-1.8.0-openjdk java-1.8.0-openjdk-devel;

On our GNU/Linux Fedora the installation folder of the JDK was /usr/lib/jvm/java-1.8.0-openjdk.


Fedora 27: Install OBS Studio

In order to record a few desktop sessions on our Fedora GNU/Linux machine, we decided to use the OBS Studio as it appeared to be a very powerful tool.
Unfortunately, this software does not ship with the official repositories so we had to install it from the  rpmfusion.org repository using the following commands.

#Enable access to both the free and the nonfree repository
#free repository: for Open Source Software (as defined by the Fedora Licensing Guidelines) which the Fedora project cannot ship due to other reasons
#nonfree repository: for redistributable software that is not Open Source Software (as defined by the Fedora Licensing Guidelines); this includes software with publicly available source-code that has "no commercial use"-like restrictions 
sudo dnf install https://download1.rpmfusion.org/free/fedora/rpmfusion-free-release-$(rpm -E %fedora).noarch.rpm https://download1.rpmfusion.org/nonfree/fedora/rpmfusion-nonfree-release-$(rpm -E %fedora).noarch.rpm;

#Perform the installation
sudo dnf install obs-studio;

Background:

RPM Fusion provides software that the Fedora Project or Red Hat don’t want to ship. That software is provided as precompiled RPMs.

Codecs in Fedora

By default Fedora does not ship with several codecs whose license is not free.
So we had to install a few packages manually and be able to playback or process sever multimedia formats.

Specifically we installed the following plugins and libraries for GStreamer (needed for the Totem Movie Player):

  1. gstreamer1-libav: This package provides libav-based GStreamer plug-ins.
    Libav is a free software project, forked from FFmpeg in 2011, that produces libraries and programs for handling multimedia data.
  2. gstreamer1-plugins-good: GStreamer Good Plugins is a collection of well-supported plugins of good quality and under the LGPL license.
  3. gstreamer-ffmpeg: This package provides FFmpeg-based GStreamer plug-ins.

GStreamer is a streaming media framework, based on graphs of filters which operate on media data. Applications using this library can do anything from real-time sound processing to playing videos, and just about anything else media-related. Its plugin-based architecture means that new data types or processing capabilities can be added simply by installing new plugins.

The command to install these packages was:


sudo dnf install gstreamer1-plugins-good gstreamer-ffmpeg gstreamer1-libav;

Additional h264 – h.264 Codec – Optional

Following, we decided to install the OpenH264 codec implementation and its extensions for Firefox and gstreamer.

Cisco provides an OpenH264 codec (as a source and a binary), which is their of implementation H.264 codec, and they cover all licensing fees for all parties using their binary. This codec allows you to use H.264 in WebRTC with gstreamer and Firefox. It does not enable generic H.264 playback, only WebRTC.

The code source is available at https://github.com/cisco/openh264 under a BSD license. The binary is released under this agreement from Cisco: http://www.openh264.org/BINARY_LICENSE.txt

Upstream Firefox versions download and install the OpenH264 plugin by default automatically. Due to it’s binary nature, Fedora disables this automatic download.

From: https://fedoraproject.org/wiki/OpenH264

To install the codec we performed the three following steps:


sudo dnf config-manager --set-enabled fedora-cisco-openh264;

sudo dnf upgrade;

sudo dnf install gstreamer1-plugin-openh264 mozilla-openh264;

# Afterwards you need open Firefox, go to menu -> Add-ons -> Plugins and enable OpenH264 plugin.

Bonus: Black Screen Issue

If you are having issues with the OBS Studio black screen bug, have a look at this post, it may be able to help you.


Qubes OS: Connect to Wi-Fi or Ethernet or another network 1

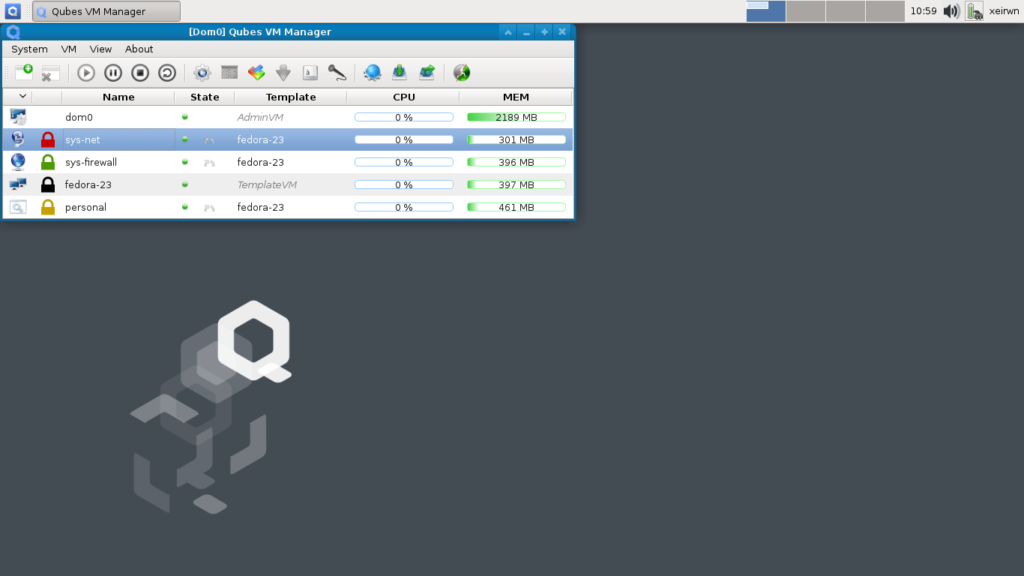
A couple of days ago we decided to give Qubes OS a go and see what it could do for a regular user. The installation was easy as it uses the same installer as Fedora, so we just created a live USB and formatted a laptop that had built in Wi-Fi.

To our surprise, we could not figure out how to change the network settings and activate an internet connection! Going to the NetworkManager (nm), even with root, would show us all fields as disabled when trying to create any new connection!

Some time passed before we realized that the NetworkManager of XFCE4 was not the way to go. After inspecting the Virtual Machines on the Qubes VM Manager, we saw that the sys-net VM was the only one that had in its hardware settings to access the Ethernet and Wi-Fi modules. So we got the hint, we needed to modify sys-net in order to connect the entire OS with its VMs to the network.

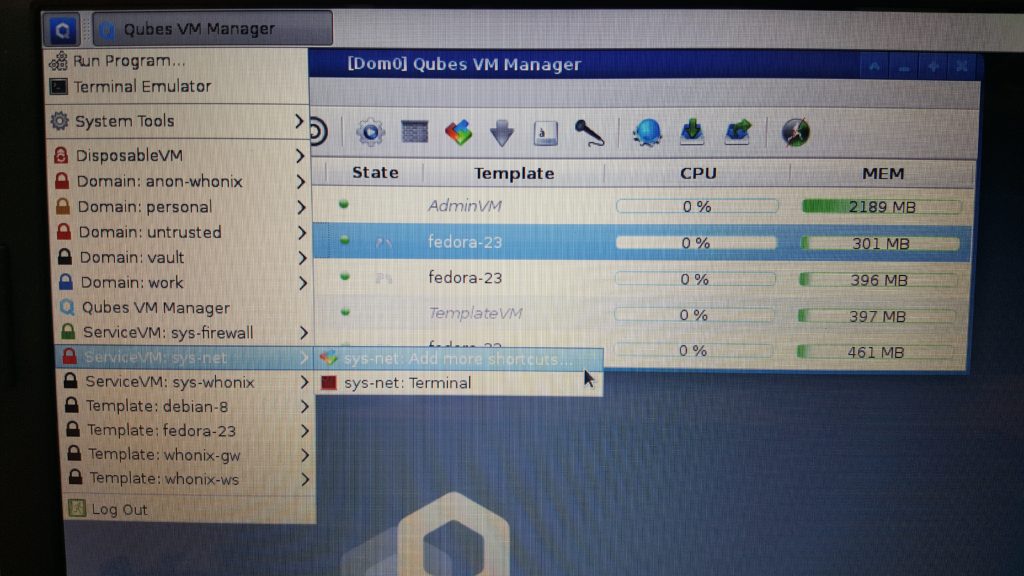
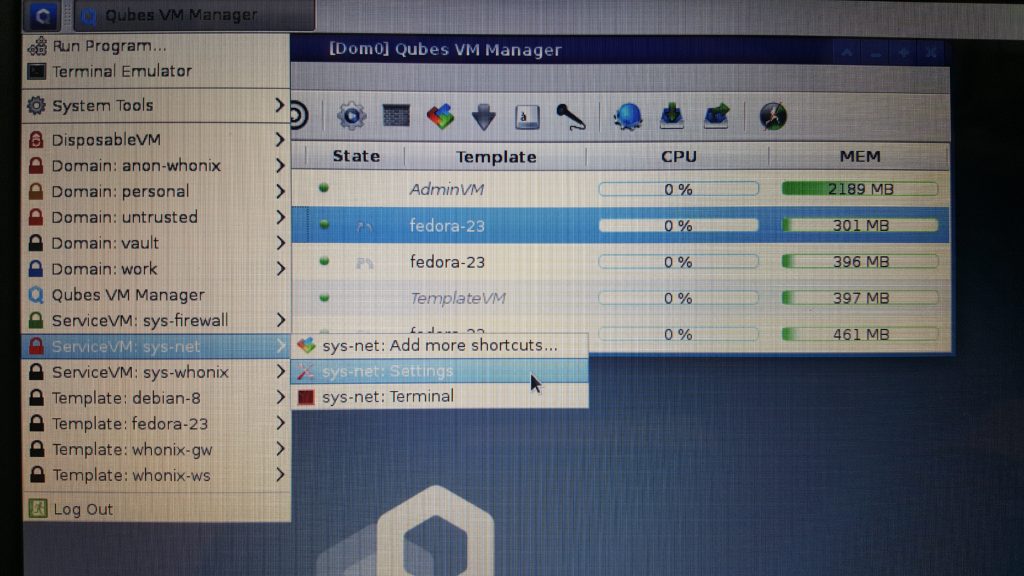
To modify the settings of the sys-net VM we needed access to the Settings Application, which was not available in the application menu. So the first thing we did, was to use the sys-net: Add more shortcuts... option under the group ServiceVM: sys-net to enable the Settings application shortcut.

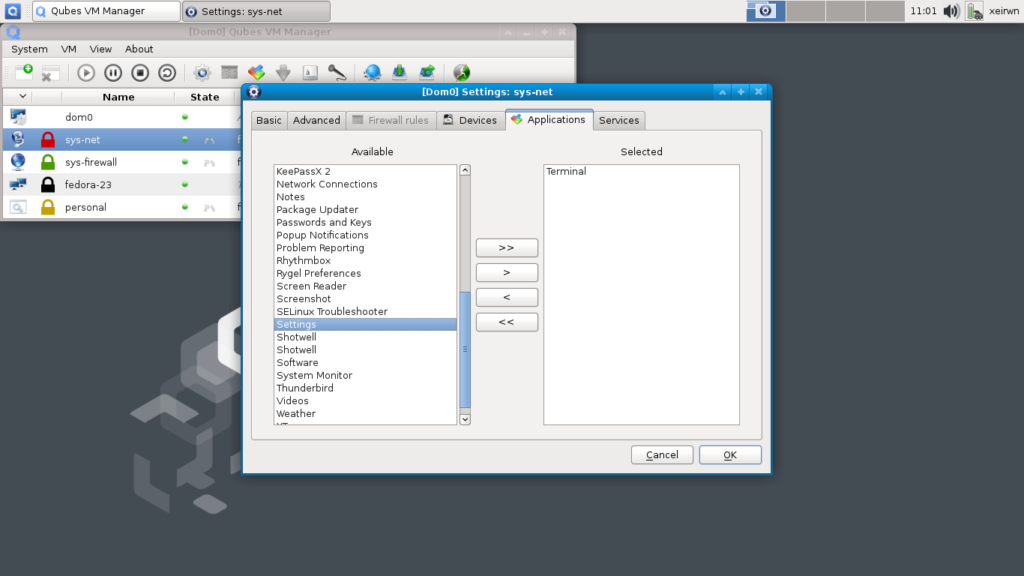
In the [Dom0] Settings: sys-net window, we went to the Applications tab, on the left list we scrolled down to find the Settings option.

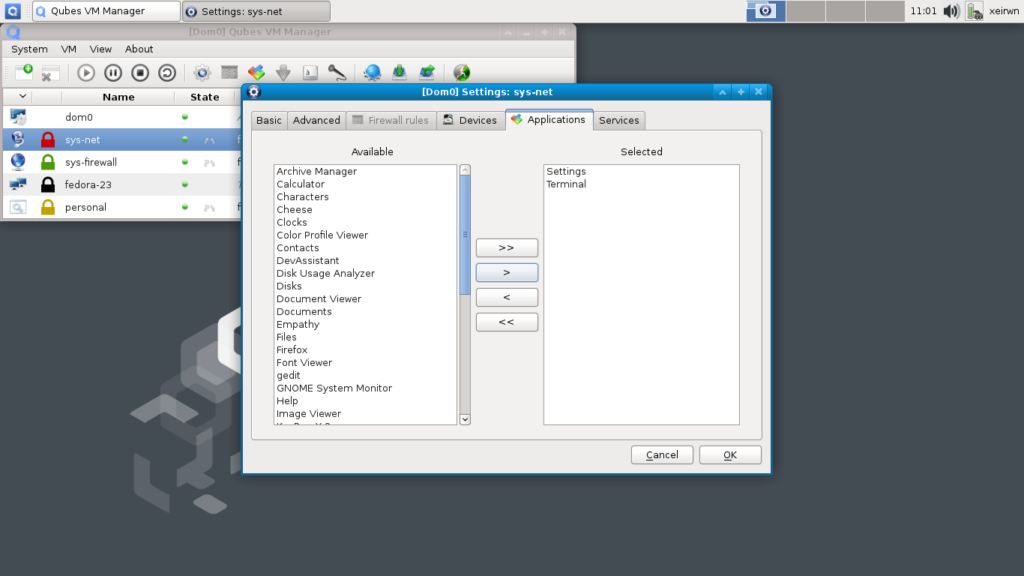
After selecting the Settings option, we clicked on the > button to move the Settings option to the right list.

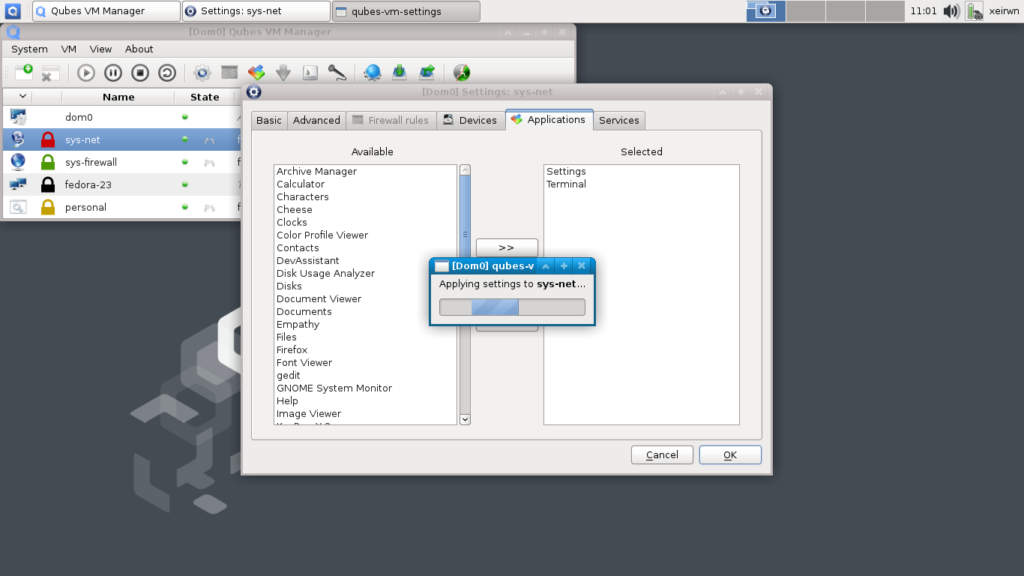
Then we clicked on the OK button to apply the changes.

Going back to the application menu and the group ServiceVM: sys-net we could see the new option for sys-net: Settings.

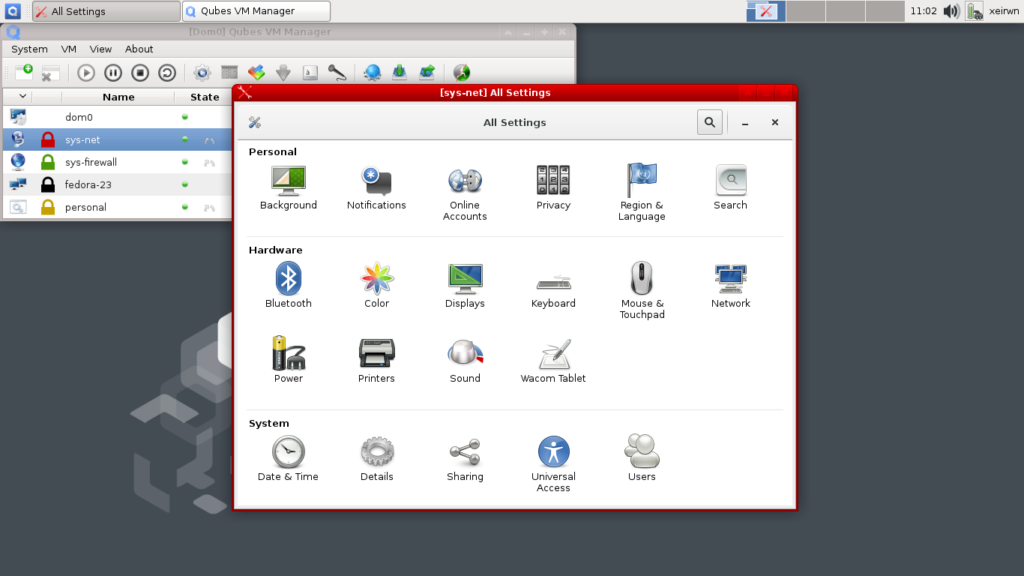
Clicking on the sys-net: Settings showed us the usual settings manager for Gnome.

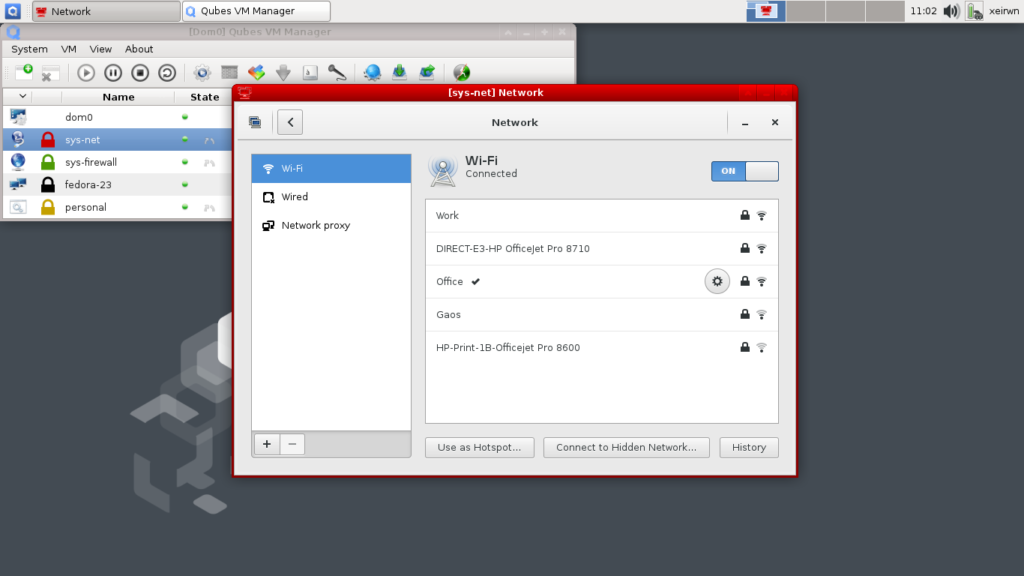
From there on, our job was easy, we just clicked on the Network option that gave us the window to modify all network settings. Then we selected the Wi-Fi network that we wanted to connect to, which worked without a hitch!

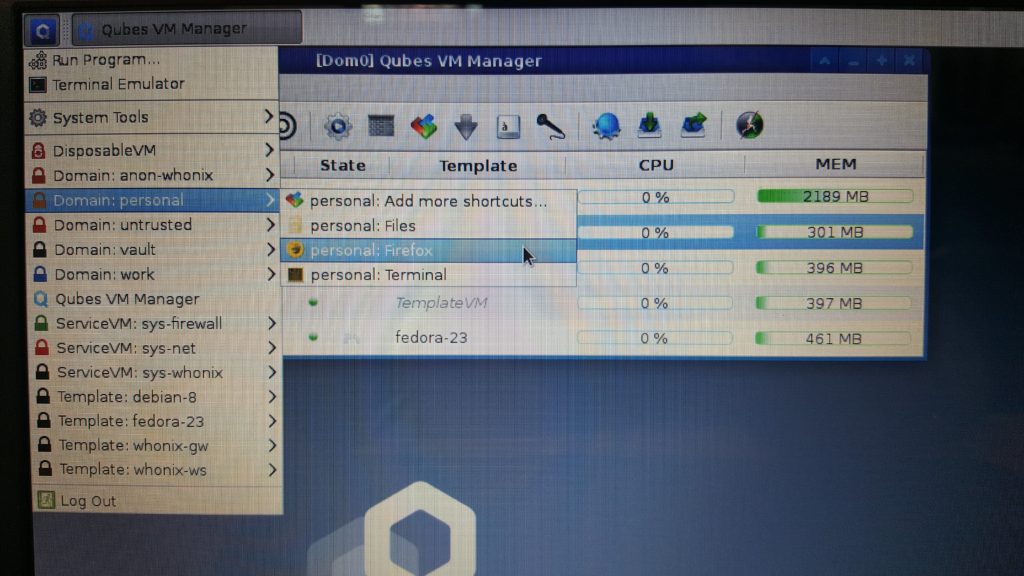
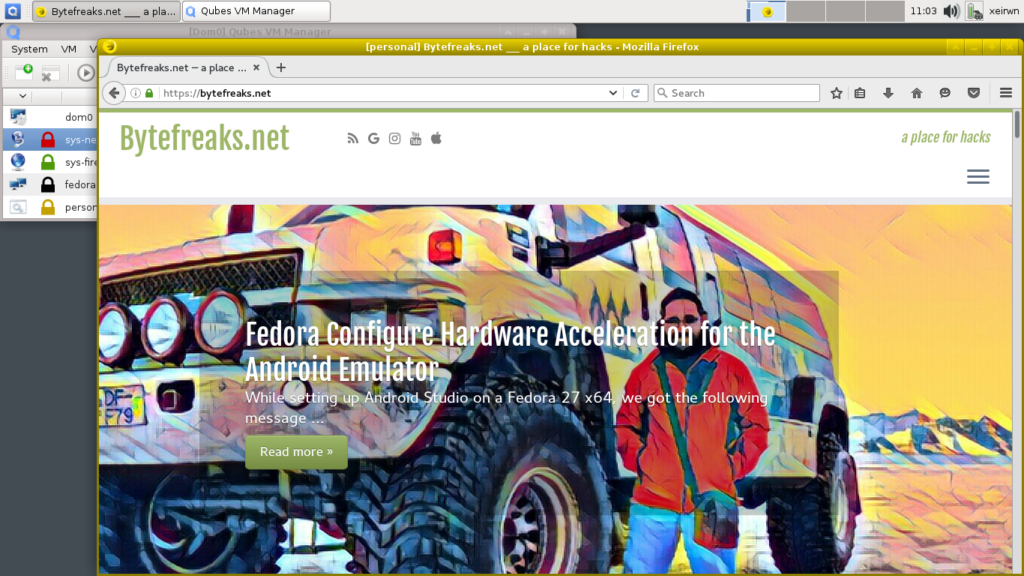
Finally, we had to test if the configuration was working as expected. From the application menu, under the group Domain: personal, we selected the option personal: Firefox to start the Firefox application on the personal VM.

Once Firefox started we could see that internet connection was active and everything was working as expected!


Fedora Configure Hardware Acceleration for the Android Emulator 1

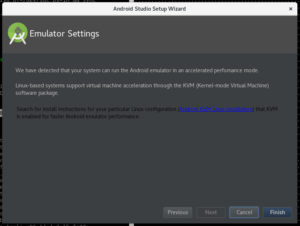
While setting up Android Studio on a Fedora 27 x64, we got the following message from the Android Studio Setup Wizard:

We have detected that your system can run the Android emulator in an accelerated performance mode.
Linux-based systems support virtual machine acceleration through the KVM (Kernel-mode Virtual Machine) software package.

Search for install instructions for your particular Linux configuration (Android KVM Linux Installation) that KVM is enabled for faster Android emulator performance.

After going through the website mentioned in the message we noticed that there were no instructions for Fedora so we decided to write our own.

Below are the steps we followed to enable hardware acceleration for the Android emulator.

Step 1: Verify that your CPU has virtualization extensions.

Execute the following in a terminal:


egrep '^flags.*(vmx|svm)' /proc/cpuinfo;

if you get ANY output then it would mean that your CPU supports either VMX or SVM which is good.
If it does not print anything then the emulator will fall back to software virtualization, which is extremely slow.

Step 2: Install the virtualization packages


sudo dnf group install --with-optional virtualization;

Step 3: Start the service


sudo systemctl start libvirtd;

Step 4: Automatically start the service on boot:


sudo systemctl enable libvirtd;

Step 5: Verify that the kvm kernel modules were loaded


lsmod | grep kvm

If the above command does not print kvm_intel or kvm_amd, it would mean that KVM is not properly configured.