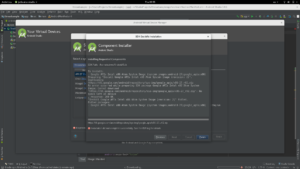
Recently we tried to install some packages from the Android SDK through Android Studio 3.0.1 and we got the error that the PC ran out of space while downloading the necessary packages and could not perform the operation.

Full Error Log:
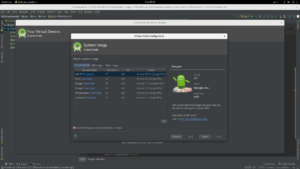
To install:
- Google APIs Intel x86 Atom System Image (system-images;android-27;google_apis;x86)
Preparing "Install Google APIs Intel x86 Atom System Image (revision: 2)".
Downloading https://dl.google.com/android/repository/sys-img/google_apis/x86-27_r02.zip
An error occurred while preparing SDK package Google APIs Intel x86 Atom System Image: Cannot download 'https://dl.google.com/android/repository/sys-img/google_apis/x86-27_r02.zip': No space left on device
, response: 200 OK.
"Install Google APIs Intel x86 Atom System Image (revision: 2)" failed.
Failed packages:
- Google APIs Intel x86 Atom System Image (system-images;android-27;google_apis;x86)
Although the disk had a lot of free space, we got this error because the /tmp partition on our GNU/Linux Fedora 27 workstation was too small (~4GB).
$ df -h;
Filesystem Size Used Avail Use% Mounted on
devtmpfs 3.9G 0 3.9G 0% /dev
tmpfs 3.9G 107M 3.8G 3% /dev/shm
tmpfs 3.9G 1.9M 3.9G 1% /run
tmpfs 3.9G 0 3.9G 0% /sys/fs/cgroup
/dev/mapper/fedora-root 50G 35G 12G 75% /
tmpfs 3.9G 2.1M 3.9G 1% /tmp
/dev/sdb1 477M 179M 269M 41% /boot
/dev/mapper/fedora-home 178G 37G 132G 22% /home
tmpfs 794M 16K 794M 1% /run/user/42
tmpfs 794M 9.2M 785M 2% /run/user/1000
/tmp was not explicitly set so it was automatically configured to have half of the size of the RAM.
We didn’t not want to change the download path for the Java environment (and hence Android Studio and Android SDK tools) as after leaving the tmpfs folder it could mean that we would have to manually maintain the new path and clean it up. So we ended up in temporarily increasing the size of /tmp partition which did the trick and the virtual device was installed successfully.
Solution – temporarily increase the size of the /tmp partition:
The command we used to increase the size of the /tmp partition on Fedora 27 was the following:
sudo mount -o remount,size=8G,noatime /tmp;
After executing we, it we immediately saw that the results were applied without the need for a restart or any other operation and we could proceed to use the PC as normal.
$ df -h
Filesystem Size Used Avail Use% Mounted on
devtmpfs 3.9G 0 3.9G 0% /dev
tmpfs 3.9G 89M 3.8G 3% /dev/shm
tmpfs 3.9G 1.9M 3.9G 1% /run
tmpfs 3.9G 0 3.9G 0% /sys/fs/cgroup
/dev/mapper/fedora-root 50G 35G 12G 75% /
tmpfs 8.0G 2.0M 8.0G 1% /tmp
/dev/sdb1 477M 179M 269M 41% /boot
/dev/mapper/fedora-home 178G 37G 132G 22% /home
tmpfs 794M 16K 794M 1% /run/user/42
tmpfs 794M 6.9M 787M 1% /run/user/1000
The information for tmpfs we got it from: https://wiki.archlinux.org/index.php/Tmpfs
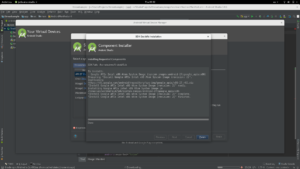
Full Correct Execution Log:
To install:
- Google APIs Intel x86 Atom System Image (system-images;android-27;google_apis;x86)
Preparing "Install Google APIs Intel x86 Atom System Image (revision: 2)".
Downloading https://dl.google.com/android/repository/sys-img/google_apis/x86-27_r02.zip
"Install Google APIs Intel x86 Atom System Image (revision: 2)" ready.
Installing Google APIs Intel x86 Atom System Image in /home/xeirwn/Android/Sdk/system-images/android-27/google_apis/x86
"Install Google APIs Intel x86 Atom System Image (revision: 2)" complete.
"Install Google APIs Intel x86 Atom System Image (revision: 2)" finished.