prisma


neural-style-tf: Another open source alternative to Prisma (for advanced users) 1

Recently we stumbled upon another very interesting project, it is called neural-style-tf which is a TensorFlow implementation of an artificial system based on Convolutional neural networks and attempts to separate and combine the content of one image with the style of another.

According to the authors, this tool is based on the following papers

What this tool does is ‘simple’, it takes as input two images, the style image and the content image and using the style image, it tries to recreate the content image in such way that the content image looks like it was created using the same technique as the style image.
Following, is an example of a photograph that was recreated using the style of The Starry Night.

This tool offers a ton of possibilities and options, which we still did not play through yet.
Overall, we are very happy with the initial results we got. The final renderings look really nice and the fact that you get to choose your own style images it gives this tool a very nice advantage.

What we did not like though, is that it takes a lot of time and memory to complete the rendering of a single image (especially if you do not use a GPU to speed up the process).
This issue with the resources is normal and expected, unfortunately though it limits the fun out of the system. Each experiment you make is blocking you for some time and you cannot fiddle with the results in real time.

We installed this tool on an Ubuntu GNU/Linux with success.
Following are the exact commands we used to install it on Ubuntu and convert our first image (the one above).

cd ~;
sudo apt-get install python-pip python-dev;
pip install tensorflow;
pip install tensorflow-gpu;
pip install scipy;
git clone https://github.com/opencv/opencv.git;
cd ~/opencv;
mkdir release;
cd release;
cmake -D CMAKE_BUILD_TYPE=RELEASE -D CMAKE_INSTALL_PREFIX=/usr/local ..;
make;
sudo make install;
cd ~;
git clone https://github.com/cysmith/neural-style-tf.git;
cd neural-style-tf/;
wget http://www.vlfeat.org/matconvnet/models/imagenet-vgg-verydeep-19.mat;
#After everything is complete, it is time to create our first 'artistic' image.
python neural_style.py --content_img "/home/bytefreaks/Pictures/Aphrodite Hills Golf Course - Paphos, Cyprus.jpg" --style_imgs "/home/bytefreaks/Pictures/Van_Gogh_-_Starry_Night_-_Google_Art_Project.jpg" --max_size 1250 --max_iterations 1500 --device /cpu:0 --verbose;

Following are the exact commands we used to install it on CentOS 7 (64bit) and convert our first image (the one above).


cd ~;
sudo yum install python-pip cmake;
sudo pip install --upgrade pip;
sudo pip install tensorflow scipy numpy;
git clone https://github.com/opencv/opencv.git;
cd ~/opencv;
mkdir release;
cd release;
cmake -D CMAKE_BUILD_TYPE=RELEASE -D CMAKE_INSTALL_PREFIX=/usr/local ..;
make;
sudo make install;
cd ~;
git clone https://github.com/cysmith/neural-style-tf.git;
cd neural-style-tf/;
wget http://www.vlfeat.org/matconvnet/models/imagenet-vgg-verydeep-19.mat;
export PYTHONPATH=$PYTHONPATH:/usr/local/lib/python2.7/site-packages
python neural_style.py --content_img "/home/bytefreaks/Pictures/Aphrodite Hills Golf Course - Paphos, Cyprus.jpg" --style_imgs "/home/bytefreaks/Pictures/Van_Gogh_-_Starry_Night_-_Google_Art_Project.jpg" --max_size 1250 --max_iterations 1500 --device /cpu:0 --verbose;

Our input images were the following:

Content Image

Style Image

Useful links


neural-style: An open source alternative to Prisma (for advanced users)

Recently we stumbled upon a very interesting project, it is called neural-style which is a torch implementation of an artificial system based on a Deep Neural Network that attempts to create artistic images of high perceptual quality.

According to the authors, this tool is based on the paper of Leon A. Gatys, Alexander S. Ecker and Matthias Bethge which is called “A Neural Algorithm of Artistic Style” (which is available to read for free here).

What this tool does is ‘simple’, it takes as input two images, the style image and the content image and using the style image, it tries to recreate the content image in such way that the content image looks like it was created using the same technique as the style image.
Following, is an example of a photograph that was recreated using the style of The Starry Night.

This tool offers a ton of possibilities and options, which we still did not play through yet.
Overall, we are very happy with the initial results we got. The final renderings look really nice and the fact that you get to choose your own style images it gives this tool a very nice advantage.

What we did not like though, is that it takes a lot of time and memory to complete the rendering of a single image (especially if you do not use a GPU to speed up the process).
This issue with the resources is normal and expected, unfortunately though it limits the fun out of the system. Each experiment you make is blocking you for some time and you cannot fiddle with the results in real time.

We installed this tool both on a Fedora GNU/Linux and on an Ubuntu with success.
Following are the exact commands we used to install it on Ubuntu and convert our first image (the one above).


cd ~;
git clone https://github.com/torch/distro.git ~/torch --recursive;
cd ~/torch;
bash install-deps;
./install.sh;
source ~/.bashrc;
sudo apt-get install libprotobuf-dev protobuf-compiler;
CC=gcc-5 CXX=g++-5 luarocks install loadcaffe;
luarocks install cutorch
cd ~/
git clone https://github.com/jcjohnson/neural-style.git;
cd neural-style/;
sh models/download_models.sh;
#After everything is complete, it is time to create our first 'artistic' image.
th neural_style.lua -num_iterations 1500 -image_size 1250 -gpu -1 -style_image "/home/bytefreaks/Pictures/Van_Gogh_-_Starry_Night_-_Google_Art_Project.jpg" -content_image "/home/bytefreaks/Pictures/Aphrodite Hills Golf Course - Paphos, Cyprus.jpg"

Our input images were the following:

Content Image

Style Image

Below are the intermediate steps the tool created until it reached the final rendered image.

This slideshow requires JavaScript.

Useful links


Hugin 1

Hugin is a cross-platform open source panorama photo stitching and HDR merging program developed by Pablo d’Angelo and others. It is a GUI front-end for Helmut Dersch’s Panorama Tools and Andrew Mihal’s Enblend and Enfuse. Stitching is accomplished by using several overlapping photos taken from the same location, and using control points to align and transform the photos so that they can be blended together to form a larger image. Hugin allows for the easy (optionally automatic) creation of control points between two images, optimization of the image transforms along with a preview window so the user can see whether the panorama is acceptable. Once the preview is correct, the panorama can be fully stitched, transformed and saved in a standard image format.

— From Wikipedia: https://en.wikipedia.org/wiki/Hugin_(software)

We have a set of images, which if stitched together they can produce a panorama. We wanted to create a panoramic ‘artwork’ using Prisma (because we like their work).
Unfortunately, a current limitation of Prisma, is that it will only produce square images of maximum size 1080px, so we could not supply it with a panorama an expect it to create the panoramic ‘artwork’.

To achieve our goal, we converted our images to ‘art’ using Prisma and we supplied the result to Hugin to create the panoramic ‘artwork’.
By using the simple wizard of Hugin we were able to create these lovely images presented in this post.

Note: Since the images we loaded into Hugin were processed by Prisma, they lost all their EXIF information.
Because of the missing EXIF information, Hugin could not know the focal length of the camera so we had to supply it manually.
In our case, for Galaxy S4 it was 35mm. After supplying this information everything went smoothly as you can see in the results.

We created two sets of images, one using the Mosaic filter (above) and another using the Dallas filter (below).

Useful links:


Murloc

This slideshow requires JavaScript.


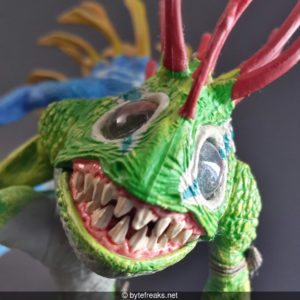
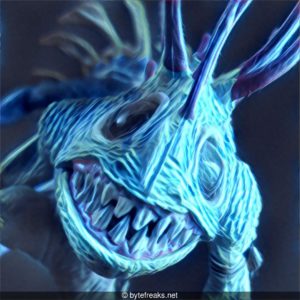
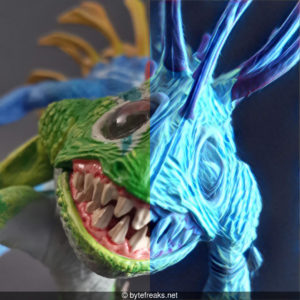
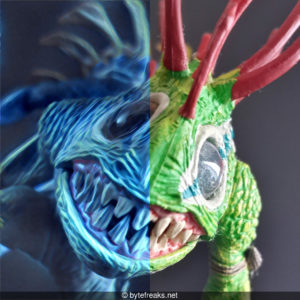
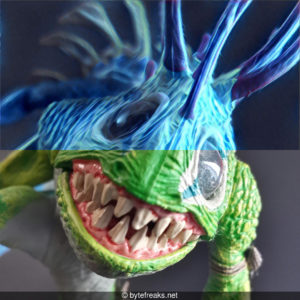
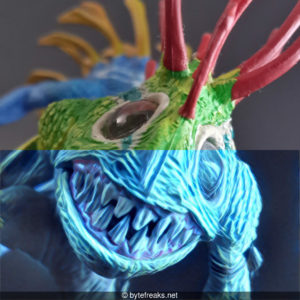
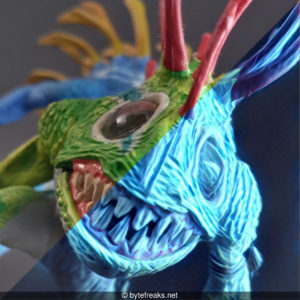
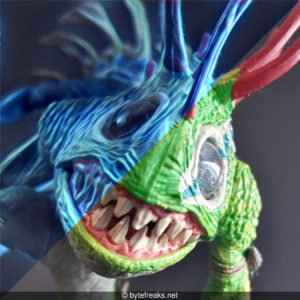
The blue filter observed in this picture is the Electric filter from the Prisma application of Prisma Labs.

Prisma is a photo-editing application that utilizes a neural network and artificial intelligence to transform the image into an artistic effect.
— From Wikipedia: https://en.wikipedia.org/wiki/Prisma_(app)

The scary looking creature photographed is a fictional character from the Warcraft franchise and it is called a Murloc:

The murlocs are amphibious bipedal fish-like creatures, which dwell along the coastlines of the Eastern Kingdoms, and few other locations. Little is known about this species, although they seemingly have enough intellect to form societies and tribes, even having their own faith system. They have their own spoken language, although it is unpronounceable in the common tongue.
— From Wikipedia: https://en.wikipedia.org/wiki/Races_and_factions_of_Warcraft#Murlocs

Useful links:

In this gallery we added along with the original and the filtered pictures some more that use half of the original picture and half of the filtered picture to better show how the effect altered the original picture.

Notes:

  • Prisma only accepts square images and it will resize the produced result to 1080px if the input image is larger than that.
  • The creation of the mixed images was done manually using Gimp.
  • We added the text at the end of the images using the following set of commands on a GNU/Linux environment (specifically Fedora) using bash shell and the imagemagick suite:
folder="modified";
mkdir "$folder";
for img in *.jpg;
do
  width=`identify -format %w "$img"`;
  convert -background '#0008' -fill white -gravity center -size ${width}x30 caption:"© bytefreaks.net" "$img" +swap -gravity south -composite "./$folder/$img";
done

The filtered images were added to the sub-folder called “modified” while the original images were not changed at all.