Symfony 5 skeleton project on Ubuntu
This guide will present the steps we followed on a GNU/Linux Ubuntu 20.04LTS to create a new project out of the Symfony 5 website skeleton.
Install core dependecies
First of all, we need to install all dependencies that we will need for sure.
sudo apt install curl gzip git php-cli php-xml php-mbstring php-intl php-mysql p7zip-full;
We chose to install the php-cli package instead of the php as we do not need to install all the additional dependencies php has, like apache2. Since we are working on a development computer, we can skip the required packages for deployment.
We decided to use MySQL in our project, so we installed the php-mysql package that provides the PDO for that database technology.
php-intl and php-mbstring were installed to suppress the following warnings:
Optional recommendations to improve your setup
~~~~~~~~~~~~~~~~~~~~~~~~~~~~~~~~~~~~~~~~~~~~~~

 * mb_strlen() should be available
   > Install and enable the mbstring extension.

 * intl extension should be available
   > Install and enable the intl extension (used for validators).
Downloading and installing symfony
Since Symfony version 5, there is a new support application for the development of Symfony projects. Using the following commands:
- we downloaded it from the official website,
- installed it to our home folder,
- and then moved it to
/user/local/bin/symfonyto be accessible from any terminal without changing the path each time.
wget https://get.symfony.com/cli/installer -O - | bash;
sudo mv ~/.symfony/bin/symfony /usr/local/bin/symfony;
In case you do not want to move the binary to /usr/local/bin you can either use it as a local file:
~/.symfony/bin/symfony;
or add it to your $PATH variable:
export PATH="$HOME/.symfony/bin:$PATH";
Creating a new project and making sure dependencies are met
After the above steps are done, we can clone the Symfony 5 skeleton and then use the symfony support application to check that our system has all the needed features.
symfony new symfony_project;
cd symfony_project;
symfony check:req;
If everything is OK, you should get a message similar to the one below:
$ symfony check:req

Symfony Requirements Checker
~~~~~~~~~~~~~~~~~~~~~~~~~~~~

> PHP is using the following php.ini file:
/etc/php/7.4/cli/php.ini

> Checking Symfony requirements:

...................................


 [OK]
 Your system is ready to run Symfony projects


Note  The command console can use a different php.ini file
~~~~  than the one used by your web server.
      Please check that both the console and the web server
      are using the same PHP version and configuration.
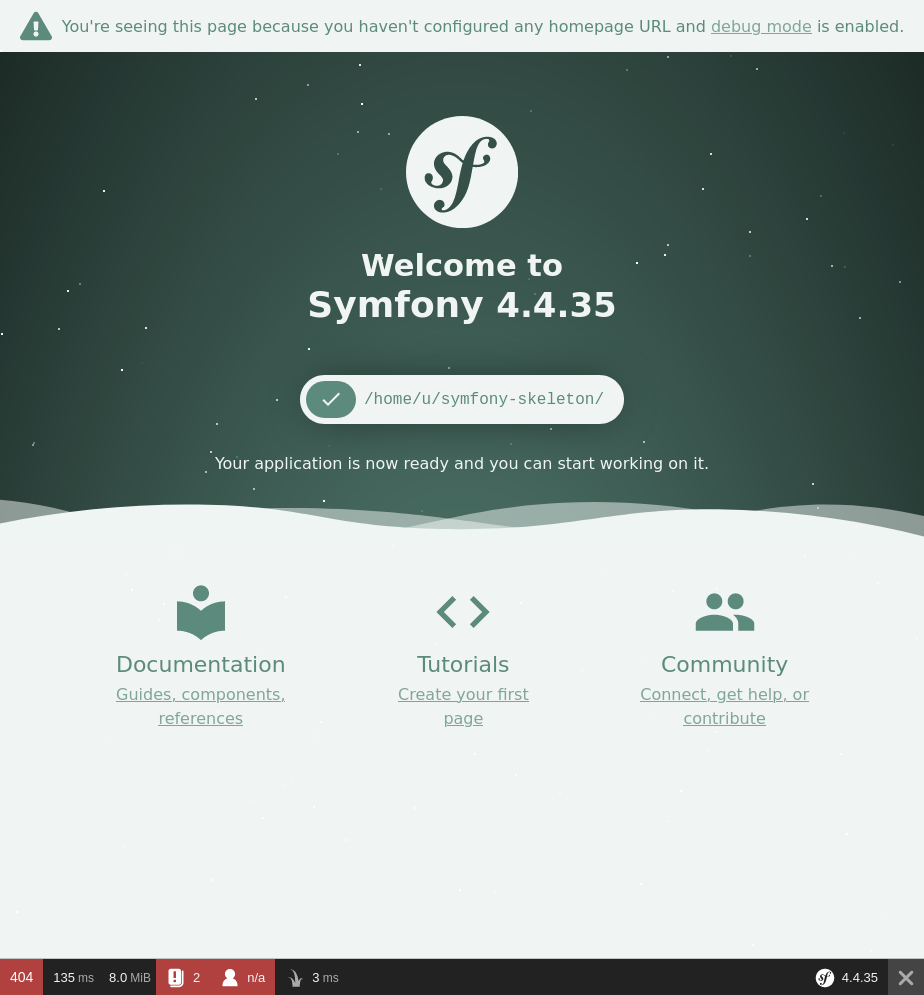
Starting a minimal web server to see the skeleton application
Using PHP’s built-in server, we can execute the skeleton application and see the result in our browser:
php -S 127.0.0.1:8000 -t public/;

Starting the Symfony minimal web server to see the skeleton application
Another option to check out your application is using the Symfony built-in web server, which is richer in features than the PHP server but lighter than Apache or Nginx. Below we present how to start it as an application in a terminal and how to start it as a detached service (leaving your terminal free for other operations).
#If you start it as it as an application, you will need to press Ctrl + C to kill it.
symfony serve;
Starting Symfony server as a detached service:
symfony serve -d;
#To stop it, use the following
symfony server:stop;
#Please note that the command contains the word server and not serve like before.
Adding more features to our project
To make our project more dynamic and versatile, we need to install a few packages using composer. Composer is a PHP utility for managing dependencies. It allows you to indicate the libraries your project relies on, and it will take care of installing and updating them. To fast install it, open a terminal and type the following command:
curl -Ss getcomposer.org/installer | php;
# Moving the composer into the /usr/local/bin/ folder will allow us to access it from any folder later on as that folder is in the default PATH variable. You could again avoid this step but it makes the process more user friendly.
sudo mv composer.phar /usr/local/bin/composer;
Allowing code annotations in our PHP code
After the composer is successfully installed, we can install the annotations package, which among other features, will allow us to define routes inside our PHP controller files.
composer require annotations;
A code example of that is the following:
<?php


namespace App\Controller;

use Symfony\Bundle\FrameworkBundle\Controller\AbstractController;
use Symfony\Component\HttpFoundation\Response;
use Symfony\Component\Routing\Annotation\Route;

class QuestionController extends AbstractController
{
    /**
     * @Route("/", name="app_homepage")
     */
    public function homepage()
    {
        return new Response('Done');
    }

    /**
     * @Route("/questions/{slug}", name="app_question_show")
     */
    public function show($slug)
    {
        $answers = [
            'a',
            'b',
            'c'
        ];
        dump($this);

        return $this->render('question/show.html.twig', [
            'question' => ucwords(str_replace('-', ' ', $slug)),
            'answers' => $answers
        ]);
        #return new Response(sprintf("The question: %s", $slug));
    }
}
Installing the twig package that allows us to work better with HTML templates
To avoid embedding HTML code in our PHP code, we can install twig, which provides a framework of templates to build several sites quickly.
composer require template;
Enriching the development experience
To debug in a better way our applications, we install the following two groups of packages that provide several debugging features, including a logging mechanism.
composer require profiler --dev;
composer require debug;
Avoid hardcoding assets in the HTML DOM
To avoid hardcoding items in your DOM (and forcing yourself to remember to edit them depending on the deployment options you are using), you can use the asset package that will handle most of those issues.
composer require symfony/asset;
Serializing more items and objects to JSON and XML
To enrich the power of API calls that return JSON or XML objects (like the code below)
return $this->json(/*...*/);
we can install the following serializer:
composer require symfony/serializer;
and be used as follows:
$serializer->serialize(
  $myObject,
  'json'
);
Develop using HTTPS / SSL for free
Although we are not super happy about installing local Certificate Authorities on our machines, we used the following commands to install the Symfony Certifying Authority certificate and enable HTTPS/SSL development without accepting a non-verified certificate in the browser each time.
sudo apt install libnss3-tools;
symfony server:ca:install;
If you do not install libnss3-tools, you will get the following warning:
$ symfony server:ca:install
You might have to enter your root password to install the local Certificate Authority certificate
Sudo password:
The local CA is now installed in the system trust store!
WARNING "certutil" is not available, so the CA can't be automatically installed in Firefox and/or Chrome/Chromium!
Install "certutil" with "apt install libnss3-tools" and re-run the command

 [OK] The local Certificate Authority is installed and trusted
After you install it, the message will change as follows:
$ symfony server:ca:install
The local CA is now installed in the Firefox and/or Chrome/Chromium trust store (requires browser restart)!

 [OK] The local Certificate Authority is installed and trusted
Install Webpack Encore for the assets
To install Webpack encore, we need yarn. To get yarn, we need npm. So we need the following installation steps:
sudo apt install npm;
sudo npm install --global yarn;
After these steps are successful, in the project folder, execute the following commands to allow the yarn to perform all necessary installations and then use encore to monitor the assets and rebuild its cache. The settings are depended on the file webpack.config.js.
yarn install;
yarn encore dev --watch;
Below, we present an example file of webpack.config.js.
var Encore = require('@symfony/webpack-encore');

// Manually configure the runtime environment if not already configured yet by the "encore" command.
// It's useful when you use tools that rely on webpack.config.js file.
if (!Encore.isRuntimeEnvironmentConfigured()) {
    Encore.configureRuntimeEnvironment(process.env.NODE_ENV || 'dev');
}

Encore
    // directory where compiled assets will be stored
    .setOutputPath('public/build/')
    // public path used by the web server to access the output path
    .setPublicPath('/build')
    // only needed for CDN's or sub-directory deploy
    //.setManifestKeyPrefix('build/')

    /*
     * ENTRY CONFIG
     *
     * Add 1 entry for each "page" of your app
     * (including one that's included on every page - e.g. "app")
     *
     * Each entry will result in one JavaScript file (e.g. app.js)
     * and one CSS file (e.g. app.css) if your JavaScript imports CSS.
     */
    .addEntry('app', './assets/js/app.js')
    //.addEntry('page1', './assets/js/page1.js')
    //.addEntry('page2', './assets/js/page2.js')

    // When enabled, Webpack "splits" your files into smaller pieces for greater optimization.
    .splitEntryChunks()

    // will require an extra script tag for runtime.js
    // but, you probably want this, unless you're building a single-page app
    .enableSingleRuntimeChunk()

    /*
     * FEATURE CONFIG
     *
     * Enable & configure other features below. For a full
     * list of features, see:
     * https://symfony.com/doc/current/frontend.html#adding-more-features
     */
    .cleanupOutputBeforeBuild()
    .enableBuildNotifications()
    .enableSourceMaps(!Encore.isProduction())
    // enables hashed filenames (e.g. app.abc123.css)
    .enableVersioning(Encore.isProduction())

    // enables @babel/preset-env polyfills
    .configureBabelPresetEnv((config) => {
        config.useBuiltIns = 'usage';
        config.corejs = 3;
    })

    // enables Sass/SCSS support
    //.enableSassLoader()

    // uncomment if you use TypeScript
    //.enableTypeScriptLoader()

    // uncomment to get integrity="..." attributes on your script & link tags
    // requires WebpackEncoreBundle 1.4 or higher
    //.enableIntegrityHashes(Encore.isProduction())

    // uncomment if you're having problems with a jQuery plugin
    //.autoProvidejQuery()

    // uncomment if you use API Platform Admin (composer req api-admin)
    //.enableReactPreset()
    //.addEntry('admin', './assets/js/admin.js')
;

module.exports = Encore.getWebpackConfig();
Some settings for PHPStorm by JetBrains
Since the IDE we are using for PHP development is PHPStorm, we installed the recommended plugins for Symfony to it. In the following image, we list the three plugins that we installed.
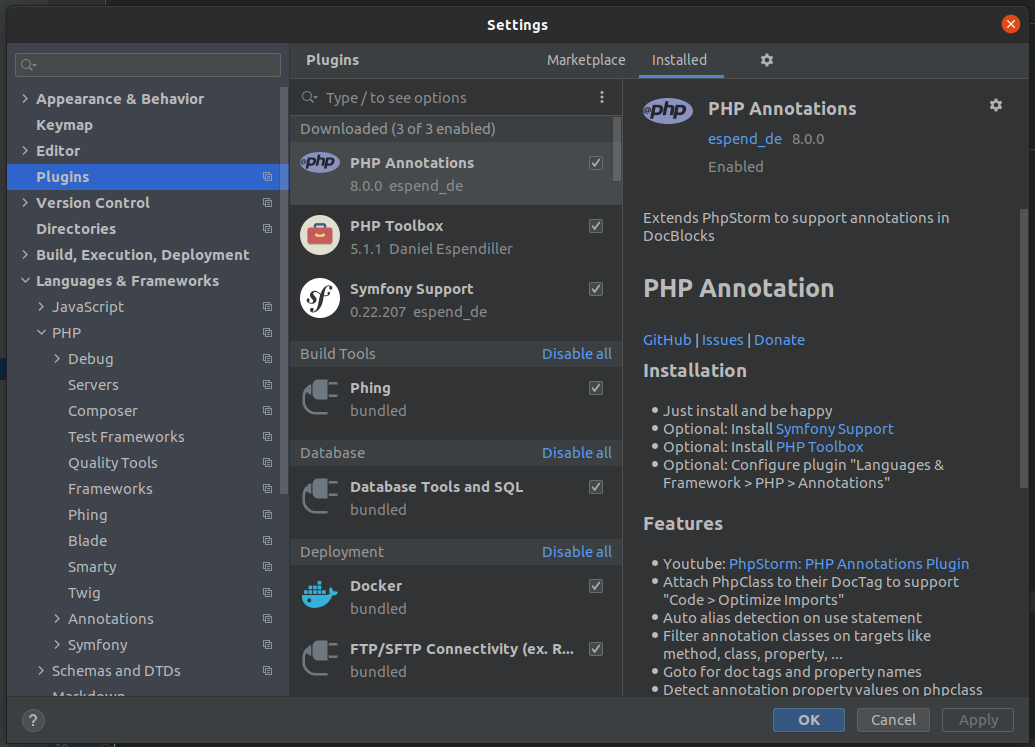
Specifically, we installed:
- Symfony Support
- PHP Annotations
- PHP Toolbox
After installing the three plugins, we navigated to the Symfony Plugin settings (which you can find either using the search functionality or under the menu: Languages & Frameworks > PHP > Symfony).
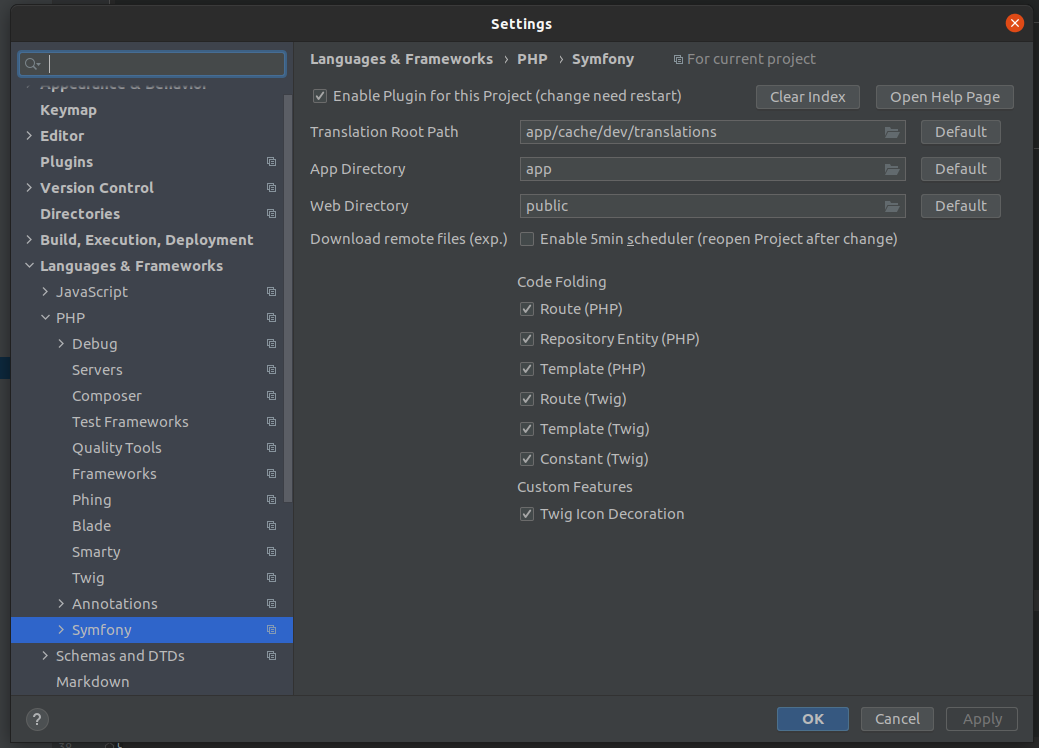
From there, we clicked on the Enable Plugin for this Project and then changed the Web Directory from web to public.