Daily Archives: 4 December 2021


Create a project using Symfony website-skeleton version 4 and then create a docker image out of it

This guide will present the steps we followed on a GNU/Linux Ubuntu 20.04LTS to create a new project out of the Symfony website skeleton and then create a new docker application image of it.

Install core dependecies

Install php-cli instead of php as we do not want to install the additional dependencies of php like apache2.
p7zip-full is needed for the package manager of composer later on. If it is missing, we will be getting one of the following errors:

Failed to download symfony/requirements-checker from dist: The zip extension and unzip/7z commands are both missing, skipping.
As there is no 'unzip' nor '7z' command installed zip files are being unpacked using the PHP zip extension.

php-xml will be required later on while creating the skeleton project for Symfony. If it is missing, you will get the following error:

symfony/framework-bundle requires ext-xml * -> it is missing from your system. Install or enable PHP's xml extension
sudo apt install php-cli php-xml p7zip-full;

Composer is a PHP utility for managing dependencies. It allows you to indicate the libraries your project relies on, and it will take care of installing and updating them. To fast install it, open a terminal and type the following command:

curl -Ss getcomposer.org/installer | php;
# Moving the composer into the /usr/local/bin/ folder will allow us to access it from any folder later on as that folder is in the default PATH variable.
sudo mv composer.phar /usr/local/bin/composer;

Symfony provides a tool to check if your operating system meets the required requirements rapidly. In addition, if suitable, the tool makes installation recommendations. To install the tool, run the following command:

composer require symfony/requirements-checker;
$ composer require symfony/requirements-checker;
Using version ^2.0 for symfony/requirements-checker
./composer.json has been updated
Running composer update symfony/requirements-checker
Loading composer repositories with package information
Updating dependencies
Lock file operations: 1 install, 0 updates, 0 removals
  - Locking symfony/requirements-checker (v2.0.1)
Writing lock file
Installing dependencies from lock file (including require-dev)
Package operations: 1 install, 0 updates, 0 removals
  - Installing symfony/requirements-checker (v2.0.1): Extracting archive
Generating autoload files
1 package you are using is looking for funding.
Use the `composer fund` command to find out more!

Once done, you can safely delete the requirements-checker:

composer remove symfony/requirements-checker;

Create the Symfony project

Using the basic skeleton, you can create a minimal Symfony project with the following command. We install the latest version of version 4.4 of the website skeleton project in this example. We found the list of versions here https://packagist.org/packages/symfony/website-skeleton.

composer create-project symfony/website-skeleton=4.4.99 symfony-skeleton;

When we got the following warning, we typed y, not sure what changes, so we stayed with the default option:

  -  WARNING  symfony/mailer (>=4.3): From github.com/symfony/recipes:master
    The recipe for this package contains some Docker configuration.

    This may create/update docker-compose.yml or update Dockerfile (if it exists).

    Do you want to include Docker configuration from recipes?
    [y] Yes
    [n] No
    [p] Yes permanently, never ask again for this project
    [x] No permanently, never ask again for this project
    (defaults to y): y

Then you need to run the following commands to install all dependencies and execute the project:

cd symfony-skeleton;
composer install;
composer require --dev symfony/web-server-bundle;
php bin/console server:start *:8000;

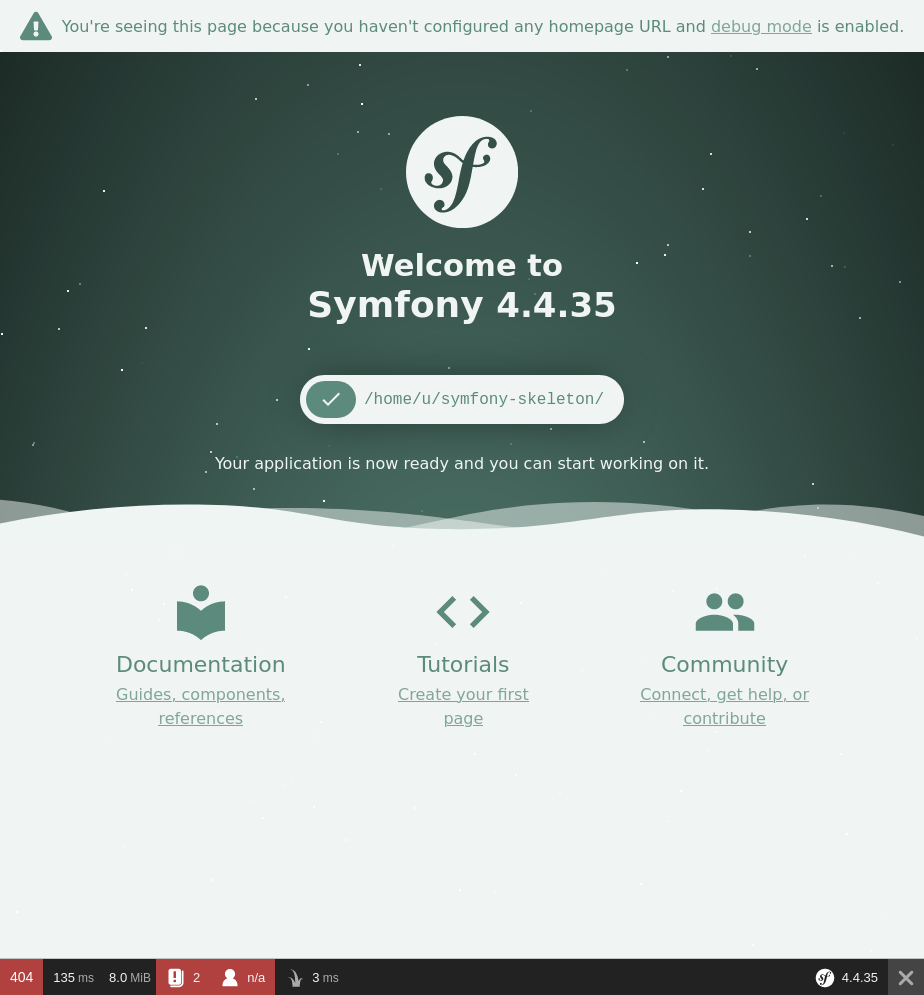
By now, you should see in a browser the landing page of your skeleton project.
# Stop the php webserver and release the port, we will need it later on.
php bin/console server:stop;

Install docker on Ubuntu

First of all, make sure your system is clean and remove any old versions:

sudo apt-get remove docker docker-engine docker.io containerd runc;
# You might want to execute `sudo apt autoremove -y;` as well to cleanup everything. We cannot ask everyone to do so as we are not sure of what complications it might have on each computer+software configurations.

We will be installing docker by adding its repositories to our system:

sudo apt-get update;
sudo apt-get install ca-certificates curl gnupg lsb-release;
curl -fsSL https://download.docker.com/linux/ubuntu/gpg | sudo gpg --dearmor -o /usr/share/keyrings/docker-archive-keyring.gpg;
echo "deb [arch=$(dpkg --print-architecture) signed-by=/usr/share/keyrings/docker-archive-keyring.gpg] https://download.docker.com/linux/ubuntu $(lsb_release -cs) stable" | sudo tee /etc/apt/sources.list.d/docker.list > /dev/null;
sudo apt-get update;
sudo apt-get install docker-ce docker-ce-cli containerd.io;
sudo docker run hello-world;

If the installation was OK, you should see the following message:

n$ sudo docker run hello-world
Unable to find image 'hello-world:latest' locally
latest: Pulling from library/hello-world
2db29710123e: Pull complete 
Digest: sha256:cc15c5b292d8525effc0f89cb299f1804f3a725c8d05e158653a563f15e4f685
Status: Downloaded newer image for hello-world:latest

Hello from Docker!
This message shows that your installation appears to be working correctly.

To generate this message, Docker took the following steps:
 1. The Docker client contacted the Docker daemon.
 2. The Docker daemon pulled the "hello-world" image from the Docker Hub.
    (amd64)
 3. The Docker daemon created a new container from that image which runs the
    executable that produces the output you are currently reading.
 4. The Docker daemon streamed that output to the Docker client, which sent it
    to your terminal.

To try something more ambitious, you can run an Ubuntu container with:
 $ docker run -it ubuntu bash

Share images, automate workflows, and more with a free Docker ID:
 https://hub.docker.com/

For more examples and ideas, visit:
 https://docs.docker.com/get-started/

Make the docker application image

Execute the following command on a terminal to get your php version:

php --version;

In case you get something different than version 7.4, please note it and update the contents of the DockerFile below accordingly. In our case, the results for the version were the ones right below and that is why we used the line FROM php:7.4-cli in our DockerFile.

$ php --version
PHP 7.4.3 (cli) (built: Oct 25 2021 18:20:54) ( NTS )
Copyright (c) The PHP Group
Zend Engine v3.4.0, Copyright (c) Zend Technologies
    with Zend OPcache v7.4.3, Copyright (c), by Zend Technologies

If you are not already at the root of your project (e.g., the symfony-skeleton folder), go to that folder and create a new text file with the name Dockerfile in there. The contents of the file should be the following:

# Dockerfile
FROM php:7.4-cli

RUN apt-get update -y && apt-get install -y libmcrypt-dev

RUN curl -sS https://getcomposer.org/installer | php -- --install-dir=/usr/local/bin --filename=composer
RUN apt-get update && apt-get install -y libonig-dev
RUN docker-php-ext-install pdo

WORKDIR /app
COPY . /app

RUN composer install

EXPOSE 8000
CMD php bin/console server:run 0.0.0.0:8000

Once you have Docker and Docker Machine installed on your machine, creating the container is a breeze. The command below will seek your Dockerfile and download all of the layers required to execute your container image. It will then complete the commands in the Dockerfile, leaving you with a container that is ready to use.

You’ll use the docker build command to create your php Symfony docker container, and you’ll give it a tag or a name so you can refer to it later when you want to execute it. The command’s final component instructs Docker to build from a specific directory.

sudo docker build -t symfony-project .;

To execute the new application image:

sudo docker run -it -p 8000:8000 symfony-project;

To export the Docker image as a tar file:

sudo docker save -o ~/symfony-skeleton.tar symfony-project;

To import the Docker image from the tar file:

sudo docker load -i symfony-skeleton.tar;


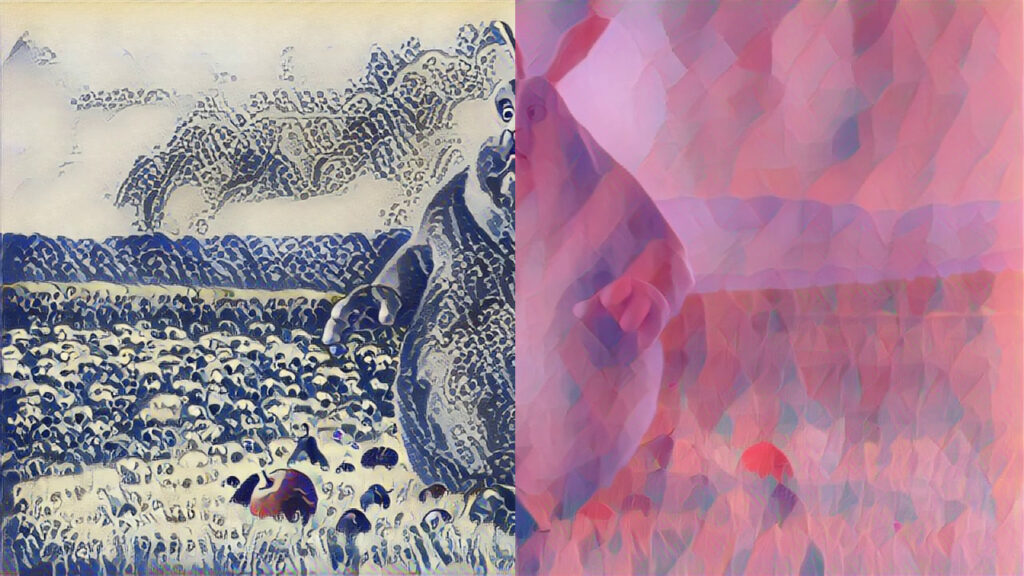
Using Neural Style Transfer on videos

We decided to revisit some old work on Neural Style Transfer and TensorFlow. Using the sample code for Fast Neural Style Transfer from this page https://www.tensorflow.org/tutorials/generative/style_transfer#fast_style_transfer_using_tf-hub and the image stylization model from here https://tfhub.dev/google/magenta/arbitrary-image-stylization-v1-256/2, we created a tool.

The goal of our venture was to simplify the procedure of changing the style of media. The input could either be an image, a series of images, a video, or a group of videos.

This tool (for which the code is below) comprises a bash script and a python code.
On a high level, it reads all videos from one folder and all styles from another. Then it recreates all those videos with all those styles making new videos out of combinations of the two.

Hardware

Please note that we enabled CUDA and GPU processing on our computer before using the tool. Without them, execution would be prolonged dramatically due to the inability of a general-purpose CPU to make many mathematic operations as fast as the GPU.
To enable CUDA, we followed the steps found in these notes: https://bytefreaks.net/gnulinux/rough-notes-on-how-to-install-cuda-on-an-ubuntu-20-04lts

Software

Conda / Anaconda

We installed and activated anaconda on an Ubuntu 20.04LTS desktop. To do so, we installed the following dependencies from the repositories:

sudo apt-get install libgl1-mesa-glx libegl1-mesa libxrandr2 libxrandr2 libxss1 libxcursor1 libxcomposite1 libasound2 libxi6 libxtst6;

Then, we downloaded the 64-Bit (x86) Installer from (https://www.anaconda.com/products/individual#linux).

Using a terminal, we followed the instructions here (https://docs.anaconda.com/anaconda/install/linux/) and performed the installation.

Python environment and OpenCV for Python

Following the previous step, we used the commands below to create a virtual environment for our code. We needed python version 3.9 (as highlighted here https://www.anaconda.com/products/individual#linux) and the following packages tensorflow matplotlib tensorflow_hub for python.

source ~/anaconda3/bin/activate;
conda create --yes --name FastStyleTransfer python=3.9;
conda activate FastStyleTransfer;
pip install --upgrade pip;
pip install tensorflow matplotlib tensorflow_hub;

faster.py

import matplotlib.pylab as plt
import numpy as np
import tensorflow as tf
import tensorflow_hub as hub

from os import listdir
from os.path import isfile, join

import argparse

print("TF Version: ", tf.__version__)
print("TF Hub version: ", hub.__version__)
print("Eager mode enabled: ", tf.executing_eagerly())
print("GPU available: ", tf.config.list_physical_devices('GPU'))

# Parsing command line arguments while making sure they are mandatory/required
parser = argparse.ArgumentParser()
parser.add_argument(
    "--input",
    type=str,
    required=True,
    help="The directory that contains the input video frames.")
parser.add_argument(
    "--output",
    type=str,
    required=True,
    help="The directory that will contain the output video frames.")
parser.add_argument(
    "--style",
    type=str,
    required=True,
    help="The location of the style frame.")


# Press the green button in the gutter to run the script.
if __name__ == '__main__':
    
    args = parser.parse_args()
    input_path = args.input + '/'
    output_path = args.output + '/'
    # List all files from the input directory. This directory should contain at least one image/video frame.
    onlyfiles = [f for f in listdir(input_path) if isfile(join(input_path, f))]

    # Loading the input style image.
    style_image_path = args.style  # @param {type:"string"}
    style_image = plt.imread(style_image_path)

    # Convert to float32 numpy array, add batch dimension, and normalize to range [0, 1]. Example using numpy:
    style_image = style_image.astype(np.float32)[np.newaxis, ...] / 255.

    # Optionally resize the images. It is recommended that the style image is about
    # 256 pixels (this size was used when training the style transfer network).
    # The content image can be any size.
    style_image = tf.image.resize(style_image, (256, 256))
    
    # Load image stylization module.
    # Enable the following line and disable the next two to load the stylization module from a local folder.
    # hub_module = hub.load('magenta_arbitrary-image-stylization-v1-256_2')
    # Disable the above line and enable these two to load the stylization module from the internet.
    hub_handle = 'https://tfhub.dev/google/magenta/arbitrary-image-stylization-v1-256/2'
    hub_module = hub.load(hub_handle)
 

    for inputfile in onlyfiles:
        content_image_path = input_path + inputfile  # @param {type:"string"}
        content_image = plt.imread(content_image_path)
        # Convert to float32 numpy array, add batch dimension, and normalize to range [0, 1]. Example using numpy:
        content_image = content_image.astype(np.float32)[np.newaxis, ...] / 255.

        # Stylize image.
        outputs = hub_module(tf.constant(content_image), tf.constant(style_image))
        stylized_image = outputs[0]

        # Saving stylized image to disk.
        content_outimage_path = output_path + inputfile  # @param {type:"string"}
        tf.keras.utils.save_img(content_outimage_path, stylized_image[0])


The above code can be invoked as follows:

python3 faster.py --input "$input_frames_folder" --output "$output_frames_folder" --style "$style";

It requires the user to define:

  1. The folder in which all input images should be.
  2. The folder where the user wants the stylized images to be saved in. Please note that the folder needs to be created by the user before the execution.
  3. The path to the image that will be used as input to the neural style transfer.

execute.sh

#!/bin/bash
#source ~/anaconda3/bin/activate;
#conda create --yes --name FastStyleTransfer python=3.9;
#pip install --upgrade pip;
#pip install tensorflow matplotlib tensorflow_hub;
#conda activate FastStyleTransfer;

source ~/anaconda3/bin/activate;
conda activate FastStyleTransfer;

input_videos="./input/videos/*";
input_styles="./input/styles/*";
input_frames="./input/frames";
input_audio="./input/audio";
output_frames="./output/frames";
output_videos="./output/videos";

# Loop on each video in the input folder.
for video in $input_videos;
do
  echo "$video";
  videoname=$(basename "$video");

  # Extract all frames from the video file and save them in a new folder using 8-digit numbers with zero padding in an incremental order.
  input_frames_folder="$input_frames/$videoname";
  mkdir -p "$input_frames_folder";
  ffmpeg -v quiet -i "$video" "$input_frames_folder/%08d.ppm";

  # Extract the audio file from the video to the format of an mp3. We will need this audio later to add it to the final product.
  input_audio_folder="$input_audio/$videoname";
  mkdir -p "$input_audio_folder";

  audio="";
  # Only VP8 or VP9 or AV1 video and Vorbis or Opus audio and WebVTT subtitles are supported for WebM.
  if [[ $videoname == *.webm ]]; then
    audio="$input_audio_folder/$videoname.ogg";
    ffmpeg -v quiet -i "$video" -vn -c:a libvorbis -y "$audio";  
  else
    audio="$input_audio_folder/$videoname.mp3";
    ffmpeg -v quiet -i "$video" -vn -c:a libmp3lame -y "$audio";
  fi

  # Retrieve the frame rate from the input video. We will need it to configure the final video later.
  frame_rate=`ffprobe -v 0 -of csv=p=0 -select_streams v:0 -show_entries stream=r_frame_rate "$video"`;

  # Loop on each image style from the input styles folder.
  for style in $input_styles;
  do
    echo "$style";
    stylename=$(basename "$style");
    output_frames_folder="$output_frames/$videoname/$stylename";
    mkdir -p "$output_frames_folder";

    # Stylize all frames using the input image and write all processed frames to the output folder.
    python3 faster.py --input "$input_frames_folder" --output "$output_frames_folder" --style "$style";

    # Combine all stylized video frames and the exported audio into a new video file.
    output_videos_folder="$output_videos/$videoname/$stylename";
    mkdir -p "$output_videos_folder";
    ffmpeg -v quiet -framerate "$frame_rate" -i "$output_frames_folder/%08d.ppm" -i "$audio" -pix_fmt yuv420p -acodec copy -y "$output_videos_folder/$videoname";
    
    rm -rf "$output_frames_folder";
  done
  rm -rf "$output_frames/$videoname";
  rm -rf "$input_frames_folder";
  rm -rf "$input_audio_folder";
done

The above script does not accept parameters, but you should load the appropriate environment before calling it. For example:

source ~/anaconda3/bin/activate;
conda activate FastStyleTransfer;
./execute.sh;

Please note that this procedure consumes significant space on your hard drive; once you are done with a video, you should probably delete all data from the output folders.