gnome


Error mounting filesystem

After installing the ewf-tools the right way on a GNU/Linux Ubuntu machine, we executed the following command to create the ewf1 mounting point for our .E01 image:

mkdir /mnt/ewf;
ewfmount ./DISK.E01 /mnt/ewf/;

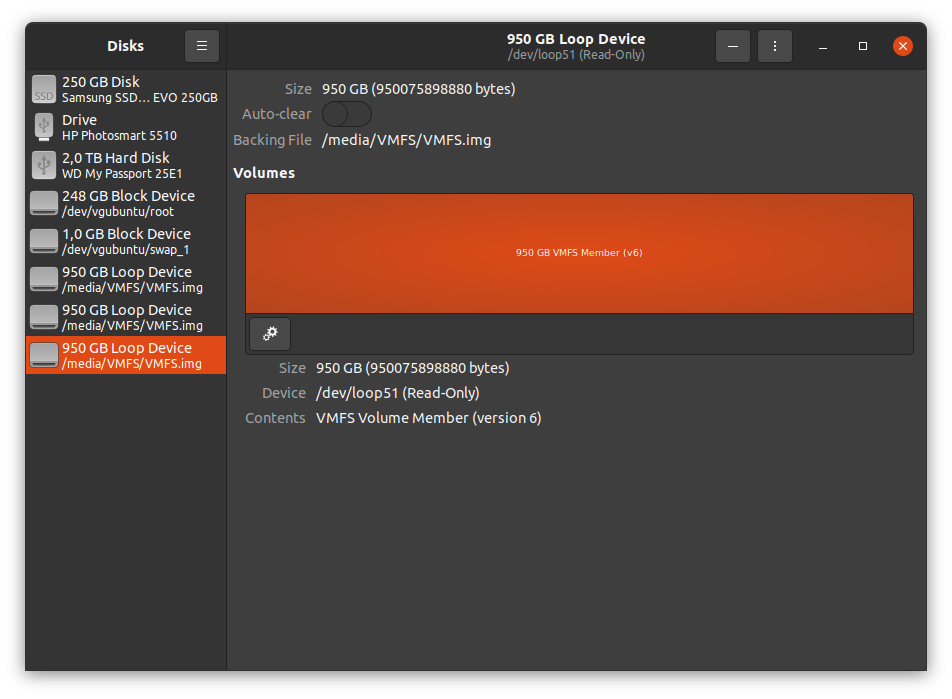
After the operating system created the mounting point, we opened the ewf1 file that appeared in /mnt/ewf/ using the Gnome Disk Image Mounter. This action made a new entry in the Gnome Disks Utility, showing our new disk.

After clicking on the play button (labeled Mount selected partition) we got the following error:

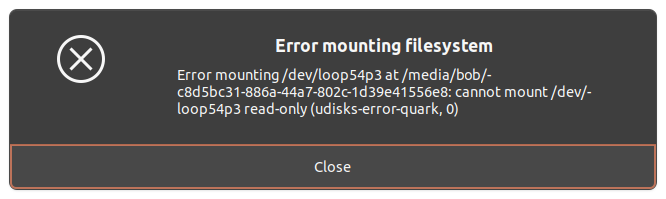
We then tried to use the terminal to gain more control over the mounting parameters. To proceed with the following commands, we copied the Device value, which was /dev/loop54p3 in this case.

$ mkdir /mnt/loc;
$ sudo mount /dev/loop54p3 /mnt/loc;
mount: /mnt/loc: cannot mount /dev/loop54p3 read-only.
$ sudo mount -o ro /dev/loop54p3 /mnt/loc;
mount: /mnt/loc: cannot mount /dev/loop54p3 read-only.
$ sudo mount -o ro,loop /dev/loop54p3 /mnt/loc;
mount: /mnt/loc: cannot mount /dev/loop58 read-only.
$ sudo mount -o ro,loop -t ext4 /dev/loop54p3 /mnt/loc;
mount: /mnt/loc: cannot mount /dev/loop58 read-only.
$ sudo mount -o ro,norecovery,loop -t ext4 /dev/loop54p3 /mnt/loc;

The command that worked for us was the following:

sudo mount -o ro,norecovery,loop -t ext4 /dev/loop54p3 /mnt/loc;

The parameter that did the trick was norecovery. norecovery/noload instructs the system not to load the journal on mounting. Note that if the filesystem was not unmounted cleanly, skipping the journal replay will lead to the filesystem containing inconsistencies that can lead to any number of problems. This problem occurred because the machine did not shut down properly before it had its image cloned, so after we mount, we might not get the latest state of the disk.


How to access VMFS Datastore from Ubuntu GNU/Linux

Suppose the ESXi host fails, but the server’s local disk or disks are still operational. In that case, it is always possible to copy the virtual machine files (both data drives and configuration files) from the VMFS datastore and run the VM on a different server. This is true even if the ESXi host fails (even on VMware Workstation or Hyper-V). The most significant issue is that the widely used operating systems, such as Windows and Linux, do not have a VMFS driver, which causes them to be unable to recognize a partition that automatically has the VMFS file system.

To mount a VMFS file system on an Ubuntu, we will need to install the vmfs-tools package.

sudo apt-get install vmfs-tools;

Then, we need to create a folder where we will perform the mount later on:

# The folders does not have to be in the /mnt path, it can be anywhere on your file system where you have access.
sudo mkdir /mnt/vmfs;

Following that, we need to identify the disk we want to mount. There are two popular ways to do so, and the first is by executing the command fdisk -l on the terminal, which will show all physical disks attached to your system. You will get results that are similar to the ones below:

sudo fdisk -l;

...

Disk /dev/loop51: 884,85 GiB, 950075898880 bytes, 1855616990 sectors
Units: sectors of 1 * 512 = 512 bytes
Sector size (logical/physical): 512 bytes / 512 bytes
I/O size (minimum/optimal): 512 bytes / 512 bytes

From these results, the drive’s path is essential information for us. In this case, it was /dev/loop51.

The second method is to use the Gnome Disks Utility:

When you start the application, you will get an image similar to this:

If you have a physical VMFS datastore hard drive, it will appear on the list on the left. You will get more information on the right panel by clicking on it. The critical information is the value after the label Device. In this case, the vital value was /dev/loop51.

If you do not have a physical drive but an image of a drive, you can attach it by clicking on the menu button with the three lines on the top left and then selecting the Attach Disk Image... (.iso, .img) option. A new window will open, allowing you to navigate and find your image file.

After we acquire the path to the physical drive or the image file, we can mount it using the following command:

sudo vmfs-fuse /dev/loop51 /mnt/vmfs;

In case you get the following error:

VMFS: Unsupported version 6
Unable to open device/file "/dev/loop51".
Unable to open filesystem

Then, you need to install the package that can handle VMFS version 6. To install, use the following command:

sudo apt-get install vmfs6-tools;

Trying again to mount, this time with the tools that are appropriate for version 6, should do the trick:

sudo vmfs6-fuse /dev/loop51 /mnt/vmfs;

To unmount, we need to execute the following:

sudo umount /mnt/vmfs;

How to suspend Gnome Ubuntu 18.04LTS from top right menu

Recently, we were using the suspend option by searching option through the “Activities” menu. We were looking for alternatives for scenarios where we would not like to use a keyboard (e.g. on a touch-enabled screen).
After some quick testing we saw that when you long press the power button it turns into a Suspend button!!

In this video we can see that if you long press the power off button in the top right menu it will convert to the “Suspend” option!


Install Gnome Boxes on Kali Linux

Our solution in getting Gnome Boxes to work on Kali Linux (which is a Debian-derived Linux distribution just like Ubuntu) is the following:

First install Gnome Boxes along with all needed virtualization software:


sudo apt-get install -y gnome-boxes qemu-kvm libvirt0 virt-manager bridge-utils;

Then, edit the file /etc/libvirt/qemu.conf to uncomment the following line:

#user = "root"

Finally, restart the host machine and your Gnome Boxes will be ready to use.

Long story

Recently, we were setting up a Kali Linux machine and one of the requirements was to add virtualization support so that the user could execute virtual machines doing.. other stuff. We started by installing gnome-boxes only (hoping that would be enough)


sudo apt-get install -y gnome-boxes;

.. but we got an error:

Boxes cannot access the virtualization backend

Apparently, installing gnome-boxes only, the dependency system did not automatically assume we would need to install an engine to handle the virtual machines, so we had to install the following as well:


sudo apt-get install -y qemu-kvm libvirt0 virt-manager bridge-utils;

After the installation, we tried  to create a new virtual machine but it would fail when we tried to start it. After looking into the logs we found the following useful information:

State: GVIR_DOMAIN_STATE_SHUTOFF

It seems that our user (even if it was root) could not start the QEMU process. To fix this issue we had to modify the file /etc/libvirt/qemu.conf and uncomment the following line:

#user = "root"

from this section

# The user for QEMU processes run by the system instance. It can be
# specified as a user name or as a user id. The qemu driver will try to
# parse this value first as a name and then, if the name doesn't exist,
# as a user id.
#
# Since a sequence of digits is a valid user name, a leading plus sign
# can be used to ensure that a user id will not be interpreted as a user
# name.
#
# Some examples of valid values are:
#
# user = "qemu" # A user named "qemu"
# user = "+0" # Super user (uid=0)
# user = "100" # A user named "100" or a user with uid=100
#
#user = "root"

# The group for QEMU processes run by the system instance. It can be
# specified in a similar way to user.
#group = "root"

After doing this change and restarting the host machine we were able to start and use any virtual machine in Gnome Boxes.

Extra information

In this case, we were using Kali Linux, where people usually operate it using the root account only.
On other installations, like on an Ubuntu installation you would need to handle differently the last step that requires you to edit the /etc/libvirt/qemu.conf file.

Specifically, the best way to handle this issue on a multi-user environment (like Ubuntu) would be to replace the following line:

#group = "root"

with this

group = "kvm"

and then add yourself to the kvm group before restarting the host machine


sudo usermod -a -G kvm $USER;

Doing so, it allows you to enable access to the virtualization services to multiple users of you choice instead of limiting it to one account.