It became apparent that new Microsoft installations are getting increasingly aggressive, forcing users to create an online Microsoft account on their machines.
Please note that we created a new online Microsoft account in the end… We do not have a working solution to this issue.
Backstory: we purchased a new laptop that had Microsoft Windows 10 pre-installed. The first time we booted it, we did not want to sign in using a Microsoft online account, so we did not give internet to the laptop. Doing so allowed us to create a local account on the computer without associating it with an online account.
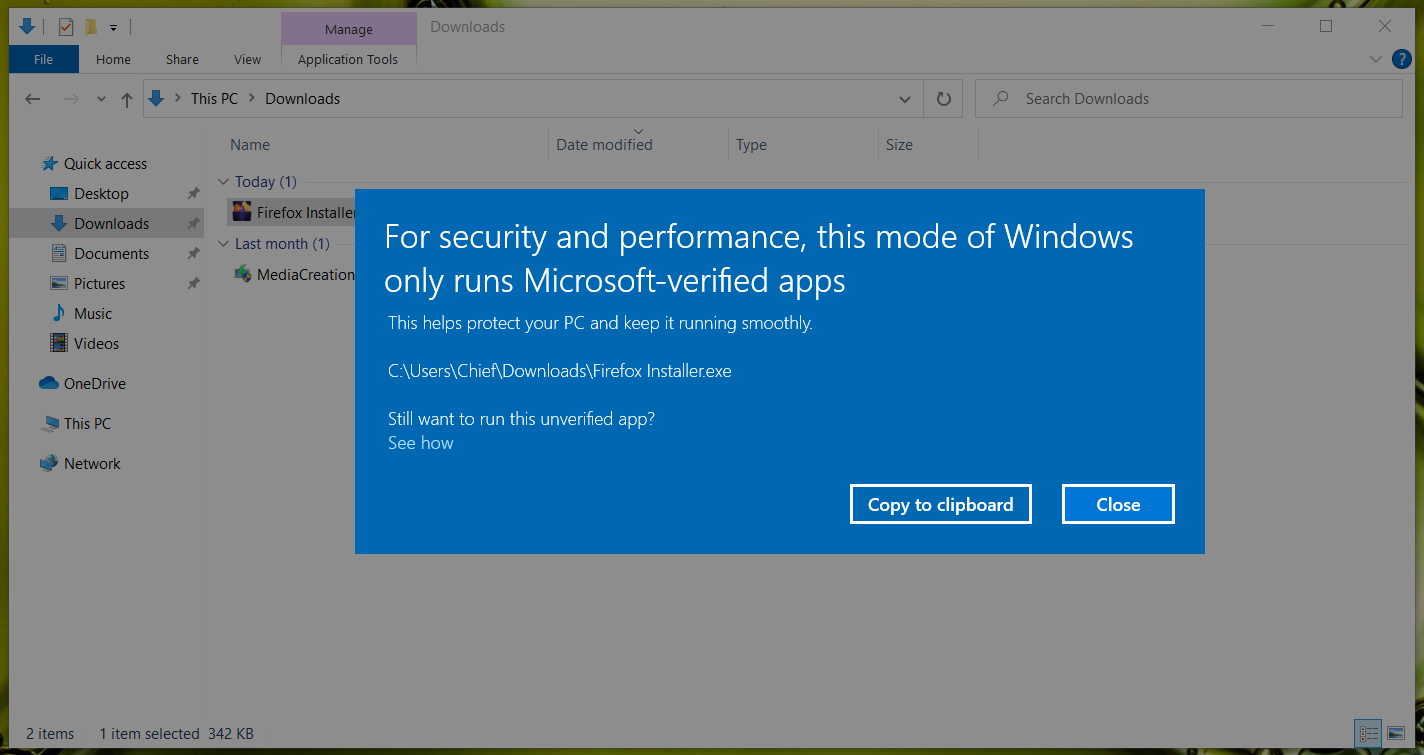
After several updates, we tried to install Firefox, and besides the usual annoying Microsoft advertisements about Bing, we got the following messages for Microsoft Windows S Mode.
For security and performance, this mode of Windows only runs Microsoft-verified apps
Initial notification of Microsoft S Mode – For security and performance, Windows 10 in S mode runs Microsoft-verified apps
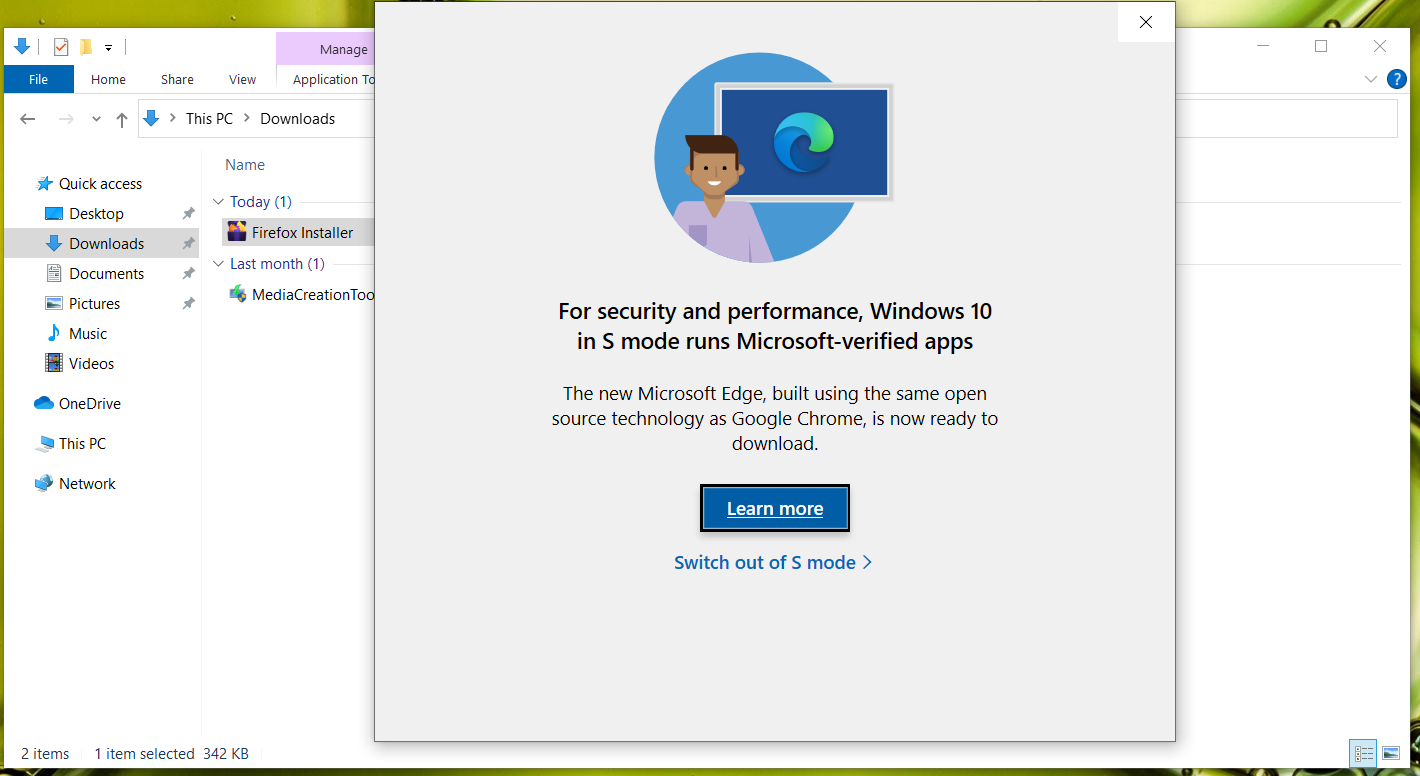
After clicking on the “Learn More” button, we got the following:
Microsoft S Mode – Switch out prompt
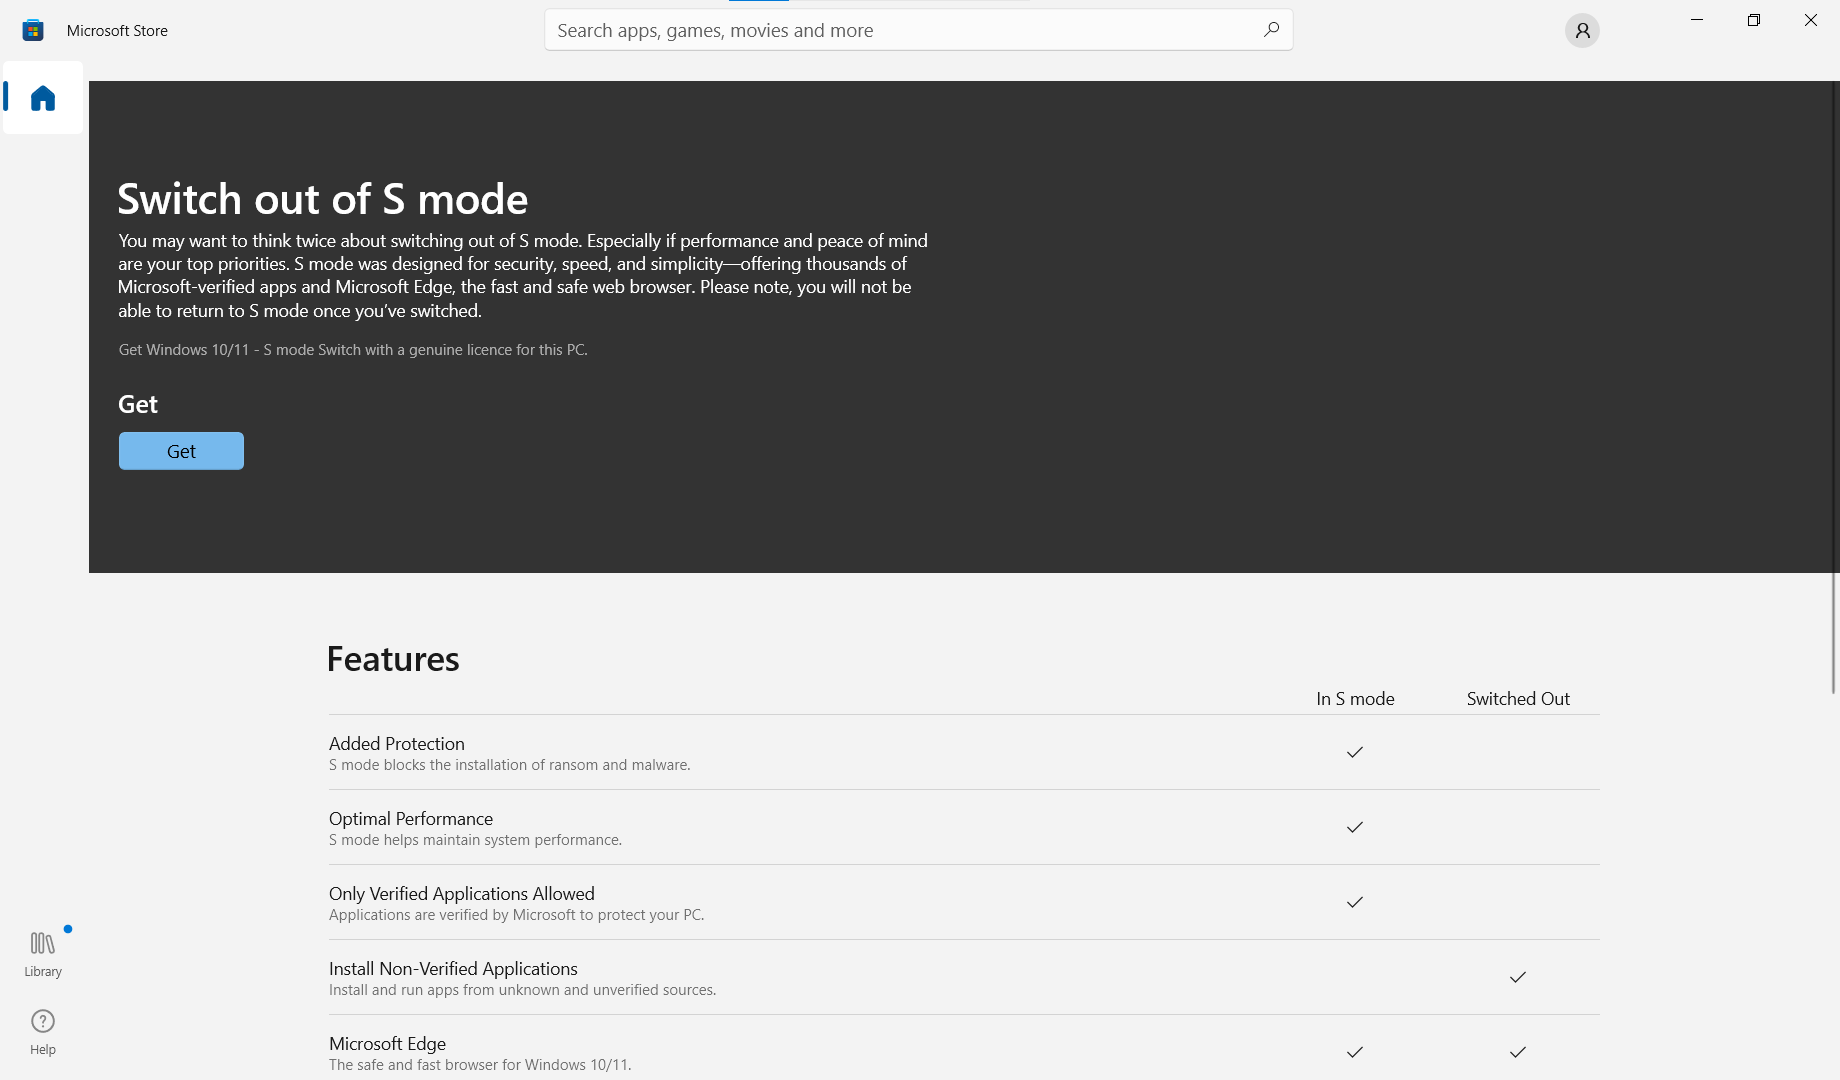
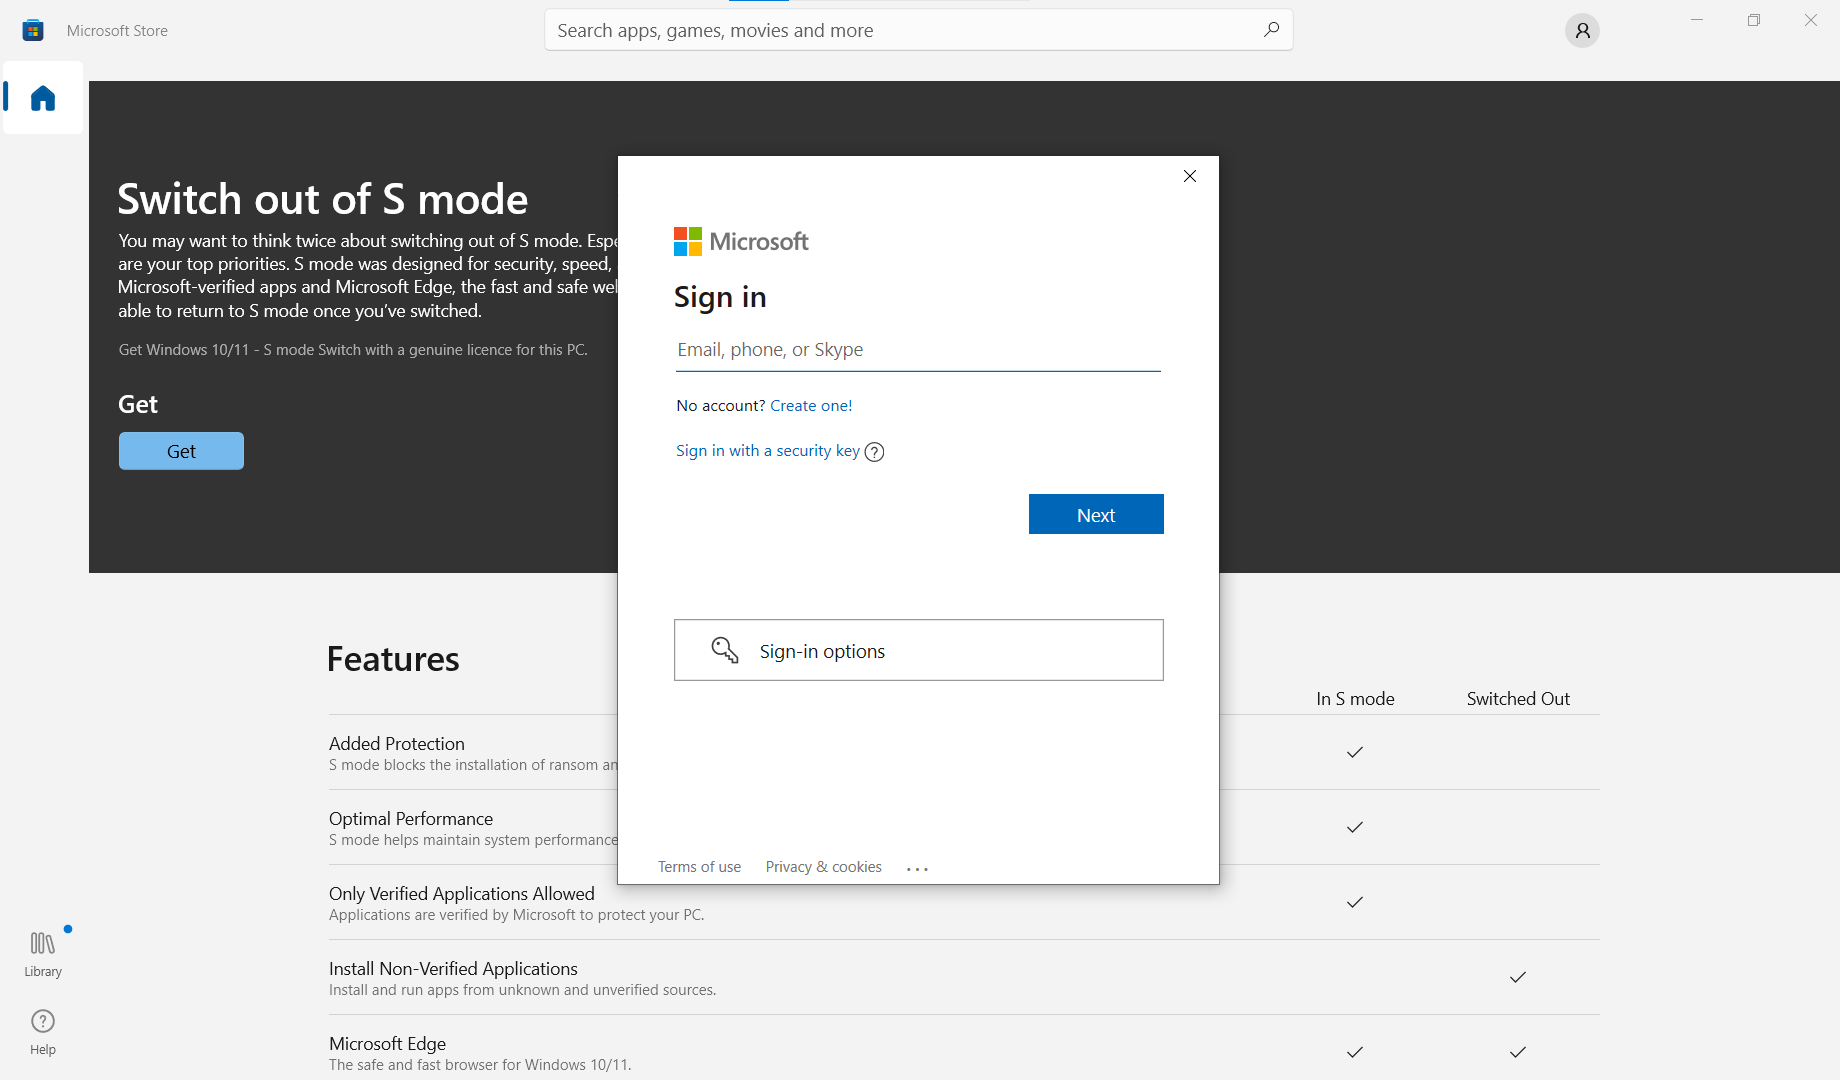
Clicking on the “Get” button got us to the Microsoft Online Account login form…
Microsoft sign-in form appears when you try to switch out of S mode.
We then closed all windows, disabled internet access, and tried installing Firefox again. This time, we got the following message:
After disabling the internet connection, we tried to bypass the SmartScreen and the S mode settings
After clicking on the “Run” button, we got stopped again by the Microsoft Windows S Mode settings.
As this post mentioned, we eventually created a new online Microsoft account and used it to log in and disable Microsoft S Mode.
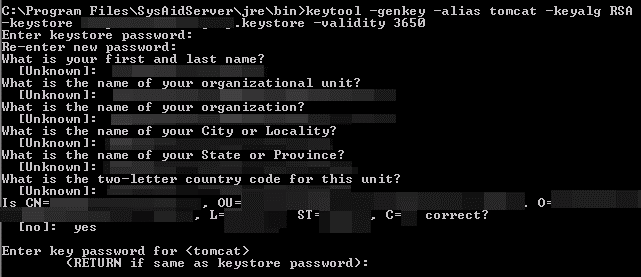
In the command above, your_site_name should be the name of the domain you want to secure with this SSL/TLS certificate. When prompted for the first and last name, type the Fully Qualified Domain Name (FQDN) for the site you are securing with this certificate (e.g., www.yourdomain.com, mail.yourdomain.com).
Step 2
Generate a Certificate Signing Request (CSR) from your New Keystore using the keytool command:
When prompted, enter the password you created earlier (when you created your new Keystore). In your current directory, certreq.csr now contains your CSR.
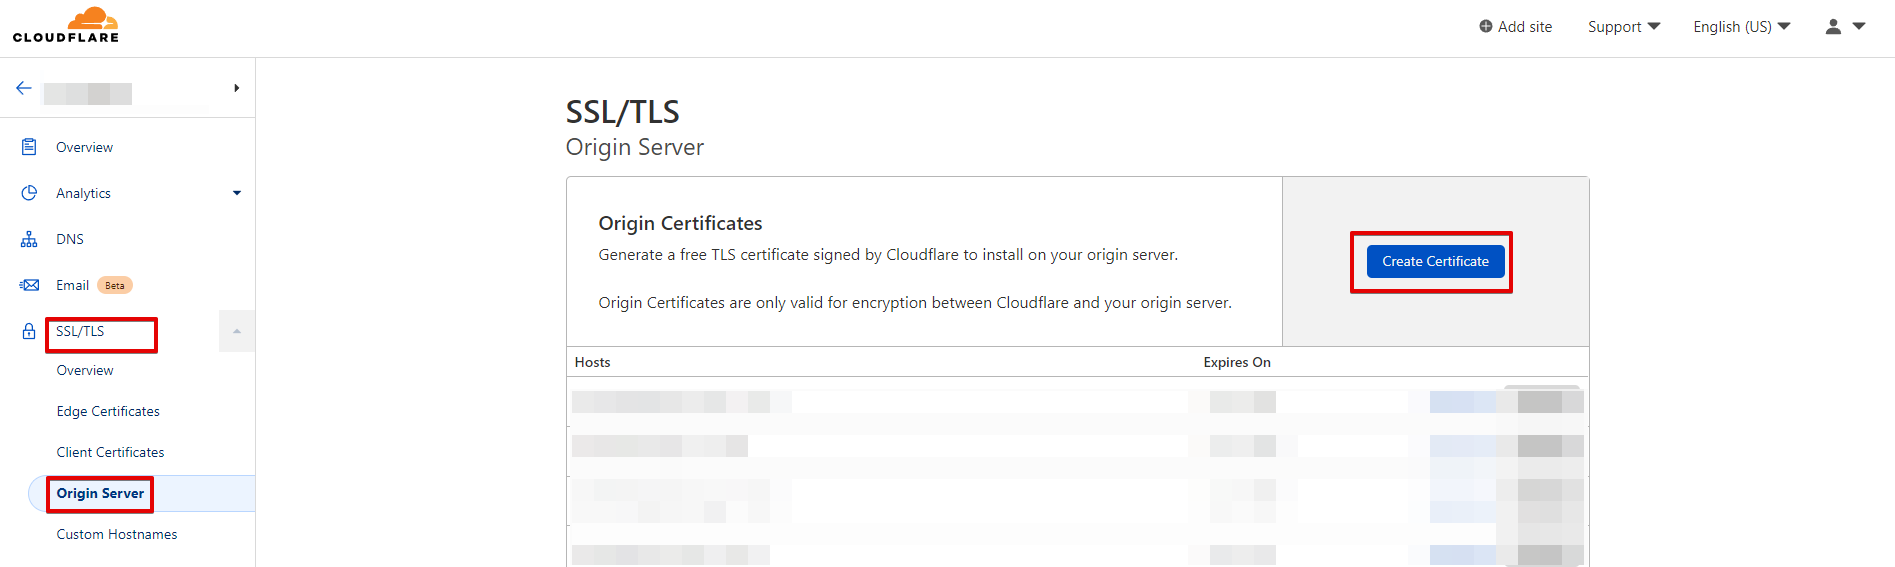
Create the certificate from Cloudflare using the certificate request that you created from your Windows Server
Step 3
Open your Cloudflare account, select your domain, open the SSL/TLS tab and click on Origin Server to create the certificate
Step 4
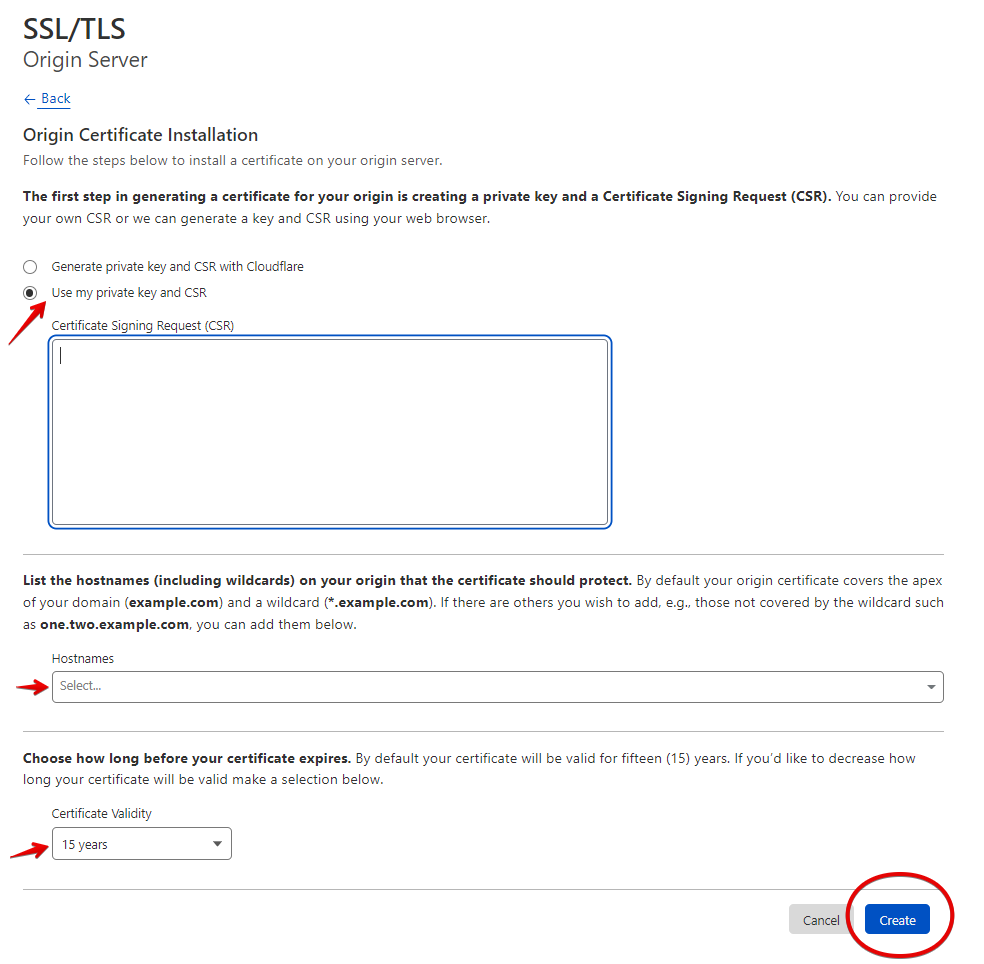
Select the option I have my own private key and CSR where you will Copy-Paste the certificate you saved on the txt file from your Windows Server (certreq.csr), fill in the hostnames, select the expiration years, and press Create
Step 5
Copy-Paste in PKCS#7 key format the certificate in a text file and save the file
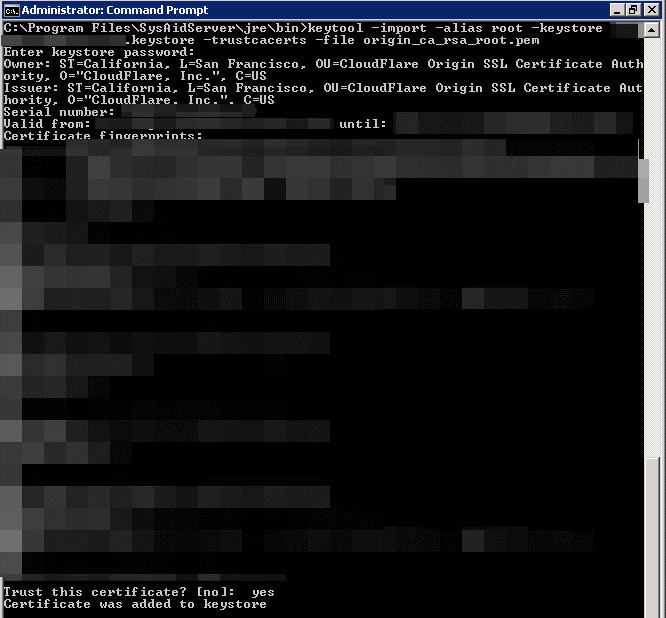
Import Cloudflare Origin CA root certificate at your Windows server
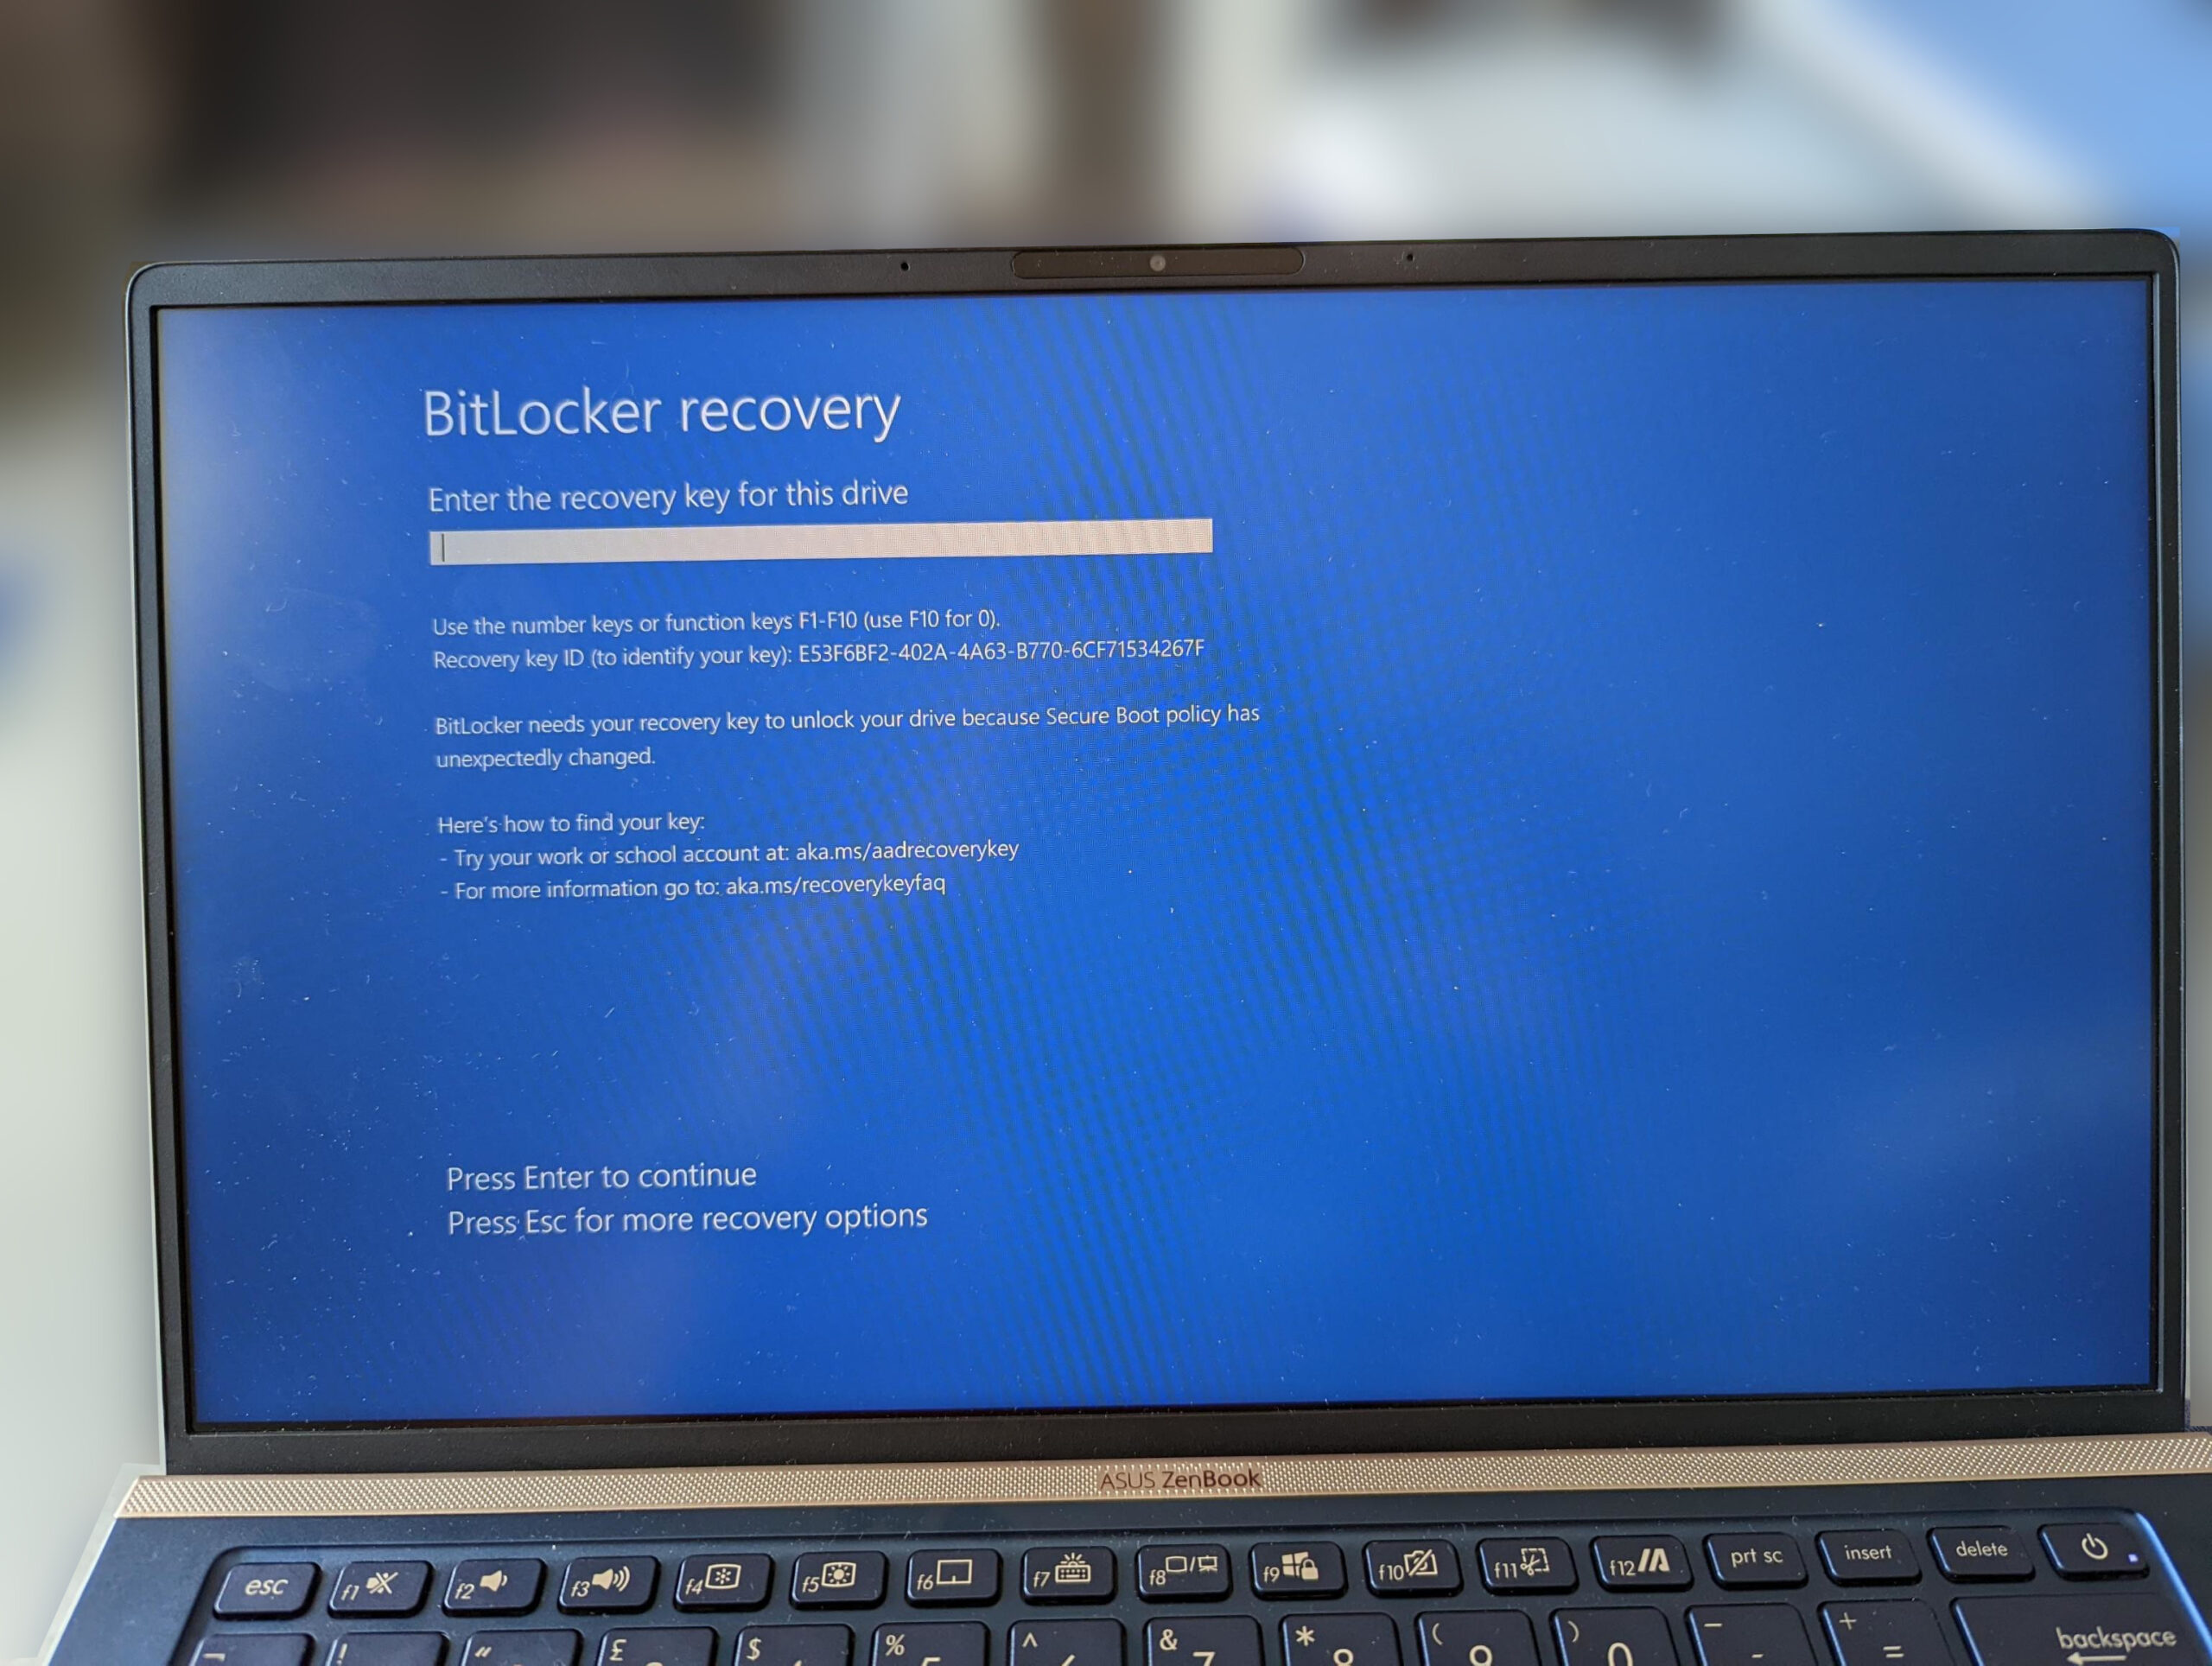
Recently, a person brought us this laptop to “fix.” The previous day, the owner performed some Windows updates, and after restarting, the machine got this error. After inquiring with him, we got the following information:
He did not possess a BitLocker recovery key with a length of 48 digits.
He had never even attempted to put one up, save it anywhere, or copy it to a USB drive, nor had he ever printed it off.
He logged into his Microsoft and Azure account, receiving the message “You don’t have any BitLocker recovery keys uploaded to your Microsoft account.” even though his device was listed there.
He could not locate the recovery key after attempting to follow the published instructions published by Microsoft.
If the information we got from that person is correct, then it means that the last Windows update cost that person inadvertently to lose all data that he did not back up in an external media or service. (Cracking the recovery key for BitLocker is, of course, out of the question for non-magical or extremely rich people with unlimited resources.)
Our only pieces of advice are the following:
Wait a few days before updating your PCs. Although this is not a safe practice, it might give the people responsible for this issue some time to fix it with a hotfix patch or similar.
In the meantime, perform timely backups of your data to external media or services.
If you are familiar with the Windows OS ecosystem, check your BitDefender settings. If that service is active and you do not have the recovery key, disable it and then reactivate it. It will produce a new pair of passwords and recovery keys that you can save for future use.
Recently, it came to our attention the existence of the so-called Windows “God Mode.” In reality, the “God Mode” is an alternative Control Panel with many options listed on one page. The most important feature of this “God Mode” Control Panel is that it makes it easier to find specific options and settings that Microsoft Windows developers hid for no apparent reason.
In the following video, we tried two methods to create the shortcut to the “God Mode” option, which was most likely named like this by people online rather than Microsoft.
Folder Method
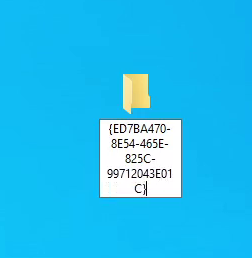
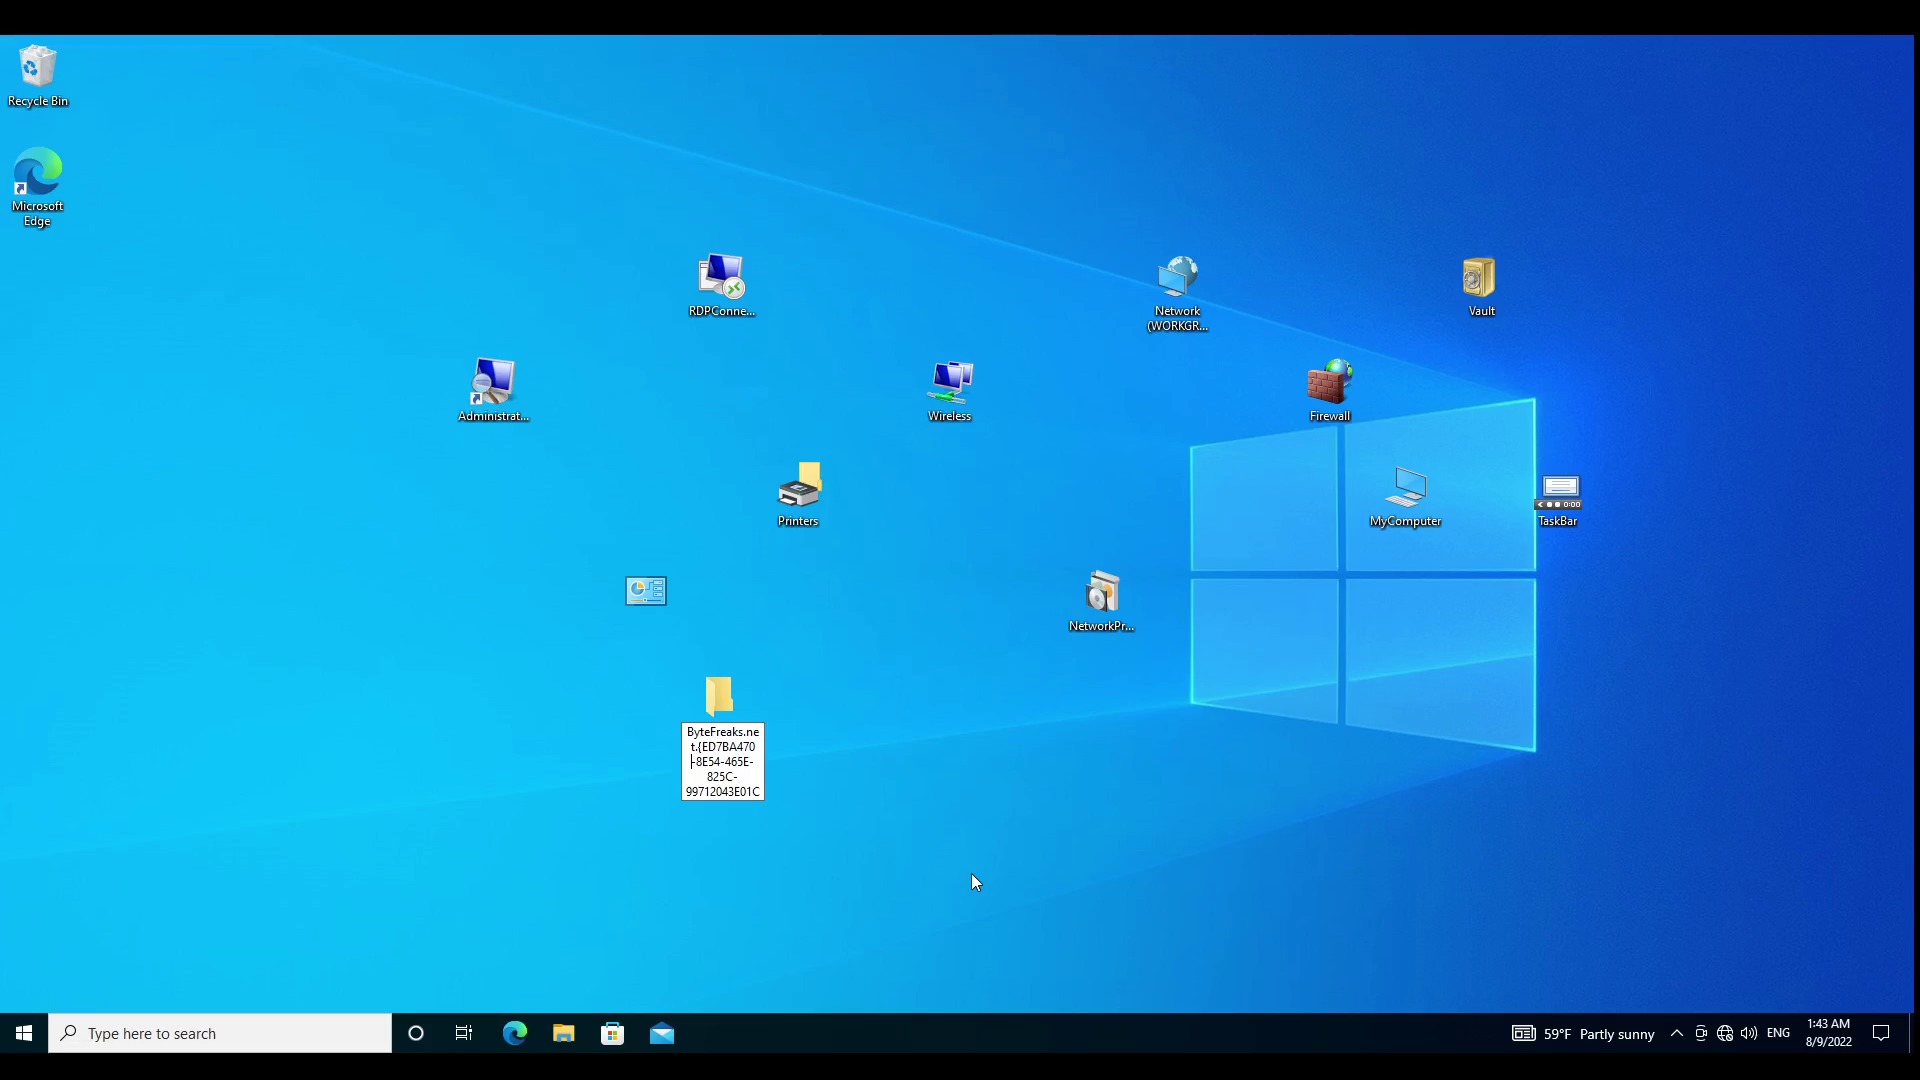
The first method was to create a new folder and add the following string as the name of the folder:
GodMode.{ED7BA470-8E54-465E-825C-99712043E01C}
The result was the following: the folder’s icon changed, and the folder’s name disappeared.
When we double-clicked the new icon, it opened a window with the variety of options that we mentioned before.
Shortcut Method
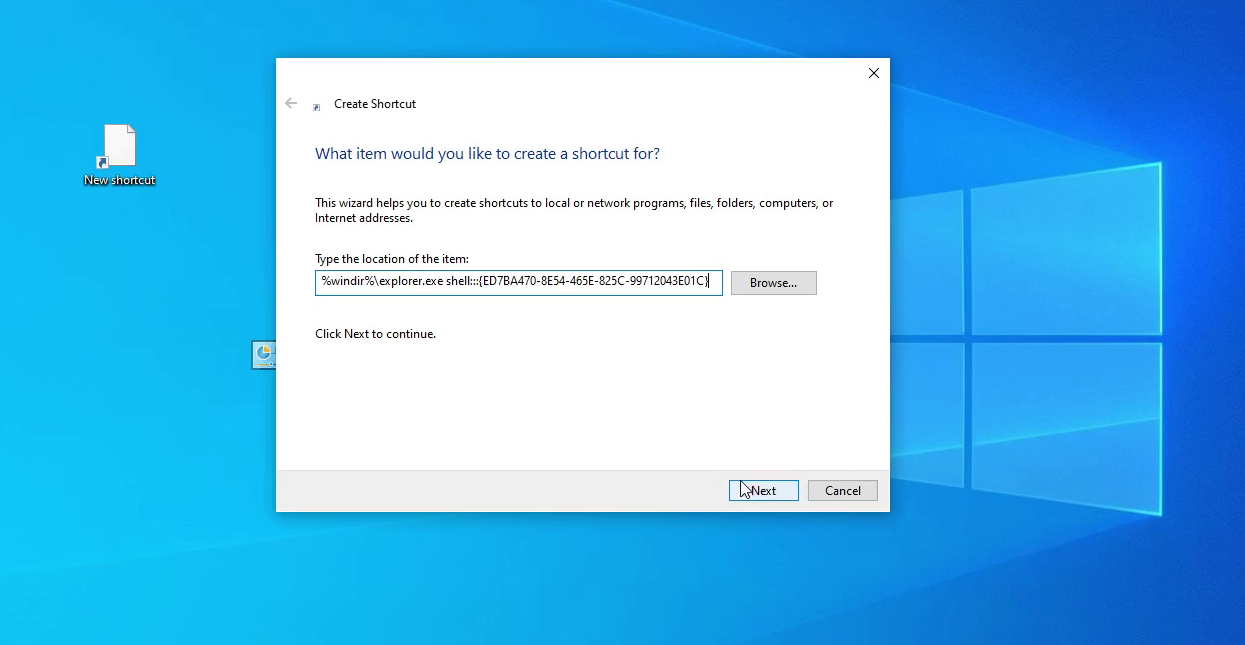
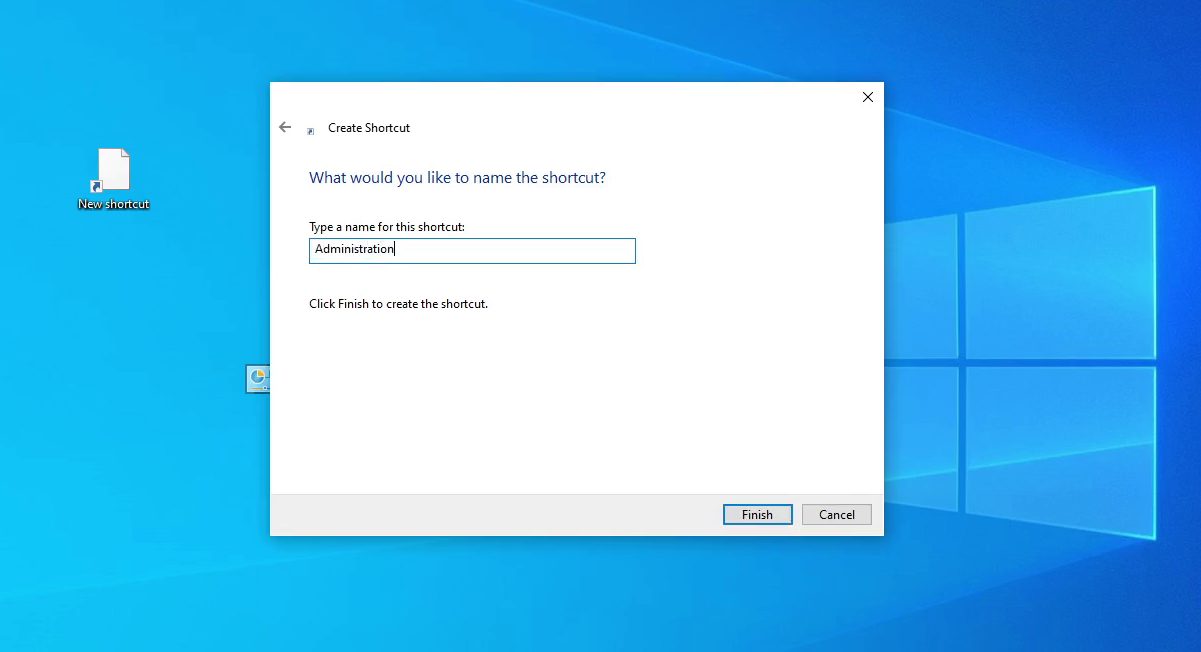
The second method involved creating a shortcut. We used that method to preserve the folder’s name and select the icon we would keep. The first step was to create a new shortcut on the Desktop. In the popup window, we set the following value at the “Type the location of the item:” option:
Then we clicked on the “Next” button. On the new page, we filled the “Type a name for this shortcut:” option with the value that we wanted to appear on the shortcut name. In our example, we used the word “Administration.”
After this, we clicked on the “Finish” button. On the Desktop, our new shortcut appeared with the correct name. As we did not like the predefined icon, we right-clicked the shortcut and selected the “Properties” option. We clicked the “Change Icon…” button in the new window. Another window opened, we pressed the “Browse…” button and navigated to the file:
%windir%\System32\imageres.dll
After clicking the “Open” button, a new list of icons appeared from which we selected one that we liked, then clicked on the “OK” button. We clicked the “Apply” button on the remaining window, and Windows applied the icon change to our shortcut.
Additional “God Mode” codes
The following values allow you to create folders to specific items on your Windows PC.