Qubes 4.0: Installation crashes when installing qubes-mgmt-salt-base-topd.noarch 5
Solution
- Disable
Secure BootfromBIOS - On
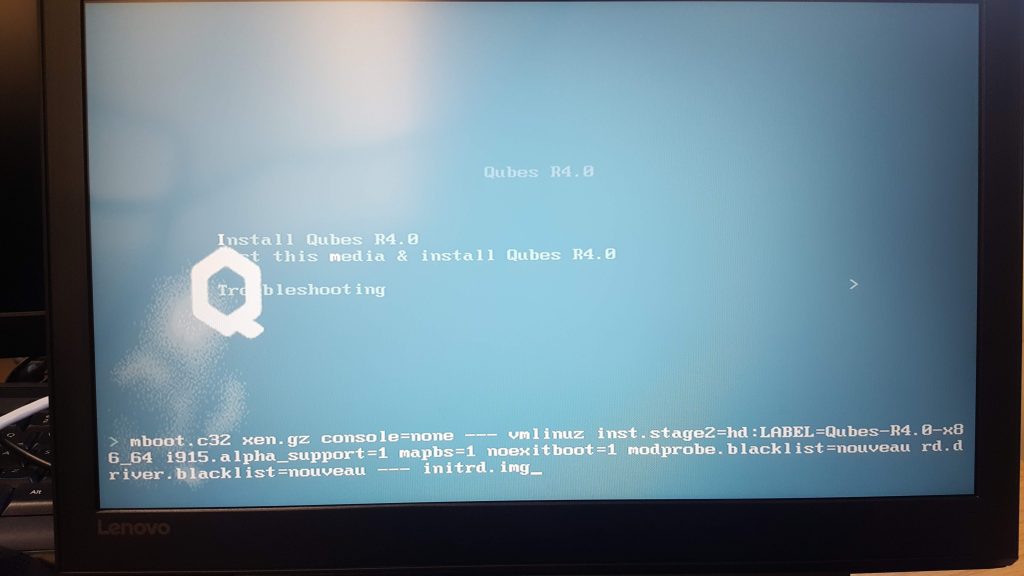
boot order, selectLegacy Devicesfirst, again fromBIOS - At the first screen of the installer (like the image below), press the
ebutton to edit the boot arguments, disabling the graphics card driver. For us what worked is the following:
mboot.c32 xen.gz console=none --- vmlinuz inst.stage2=hd:LABEL=Qubes-R4.0-x86_64 i915.alpha_support=1 mapbs=1 noexitboot=1 modprobe.blacklist=nouveau rd.driver.blacklist=nouveau -- initrd.img - Enjoy!
Back Story
Recently, we were trying to install Qubes GNU/Linux version 4.0 on a Lenovo Legion Y520 that has NVIDIA® GeForce® GTX 1050 Ti installed. After disabling secure boot from the BIOS and then setting the default boot to be on Legacy Devices, we were able to boot the anaconda installer.
We proceeded into configuring the installation (set the timezone, the keyboard layout, created the administrator user and selected the disk for the installation) and we waited for the system to install. After some serious amount of time, we realized that the installer had crashed completely while installing qubes-mgmt-salt-base-topd.noarch. We restarted the process and tried again, this time the installed did not crash but it would get stuck at the same step. Following, we gave it a few more tries just in case it would work but unfortunately it would always result either crashing or getting infinitely stuck.
Following the guide at https://www.qubes-os.org/doc/uefi-troubleshooting/ and https://www.qubes-os.org/doc/nvidia-troubleshooting/ we modified the boot parameters of the installer to add mabps and noexitboot, then disable the nouveau driver for the graphics card and it worked like a charm.