docker


Create a project using Symfony website-skeleton version 4 and then create a docker image out of it

This guide will present the steps we followed on a GNU/Linux Ubuntu 20.04LTS to create a new project out of the Symfony website skeleton and then create a new docker application image of it.

Install core dependecies

Install php-cli instead of php as we do not want to install the additional dependencies of php like apache2.
p7zip-full is needed for the package manager of composer later on. If it is missing, we will be getting one of the following errors:

Failed to download symfony/requirements-checker from dist: The zip extension and unzip/7z commands are both missing, skipping.
As there is no 'unzip' nor '7z' command installed zip files are being unpacked using the PHP zip extension.

php-xml will be required later on while creating the skeleton project for Symfony. If it is missing, you will get the following error:

symfony/framework-bundle requires ext-xml * -> it is missing from your system. Install or enable PHP's xml extension
sudo apt install php-cli php-xml p7zip-full;

Composer is a PHP utility for managing dependencies. It allows you to indicate the libraries your project relies on, and it will take care of installing and updating them. To fast install it, open a terminal and type the following command:

curl -Ss getcomposer.org/installer | php;
# Moving the composer into the /usr/local/bin/ folder will allow us to access it from any folder later on as that folder is in the default PATH variable.
sudo mv composer.phar /usr/local/bin/composer;

Symfony provides a tool to check if your operating system meets the required requirements rapidly. In addition, if suitable, the tool makes installation recommendations. To install the tool, run the following command:

composer require symfony/requirements-checker;
$ composer require symfony/requirements-checker;
Using version ^2.0 for symfony/requirements-checker
./composer.json has been updated
Running composer update symfony/requirements-checker
Loading composer repositories with package information
Updating dependencies
Lock file operations: 1 install, 0 updates, 0 removals
  - Locking symfony/requirements-checker (v2.0.1)
Writing lock file
Installing dependencies from lock file (including require-dev)
Package operations: 1 install, 0 updates, 0 removals
  - Installing symfony/requirements-checker (v2.0.1): Extracting archive
Generating autoload files
1 package you are using is looking for funding.
Use the `composer fund` command to find out more!

Once done, you can safely delete the requirements-checker:

composer remove symfony/requirements-checker;

Create the Symfony project

Using the basic skeleton, you can create a minimal Symfony project with the following command. We install the latest version of version 4.4 of the website skeleton project in this example. We found the list of versions here https://packagist.org/packages/symfony/website-skeleton.

composer create-project symfony/website-skeleton=4.4.99 symfony-skeleton;

When we got the following warning, we typed y, not sure what changes, so we stayed with the default option:

  -  WARNING  symfony/mailer (>=4.3): From github.com/symfony/recipes:master
    The recipe for this package contains some Docker configuration.

    This may create/update docker-compose.yml or update Dockerfile (if it exists).

    Do you want to include Docker configuration from recipes?
    [y] Yes
    [n] No
    [p] Yes permanently, never ask again for this project
    [x] No permanently, never ask again for this project
    (defaults to y): y

Then you need to run the following commands to install all dependencies and execute the project:

cd symfony-skeleton;
composer install;
composer require --dev symfony/web-server-bundle;
php bin/console server:start *:8000;

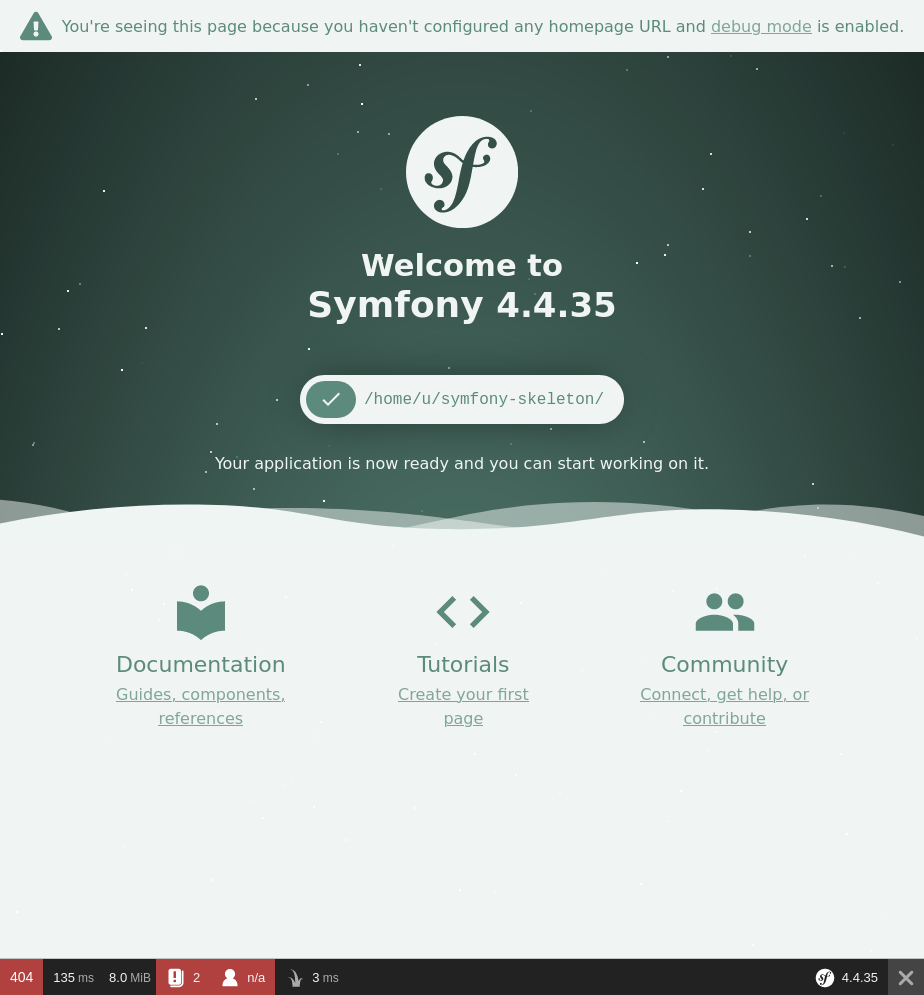
By now, you should see in a browser the landing page of your skeleton project.

# Stop the php webserver and release the port, we will need it later on.
php bin/console server:stop;

Install docker on Ubuntu

First of all, make sure your system is clean and remove any old versions:

sudo apt-get remove docker docker-engine docker.io containerd runc;
# You might want to execute `sudo apt autoremove -y;` as well to cleanup everything. We cannot ask everyone to do so as we are not sure of what complications it might have on each computer+software configurations.

We will be installing docker by adding its repositories to our system:

sudo apt-get update;
sudo apt-get install ca-certificates curl gnupg lsb-release;
curl -fsSL https://download.docker.com/linux/ubuntu/gpg | sudo gpg --dearmor -o /usr/share/keyrings/docker-archive-keyring.gpg;
echo "deb [arch=$(dpkg --print-architecture) signed-by=/usr/share/keyrings/docker-archive-keyring.gpg] https://download.docker.com/linux/ubuntu $(lsb_release -cs) stable" | sudo tee /etc/apt/sources.list.d/docker.list > /dev/null;
sudo apt-get update;
sudo apt-get install docker-ce docker-ce-cli containerd.io;
sudo docker run hello-world;

If the installation was OK, you should see the following message:

n$ sudo docker run hello-world
Unable to find image 'hello-world:latest' locally
latest: Pulling from library/hello-world
2db29710123e: Pull complete 
Digest: sha256:cc15c5b292d8525effc0f89cb299f1804f3a725c8d05e158653a563f15e4f685
Status: Downloaded newer image for hello-world:latest

Hello from Docker!
This message shows that your installation appears to be working correctly.

To generate this message, Docker took the following steps:
 1. The Docker client contacted the Docker daemon.
 2. The Docker daemon pulled the "hello-world" image from the Docker Hub.
    (amd64)
 3. The Docker daemon created a new container from that image which runs the
    executable that produces the output you are currently reading.
 4. The Docker daemon streamed that output to the Docker client, which sent it
    to your terminal.

To try something more ambitious, you can run an Ubuntu container with:
 $ docker run -it ubuntu bash

Share images, automate workflows, and more with a free Docker ID:
 https://hub.docker.com/

For more examples and ideas, visit:
 https://docs.docker.com/get-started/

Make the docker application image

Execute the following command on a terminal to get your php version:

php --version;

In case you get something different than version 7.4, please note it and update the contents of the DockerFile below accordingly. In our case, the results for the version were the ones right below and that is why we used the line FROM php:7.4-cli in our DockerFile.

$ php --version
PHP 7.4.3 (cli) (built: Oct 25 2021 18:20:54) ( NTS )
Copyright (c) The PHP Group
Zend Engine v3.4.0, Copyright (c) Zend Technologies
    with Zend OPcache v7.4.3, Copyright (c), by Zend Technologies

If you are not already at the root of your project (e.g., the symfony-skeleton folder), go to that folder and create a new text file with the name Dockerfile in there. The contents of the file should be the following:

# Dockerfile
FROM php:7.4-cli

RUN apt-get update -y && apt-get install -y libmcrypt-dev

RUN curl -sS https://getcomposer.org/installer | php -- --install-dir=/usr/local/bin --filename=composer
RUN apt-get update && apt-get install -y libonig-dev
RUN docker-php-ext-install pdo

WORKDIR /app
COPY . /app

RUN composer install

EXPOSE 8000
CMD php bin/console server:run 0.0.0.0:8000

Once you have Docker and Docker Machine installed on your machine, creating the container is a breeze. The command below will seek your Dockerfile and download all of the layers required to execute your container image. It will then complete the commands in the Dockerfile, leaving you with a container that is ready to use.

You’ll use the docker build command to create your php Symfony docker container, and you’ll give it a tag or a name so you can refer to it later when you want to execute it. The command’s final component instructs Docker to build from a specific directory.

sudo docker build -t symfony-project .;

To execute the new application image:

sudo docker run -it -p 8000:8000 symfony-project;

To export the Docker image as a tar file:

sudo docker save -o ~/symfony-skeleton.tar symfony-project;

To import the Docker image from the tar file:

sudo docker load -i symfony-skeleton.tar;


Quick notes on optimizing a mysql/mariadb database in a docker container

First, to avoid opening the network of the container to another network, you need to open a shell to the docker container itself. To do so, use the following command:

docker exec -it website_db /bin/bash;

After executing the exec command, you will get a shell to the docker container. Use the following command to optimize all databases and their tables:

mysqlcheck -p -o --all-databases;

The -p parameter instructs the command to ask for a password (which probably and hopefully have set).

To exit the console and close the connection just type exit; after you are done with the above command.

Note: Where we used the word website_db you need to use the name of your container. If you are not sure of the name of the container, you can list all of the containers with their names using the following command:

docker container ls;

Ubuntu – Overwrite dockerd default settings

Trying to create a new bridge on docker, we got the following error

$ docker-compose up -d;
Creating network "docker-compose_new_bridge" with driver "bridge"
ERROR: could not find an available, non-overlapping IPv4 address pool among the defaults to assign to the network

After investigating, we realized that it was due to some default limitations of docker that did not allow more virtual networks to be created. To overcome the problem, we read that we had to give access to more address space using the /etc/docker/daemon.json.

On Ubuntu that file did not exist so we created it and copied the following content to it:

{
  "default-address-pools": [
    {
      "base": "172.80.0.0/16",
      "size": 24
    },
    {
      "base": "172.90.0.0/16",
      "size": 24
    }
  ]
}

Source: https://docs.docker.com/engine/reference/commandline/dockerd/

This configuration allowed Docker to reserve the network address space 172.80.[0-255].0/24 and 172.90.[0-255].0/24, that provided the daemon a total of 512 networks each owning 256 addresses.

To apply the changes to the daemon, we restarted it:

sudo systemctl restart docker.service;

and then we applied our changes to our docker ecosystem:

docker-compose up -d;

Rough notes on Ray

Just a bunch of snippets that we used to deploy a local Ray cluster. We couldn’t get the second node to connect to the cluster even though no error was given.

From https://www.anaconda.com/products/individual-b
 wget https://repo.anaconda.com/archive/Anaconda3-2021.05-Linux-x86_64.sh
 bash ./Anaconda3-2021.05-Linux-x86_64.sh
 source ~/anaconda3/bin/activate
 conda create --name ray.3.7 python=3.7.10;
 conda activate ray.3.7;
 conda install --name ray.3.7 pip;
 pip install ray==1.1.0
 pip install gym pandas torch ray ray[default] ray[rllib] ray[serve] ray[tune];

 ON WORKERS:
 From https://docs.docker.com/engine/install/ubuntu/
 sudo apt-get remove docker docker-engine docker.io containerd runc;
 sudo apt-get update;
 sudo apt-get install apt-transport-https ca-certificates curl gnupg lsb-release;
 curl -fsSL https://download.docker.com/linux/ubuntu/gpg | sudo gpg --dearmor -o /usr/share/keyrings/docker-archive-keyring.gpg
 echo "deb [arch=amd64 signed-by=/usr/share/keyrings/docker-archive-keyring.gpg] https://download.docker.com/linux/ubuntu $(lsb_release -cs) stable" | sudo tee /etc/apt/sources.list.d/docker.list > /dev/null
 sudo apt-get update
 sudo apt-get install docker-ce docker-ce-cli containerd.io
 sudo addgroup --system docker
 sudo adduser $USER docker
 newgrp docker
 sudo systemctl restart docker

 Uninstall Docker Engine
 Uninstall the Docker Engine, CLI, and Containerd packages:
 sudo apt-get purge docker-ce docker-ce-cli containerd.io
 Images, containers, volumes, or customized configuration files on your host are not automatically removed. To delete all images, containers, and volumes:
 sudo rm -rf /var/lib/docker
  sudo rm -rf /var/lib/containerd
 You must delete any edited configuration files manually.


 2021-06-09 03:56:34,453    WARNING services.py:1740 -- WARNING: The object store is using /tmp instead of /dev/shm because /dev/shm has only 7963275264 bytes available. This will harm performance! You may be able to free up space by deleting files in /dev/shm. If you are inside a Docker container, you can increase /dev/shm size by passing '--shm-size=10.24gb' to 'docker run' (or add it to the run_options list in a Ray cluster config). Make sure to set this to more than 30% of available RAM.

 ON MASTER:
 ray up office.yaml
 ray up -vvvvvv office.yaml
 ray exec office.yaml 'ray status'

The yaml file that we used was the following

# A unique identifier for the head node and workers of this cluster.
cluster_name: default

# This executes all commands on all nodes in the docker container,
# and opens all the necessary ports to support the Ray cluster.
# Empty string means disabled. Assumes Docker is installed.
docker:
    image: "rayproject/ray-ml:1.1.0" # You can change this to latest-cpu if you don't need GPU support and want a faster startup
    # image: rayproject/ray:latest-gpu   # use this one if you don't need ML dependencies, it's faster to pull
    container_name: "ray_container"
    # If true, pulls latest version of image. Otherwise, `docker run` will only pull the image
    # if no cached version is present.
    pull_before_run: True
    run_options: ["--shm-size=10.24gb"]  # Extra options to pass into "docker run"

provider:
    type: local
    head_ip: 192.168.1.14
    ## head_ip: YOUR_HEAD_NODE_HOSTNAME
    # You may need to supply a public ip for the head node if you need
    # to run `ray up` from outside of the Ray cluster's network
    # (e.g. the cluster is in an AWS VPC and you're starting ray from your laptop)
    # This is useful when debugging the local node provider with cloud VMs.
    # external_head_ip: YOUR_HEAD_PUBLIC_IP
    worker_ips: [192.168.1.70]
    ## worker_ips: [WORKER_NODE_1_HOSTNAME, WORKER_NODE_2_HOSTNAME, ... ]
    # Optional when running automatic cluster management on prem. If you use a coordinator server,
    # then you can launch multiple autoscaling clusters on the same set of machines, and the coordinator
    # will assign individual nodes to clusters as needed.
    #    coordinator_address: "<host>:<port>"
    # cache_stopped_nodes: False

# How Ray will authenticate with newly launched nodes.
auth:
    ssh_user: tux
    #ssh_user: YOUR_USERNAME
    # Optional if an ssh private key is necessary to ssh to the cluster.
    ssh_private_key: ~/.ssh/id_rsa

# The minimum number of workers nodes to launch in addition to the head
# node. This number should be >= 0.
# Typically, min_workers == max_workers == len(worker_ips).
min_workers: 20

# The maximum number of workers nodes to launch in addition to the head node.
# This takes precedence over min_workers.
# Typically, min_workers == max_workers == len(worker_ips).
max_workers: 20
# The default behavior for manually managed clusters is
# min_workers == max_workers == len(worker_ips),
# meaning that Ray is started on all available nodes of the cluster.
# For automatically managed clusters, max_workers is required and min_workers defaults to 0.

initial_workers: 20

# The autoscaler will scale up the cluster faster with higher upscaling speed.
# E.g., if the task requires adding more nodes then autoscaler will gradually
# scale up the cluster in chunks of upscaling_speed*currently_running_nodes.
# This number should be > 0.
upscaling_speed: 1.0

idle_timeout_minutes: 5

# Files or directories to copy to the head and worker nodes. The format is a
# dictionary from REMOTE_PATH: LOCAL_PATH, e.g.
file_mounts: {
#    "/path1/on/remote/machine": "/path1/on/local/machine",
#    "/path2/on/remote/machine": "/path2/on/local/machine",
}

# Files or directories to copy from the head node to the worker nodes. The format is a
# list of paths. The same path on the head node will be copied to the worker node.
# This behavior is a subset of the file_mounts behavior. In the vast majority of cases
# you should just use file_mounts. Only use this if you know what you're doing!
cluster_synced_files: []

# Whether changes to directories in file_mounts or cluster_synced_files in the head node
# should sync to the worker node continuously
file_mounts_sync_continuously: False

# Patterns for files to exclude when running rsync up or rsync down
rsync_exclude:
    - "**/.git"
    - "**/.git/**"

# Pattern files to use for filtering out files when running rsync up or rsync down. The file is searched for
# in the source directory and recursively through all subdirectories. For example, if .gitignore is provided
# as a value, the behavior will match git's behavior for finding and using .gitignore files.
rsync_filter:
    - ".gitignore"

# List of commands that will be run before `setup_commands`. If docker is
# enabled, these commands will run outside the container and before docker
# is setup.
initialization_commands: []

# List of shell commands to run to set up each nodes.
setup_commands: []
    # Note: if you're developing Ray, you probably want to create a Docker image that
    # has your Ray repo pre-cloned. Then, you can replace the pip installs
    # below with a git checkout <your_sha> (and possibly a recompile).
    # To run the nightly version of ray (as opposed to the latest), either use a rayproject docker image
    # that has the "nightly" (e.g. "rayproject/ray-ml:nightly-gpu") or uncomment the following line:
    # - pip install -U "ray[default] @ https://s3-us-west-2.amazonaws.com/ray-wheels/latest/ray-2.0.0.dev0-cp37-cp37m-manylinux2014_x86_64.whl"

# Custom commands that will be run on the head node after common setup.
head_setup_commands: []

# Custom commands that will be run on worker nodes after common setup.
worker_setup_commands: []

# Command to start ray on the head node. You don't need to change this.
head_start_ray_commands:
    - ray stop
    - ulimit -c unlimited && ray start --head --port=6379 --autoscaling-config=~/ray_bootstrap_config.yaml

# Command to start ray on worker nodes. You don't need to change this.
worker_start_ray_commands:
    - ray stop
    - ray start --address=$RAY_HEAD_IP:6379