WordPress


JetPack: Cannot Verify Site Ownership using pinterest 6

Recently, we tried to verify the ownership of a site running WordPress with JetPack in Pinterest.

As the instructions say, we logged in to Pinterest and visited the settings page to Claim Website paragraph.

Using the meta tag solution we received a code similar to the one below:

<meta name="p:domain_verify" content="8525e3384b3545fb80b9e21f0910de21"/>

When we tried to add the code in the JetPack site verification page (https://example.com/wp-admin/admin.php?page=jetpack#/traffic) we got the following error:
Error updating settings. Invalid parameter(s): pinterest (Status 400).

To resolve the issue, we just added a space character right before the end of the tag /> and our code became:

<meta name="p:domain_verify" content="8525e3384b3545fb80b9e21f0910de21" />

Trying again, it worked properly!


An attempt to use images in WP-Polls

Recently we needed to make a poll with images in WordPress.
On our system we only had WP-Polls installed and we decided to go along with it despite its drawbacks.

Drawbacks of using WP-Polls:

  • Does not support polls with images directly.
  • Does not allow you to configure ‘Poll Options’ per poll.
    For example, either all polls are logged by username or none is.

WP-Polls

In any case, we only needed one poll for a very specific task so we decided to ignore those limitations and see what we could do with the current vanilla code of WP-Polls ([download id=”4022″]).

What we did was the following:

A: We configured the system to only allow registered users to vote and set the vote logging to be per username

B: We modified the templates below to receive the poll answers as URIs for images.

Voting Form Body:


<li><input type="%POLL_CHECKBOX_RADIO%" id="poll-answer-%POLL_ANSWER_ID%" name="poll_%POLL_ID%" value="%POLL_ANSWER_ID%" /> <label for="poll-answer-%POLL_ANSWER_ID%"><img src="%POLL_ANSWER%" />%POLL_ANSWER%</label></li>

Result Body:
Displayed When The User HAS NOT Voted


<li><img src="%POLL_ANSWER%" />%POLL_ANSWER% <small>(%POLL_ANSWER_PERCENTAGE%%, %POLL_ANSWER_VOTES% Votes)</small><div class="pollbar" style="width: %POLL_ANSWER_IMAGEWIDTH%%" title="%POLL_ANSWER_TEXT% (%POLL_ANSWER_PERCENTAGE%% | %POLL_ANSWER_VOTES% Votes)"></div></li>

Result Body:
Displayed When The User HAS Voted


<li><img src="%POLL_ANSWER%" /><strong><i>%POLL_ANSWER% <small>(%POLL_ANSWER_PERCENTAGE%%, %POLL_ANSWER_VOTES% Votes)</small></i></strong><div class="pollbar" style="width: %POLL_ANSWER_IMAGEWIDTH%%" title="You Have Voted For This Choice - %POLL_ANSWER_TEXT% (%POLL_ANSWER_PERCENTAGE%% | %POLL_ANSWER_VOTES% Votes)"></div></li>

These two changes produced the following result:

[poll id=”1″]

We did not fiddle with the CCS of the site to make the polls look better or anything as it was OK for the scenario that we cared about.


WPML: How to add the Languages’s list in a WordPress menu

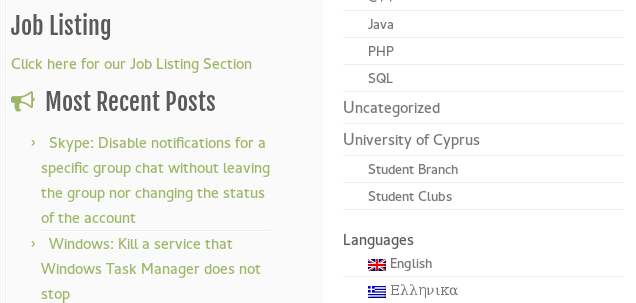
The code in this article can be used to create a WPML language switcher that will be attached at the bottom of a specific WordPress menu. Each Language will be a sub-menu item of a new menu item named Languages.

Menu Languages Options

You should add this code to your theme’s functions.php file. It is highly recommended to add this change to the functions.php of child theme.

Choosing which languages to show

By default, the following code will be showing ALL available languages, including the currently active one. We did that as we only have two languages in our website and it would weird to: (a) have only one sub-menu item in the Languages menu item or (b) remove the Languages menu item and place the inactive language item directly on the menu.

To show only the inactive languages, change the line that contains $showActive = true; to $showActive = false;.

Choosing which menu to show the languages on

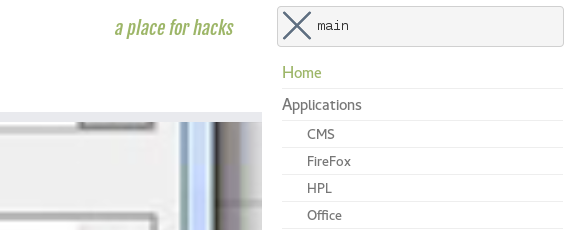
To choose the menu on which you want the languages to appear in, you need to set the value of $themeLocation = 'main'; to the theme location that the menu has in your current theme.

For the default WordPress themes (Twenty Sixteen, Twenty Fifteen, etc.) setting the value to primary as follows $themeLocation = 'primary'; will add the languages to the main menu.

For the customizr theme (this also works for the pro version),  setting the value to main as follows $themeLocation = 'main'; will add the languages to the main menu.

For other themes, you need to find the name of the menu you want to append the languages to. To do so change the line $showMenuName = false; to $showMenuName = true;. This will print at the beginning of your menu the location of the menu inside the theme using a <pre> tag. Copy that value to the $themeLocation variable, change the $showMenuName back to $showMenuName = false; and you are done.

Menu Location

/* Add languages menu to main menu */
add_filter('wp_nav_menu_items', 'new_nav_menu_items', 10, 2);
function new_nav_menu_items($items, $args) {
    
    $showActive = true;
    $themeLocation = 'main';
    $showMenuName = false;

    if ($showMenuName) {
        echo "<pre>"; print_r(get_object_vars($args)['theme_location']); echo "</pre>";
    }

    // get languages
    $languages = apply_filters( 'wpml_active_languages', NULL, 'skip_missing=0' );

    if ( $languages && $args->theme_location == $themeLocation) {

        if(!empty($languages)){

            $items = $items . '<br/><li class="menu-item">Languages';
            $items = $items . '<ul class="dropdown-menu">';
            foreach($languages as $l){

                if(!$l['active'] || $showActive){
                    $items = $items . '<li class="menu-item"><a href="' . $l['url'] . '"><img src="' . $l['country_flag_url'] . '" height="12" alt="' . $l['language_code'] . '" width="18" /> ' . $l['native_name'] . '</a></li>';
                }
            }
            $items = $items . '</li></ul>';
        }
    }

    return $items;
}

The above code was generated using the documentation examples of WPML.


WordPress: Google AdSense Plugin 3

Recently, we were trying to changing the position of the Google Ads that are shown on a website using the Google AdSense plugin for WordPress.

After clicking on the Manage Ads button at the configuration page (http://example.com/wp-admin/options-general.php?page=GooglePublisherPlugin) we would get an error that another theme had set the active ads and that the plugin cannot proceed to modify them unless they are disabled from the other theme (Specifically we would get the following error: Due to a theme change, ads are not being shown. Please reconfigure your ads or restore the previous theme.).

(a) Disabling the plugin, (b) Uninstalling the plugin (c) Reconnecting with another AdSense account did not help at all.

What we did at the end was to remove the GooglePublisherPlugin entry from the wp_option database of our installation.

DELETE FROM `MyDatabase`.`wp_options` WHERE `option_name` = "GooglePublisherPlugin";

Next time we visited the configuration page, we were disconnected from the previous account and we had to reconnect.

GetStarted-AdSense
After reconnecting, we followed the configuration procedure, we pressed the Manage Ads button, the website was analyzed, we got the confirmation message and we clicked on the Save & Activate button to store the changes.

For a few hours, no ads were shown on the site. We did not take any action and on the next day that ads started appearing as expected.