
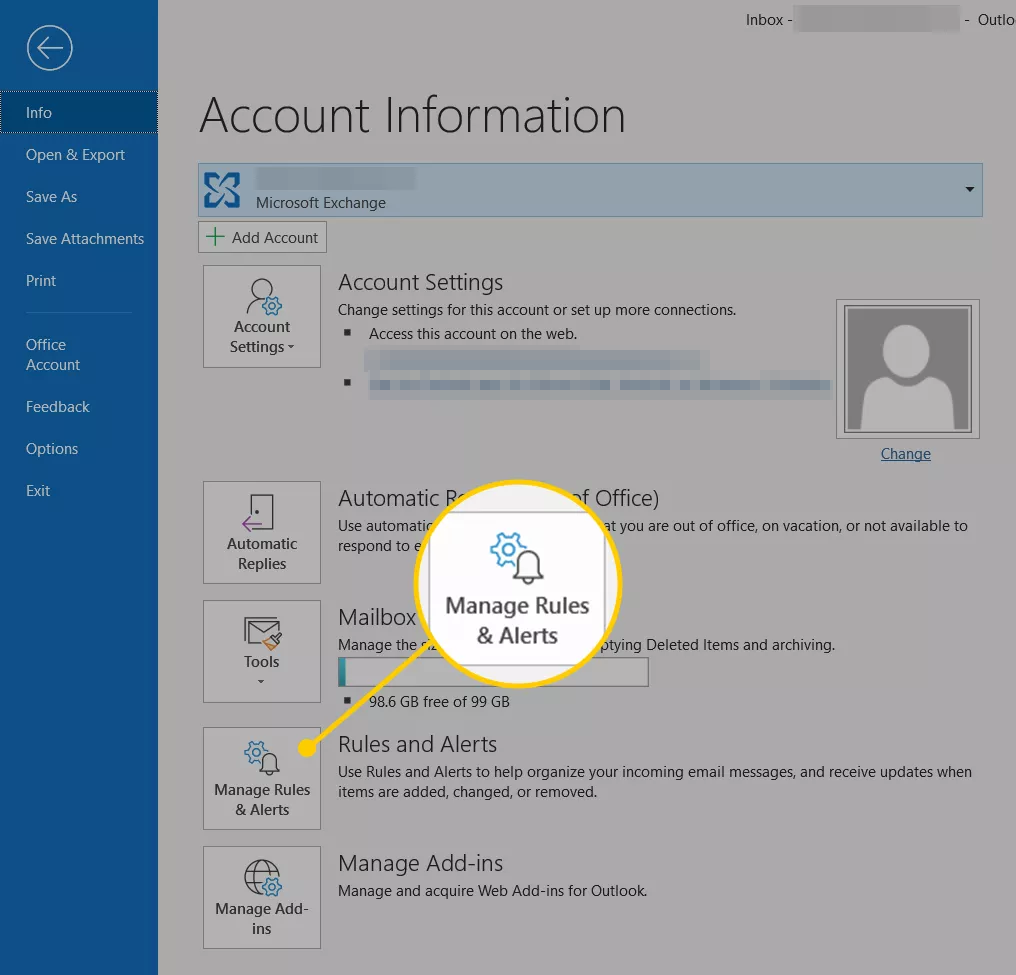
1) Click File in your Outlook Inbox.

2) Go to the info category.
3) Make sure the account for which you want to set up automatic Cc copies is selected under Account Information.
4) Click Manage Rules & Alerts.
5) Go to the E-mail Rules tab.
6) Click New Rule….

7) For Step 1: Select a template, make sure Apply rule on messages I send is selected (under Start from a blank rule).
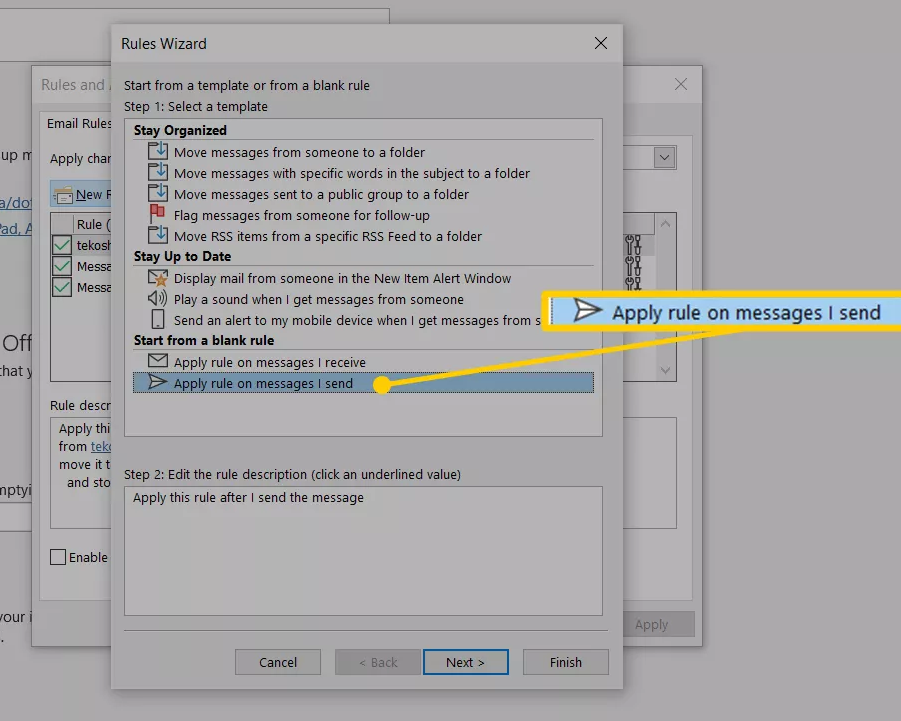
8) Click Next >.
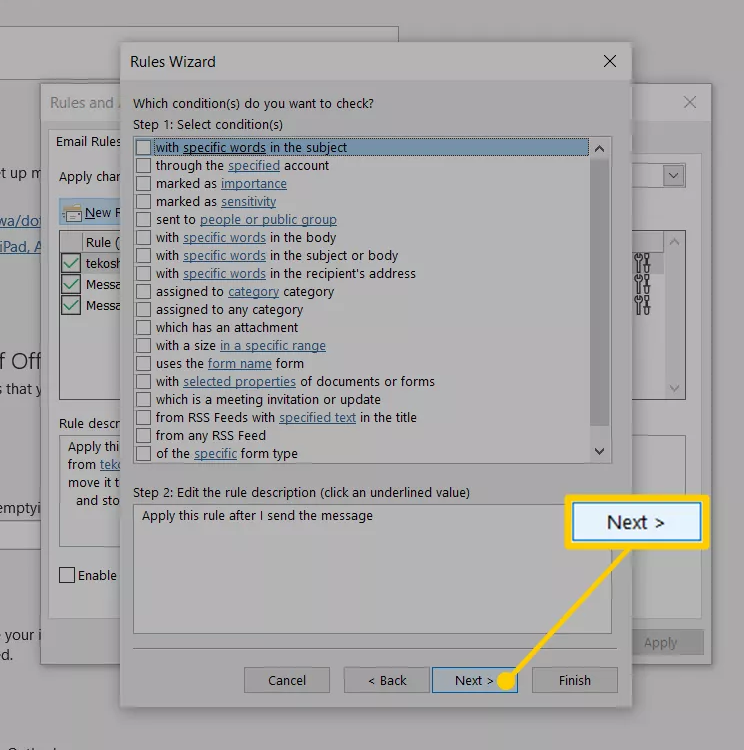
9) Click Next > again.
You can pick criteria for the messages you want to copy via Cc; if you select nothing, however, all emails will be added the CC: recipients.
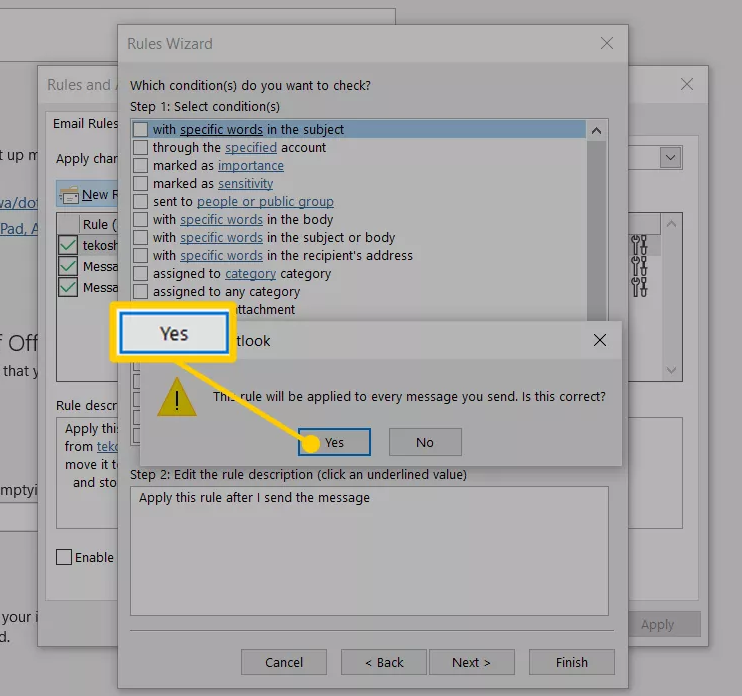
10) If you are prompted:
Under This rule will be applied to every message you send. Is this correct?, click Yes.
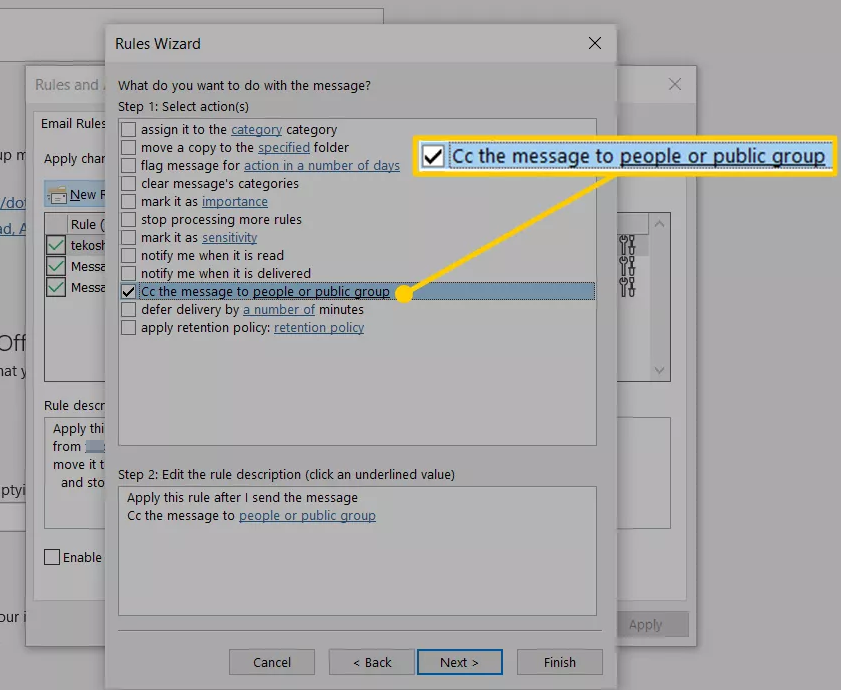
11) Under Step 1: Select action(s), make sure CC the message to people or public group is checked.
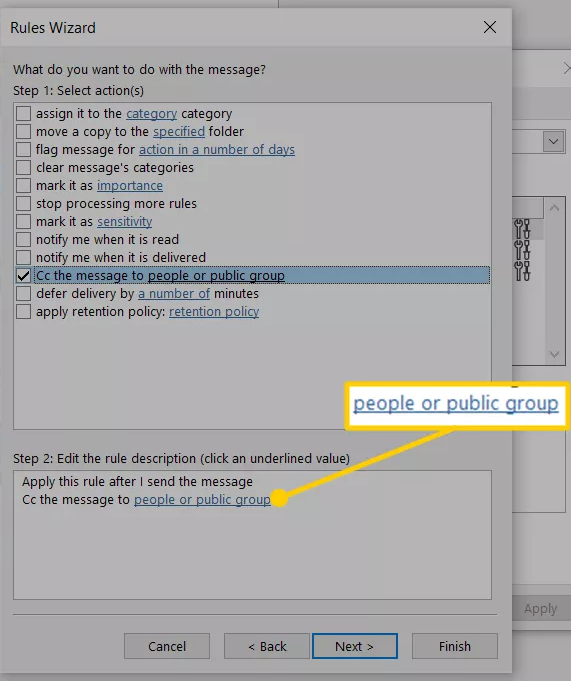
12) Under Step 2: Edit the rule description, click people or public group.
13) Double-click any recipients (or lists) from your address book, or enter email addresses directly under To ->; these addresses will receive the CC: copies.
Separate email addresses under To -> with semicolons (;).

14) Click OK.
15) Now click Next >.
16) Optionally, under Are there any exceptions?, specify any exceptions to the Cc: sending rule .
17) Click Next >.
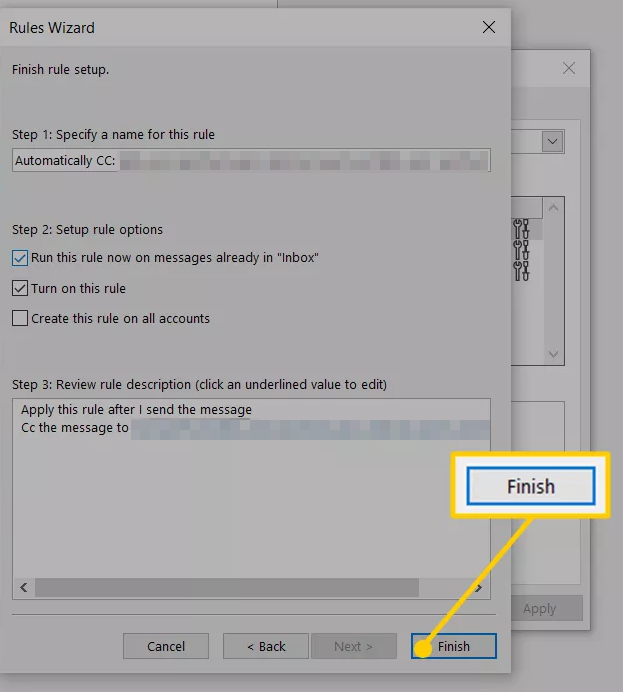
18) Typically, precede the email address or addresses entered under Step 1: Specify a name for this rule with something like “Automatically Cc “.

19) Also typically, make sure Run this rule now on messages already in “Inbox” is not checked.
20) Click Finish.
21) Now click OK.

This post is also available in: Greek

