wordpress


Install Required Plugins of Gillion | Multi-Concept Blog/Magazine & Shop WordPress Theme

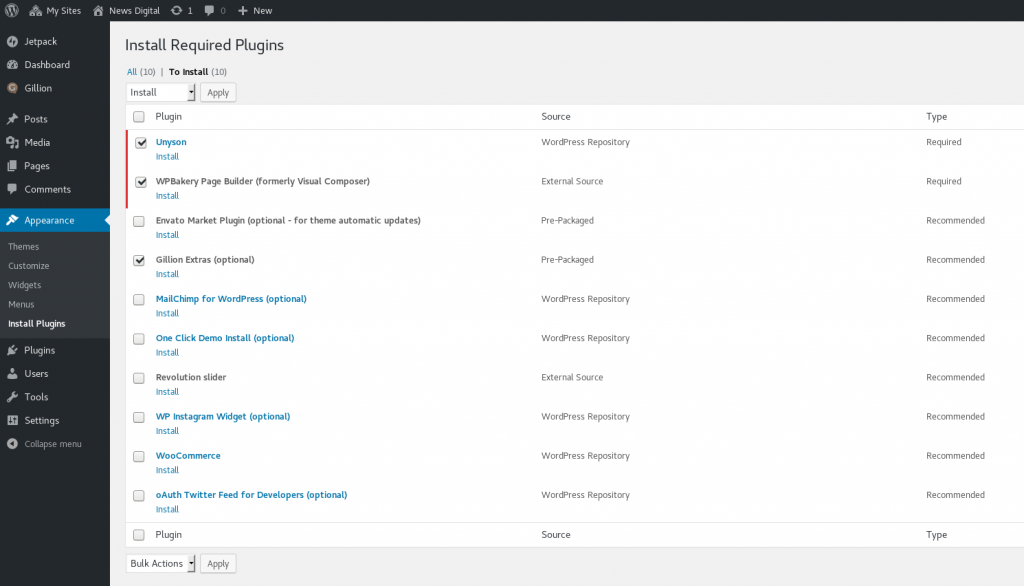
For Gillion (the Multi-Concept Blog/Magazine & Shop WordPress Theme) to properly work, it needs the WPBakery Page Builder (formerly Visual Composer) and the Unison plugins. In a clients’ page, they did not get the message prompting to install the required plugins and could not find it again. Unison is available through WordPress Plugin Directory so that was easy to setup. On the other hand, WPBakery (and the Revolution slider) it is not available through the directory as it is a commercial product. After reading through the support forums we realised that they should not need to make a separate purchase of the plugin, the theme will be able to pull it automatically from a CDN of shufflehound (without getting support from the WPBakery team).

Solution: In case you are facing the same issue, you can find the installation link under the left side menu Appearance where a new option will be available called Install Plugins (the link will be similar to this http://example.com/wp-admin/themes.php?page=tgmpa-install-plugins). We installed for them the two required plugins and their theme was operational.

Links:


JetPack: Cannot Verify Site Ownership using pinterest 6

Recently, we tried to verify the ownership of a site running WordPress with JetPack in Pinterest.

As the instructions say, we logged in to Pinterest and visited the settings page to Claim Website paragraph.

Using the meta tag solution we received a code similar to the one below:

<meta name="p:domain_verify" content="8525e3384b3545fb80b9e21f0910de21"/>

When we tried to add the code in the JetPack site verification page (https://example.com/wp-admin/admin.php?page=jetpack#/traffic) we got the following error:
Error updating settings. Invalid parameter(s): pinterest (Status 400).

To resolve the issue, we just added a space character right before the end of the tag /> and our code became:

<meta name="p:domain_verify" content="8525e3384b3545fb80b9e21f0910de21" />

Trying again, it worked properly!


WPML: How to add the Languages’s list in a WordPress menu

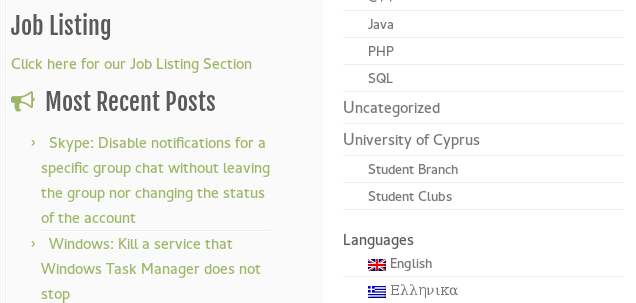
The code in this article can be used to create a WPML language switcher that will be attached at the bottom of a specific WordPress menu. Each Language will be a sub-menu item of a new menu item named Languages.

Menu Languages Options

You should add this code to your theme’s functions.php file. It is highly recommended to add this change to the functions.php of child theme.

Choosing which languages to show

By default, the following code will be showing ALL available languages, including the currently active one. We did that as we only have two languages in our website and it would weird to: (a) have only one sub-menu item in the Languages menu item or (b) remove the Languages menu item and place the inactive language item directly on the menu.

To show only the inactive languages, change the line that contains $showActive = true; to $showActive = false;.

Choosing which menu to show the languages on

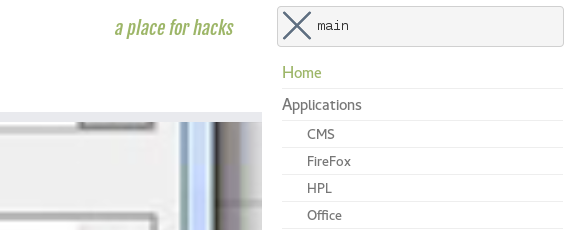
To choose the menu on which you want the languages to appear in, you need to set the value of $themeLocation = 'main'; to the theme location that the menu has in your current theme.

For the default WordPress themes (Twenty Sixteen, Twenty Fifteen, etc.) setting the value to primary as follows $themeLocation = 'primary'; will add the languages to the main menu.

For the customizr theme (this also works for the pro version),  setting the value to main as follows $themeLocation = 'main'; will add the languages to the main menu.

For other themes, you need to find the name of the menu you want to append the languages to. To do so change the line $showMenuName = false; to $showMenuName = true;. This will print at the beginning of your menu the location of the menu inside the theme using a <pre> tag. Copy that value to the $themeLocation variable, change the $showMenuName back to $showMenuName = false; and you are done.

Menu Location

/* Add languages menu to main menu */
add_filter('wp_nav_menu_items', 'new_nav_menu_items', 10, 2);
function new_nav_menu_items($items, $args) {
    
    $showActive = true;
    $themeLocation = 'main';
    $showMenuName = false;

    if ($showMenuName) {
        echo "<pre>"; print_r(get_object_vars($args)['theme_location']); echo "</pre>";
    }

    // get languages
    $languages = apply_filters( 'wpml_active_languages', NULL, 'skip_missing=0' );

    if ( $languages && $args->theme_location == $themeLocation) {

        if(!empty($languages)){

            $items = $items . '<br/><li class="menu-item">Languages';
            $items = $items . '<ul class="dropdown-menu">';
            foreach($languages as $l){

                if(!$l['active'] || $showActive){
                    $items = $items . '<li class="menu-item"><a href="' . $l['url'] . '"><img src="' . $l['country_flag_url'] . '" height="12" alt="' . $l['language_code'] . '" width="18" /> ' . $l['native_name'] . '</a></li>';
                }
            }
            $items = $items . '</li></ul>';
        }
    }

    return $items;
}

The above code was generated using the documentation examples of WPML.


Create a sortable ‘Modified Date’ sortable column for posts and pages in wordpress admin area 7

2016-07-14: Post updated to support both pages and posts without redundant/useless code

Paste the following in the functions.php file of your theme:

// Register the column for modified date
function bf_post_modified_column_register( $columns ) {
    $columns['post_modified'] = __( 'Modified Date', 'mytextdomain' );
    return $columns;
}
add_filter( 'manage_edit-post_columns', 'bf_post_modified_column_register' );
add_filter( 'manage_edit-page_columns', 'bf_post_modified_column_register' );

// Display the modified date column content
function bf_post_modified_column_display( $column_name, $post_id ) {
    if ( 'post_modified' != $column_name ){
        return;
    }
    $post_modified = get_post_field('post_modified', $post_id);
    if ( !$post_modified ){
        $post_modified = '' . __( 'undefined', 'mytextdomain' ) . '';
    }
    echo $post_modified;
}
add_action( 'manage_posts_custom_column', 'bf_post_modified_column_display', 10, 2 );
add_action( 'manage_pages_custom_column', 'bf_post_modified_column_display', 10, 2 );

// Register the modified date column as sortable
function bf_post_modified_column_register_sortable( $columns ) {
    $columns['post_modified'] = 'post_modified';
    return $columns;
}
add_filter( 'manage_edit-post_sortable_columns', 'bf_post_modified_column_register_sortable' );
add_filter( 'manage_edit-page_sortable_columns', 'bf_post_modified_column_register_sortable' );

When you refresh http://<Your Domain>/wp-admin/edit.php or http://<Your Domain>/wp-admin/edit.php?post_type=page the ‘Modified Date’ column will be visible and sortable.