windows


Microsoft Windows “God Mode” and other shortcuts

Recently, it came to our attention the existence of the so-called Windows “God Mode.” In reality, the “God Mode” is an alternative Control Panel with many options listed on one page. The most important feature of this “God Mode” Control Panel is that it makes it easier to find specific options and settings that Microsoft Windows developers hid for no apparent reason.

In the following video, we tried two methods to create the shortcut to the “God Mode” option, which was most likely named like this by people online rather than Microsoft.

Folder Method

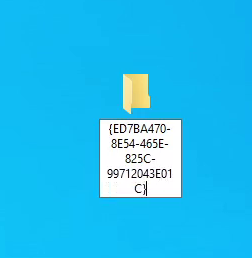
The first method was to create a new folder and add the following string as the name of the folder:

GodMode.{ED7BA470-8E54-465E-825C-99712043E01C}

The result was the following: the folder’s icon changed, and the folder’s name disappeared.

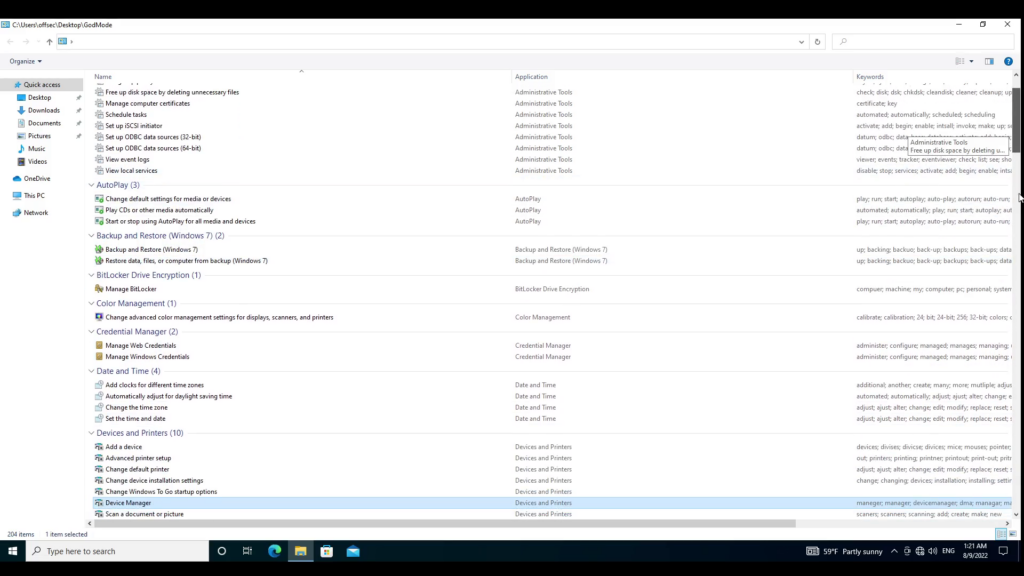
When we double-clicked the new icon, it opened a window with the variety of options that we mentioned before.

Shortcut Method

The second method involved creating a shortcut. We used that method to preserve the folder’s name and select the icon we would keep.
The first step was to create a new shortcut on the Desktop.
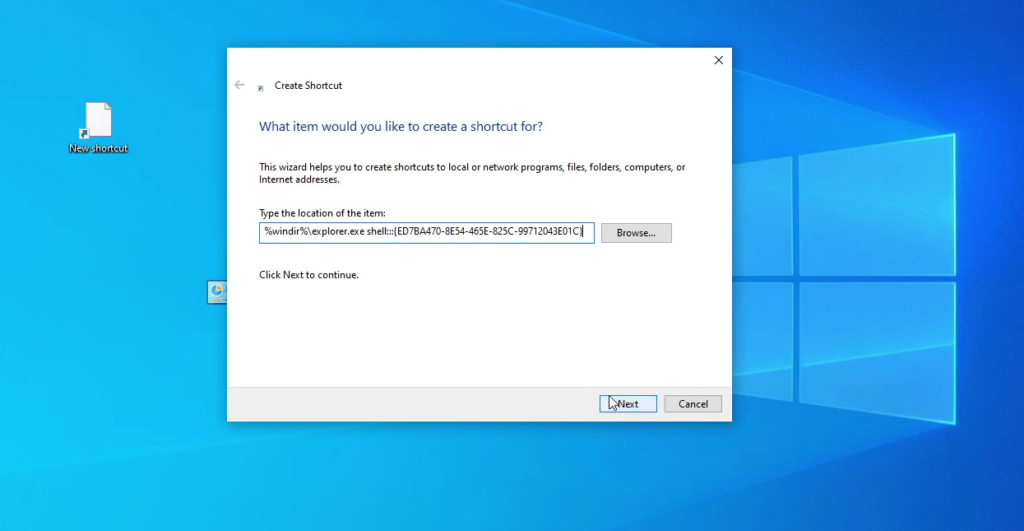
In the popup window, we set the following value at the “Type the location of the item:” option:

%windir%\explorer.exe shell:::{ED7BA470-8E54-465E-825C-99712043E01C}

Then we clicked on the “Next” button.
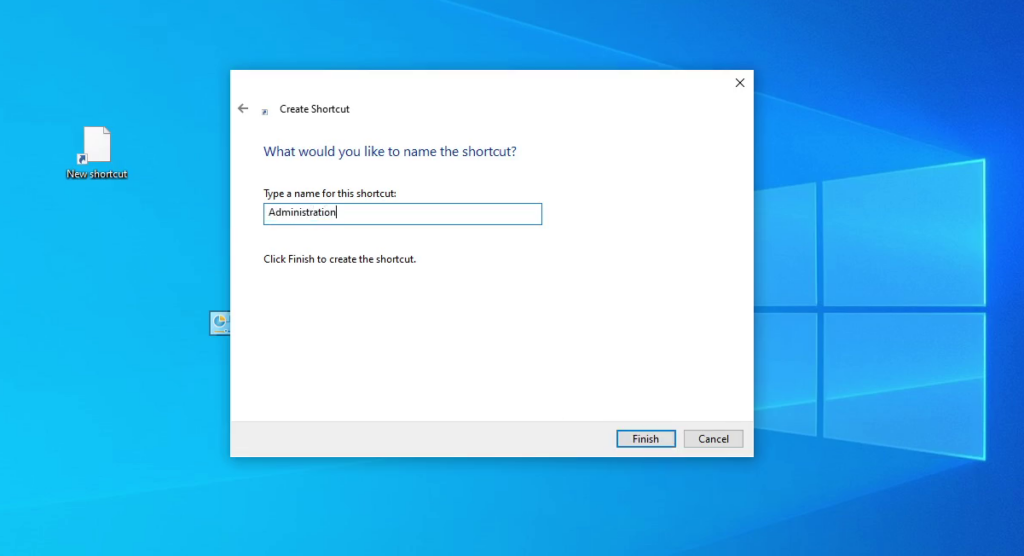
On the new page, we filled the “Type a name for this shortcut:” option with the value that we wanted to appear on the shortcut name. In our example, we used the word “Administration.”

After this, we clicked on the “Finish” button.
On the Desktop, our new shortcut appeared with the correct name. As we did not like the predefined icon, we right-clicked the shortcut and selected the “Properties” option. We clicked the “Change Icon…” button in the new window. Another window opened, we pressed the “Browse…” button and navigated to the file:

%windir%\System32\imageres.dll

After clicking the “Open” button, a new list of icons appeared from which we selected one that we liked, then clicked on the “OK” button. We clicked the “Apply” button on the remaining window, and Windows applied the icon change to our shortcut.

Additional “God Mode” codes

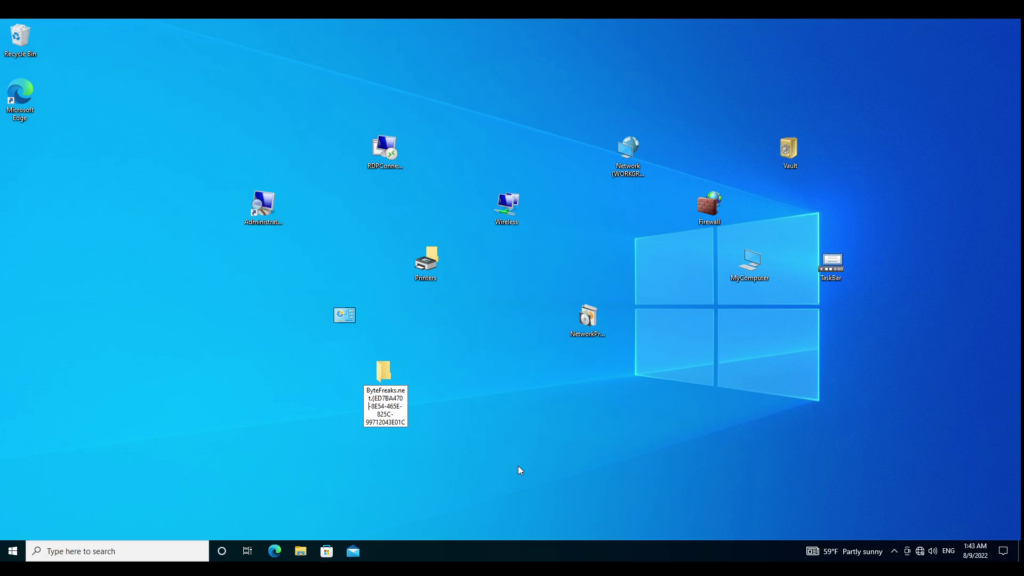
The following values allow you to create folders to specific items on your Windows PC.

Bytefreaks.net.{ED7BA470-8E54-465E-825C-99712043E01C}
TaskBarIcons.{05D7B0F4-2121-4EFF-BF6B-ED3F69B894D9}.
MyComputer.{20D04FE0-3AEA-1069-A2D8-08002B30309D}.
WinVault.{1206F5F1-0569-412C-8FEC-3204630DFB70}.
Firewall.{4026492F-2F69-46B8-B9BF-5654FC07E423}.
Network.{208D2C60-3AEA-1069-A2D7-08002B30309D}.
NetworkApplicationInstallation.{15EAE92E-F17A-4431-9F28-805E482DAFD4}.
Wireless.{1FA9085F-25A2-489B-85D4-86326EEDCD87}.
RDPConnecitions.{241D7C96-F8BF-4F85-B01F-E2B043341A4B}.
Printers.{2227A280-3AEA-1069-A2DE-08002B30309D}.

Using Sysinternals from the command line

Recently, we connected to a Windows machine using SSH and downloaded a fresh copy of the Sysinternal suite. When we tried to use PSexec from our command line shell, it would get stuck without warning. We were unaware that the Sysuinteral suite does not prompt the user to accept the EULA agreement without a graphical interface. For this reason, we did not know that we had to take some action, and we were waiting indefinitely for the modules to finish, killing the processes and restarting them.

Eventually, we realized that if we added the following key in the Windows registry, PSexec would be considered by the Sysinternal suite as a EULA agreement acceptance and thus becoming operational again.

reg ADD HKCU\Software\Sysinternals\PSexec /v EulaAccepted /t REG_DWORD /d 1 /f

psftp.exe: The server’s host key is not cached in the registry. You have no guarantee that the server is the computer you think it is.

Recently, we were debugging a scheduled job running on a Microsoft SQL Server Agent. After starting the SQL Server Management Studio, we saw that the specific task was using psftp.exe to upload some data securely to a remote server. When executing the job manually, it would work as expected. On the other hand, when the job would be executed automatically, it would always fail. After review the error logs, we got the following message:

Executed as user: FSRV\SYSTEM. …s\FTP\remote-server.ppk myuser@remote-server -batch -bc -be -b C:\putty\upload.txtThe server's host key is not cached in the registry. You  have no guarantee that the server is the computer you  think it is.  The server's rsa2 key fingerprint is:  ssh-rsa 2048 39:e4:84:b2:6f:bc:87:04:1f:21:bf:32:83:79:0b:cf  Connection abandoned.  DTSRun:  Loading…   DTSRun:  Executing…   DTSRun OnStart:  DTSStep_DTSExecuteSQLTask_1   DTSRun OnFinish:  DTSStep_DTSExecuteSQLTask_1   DTSRun OnStart:  DTSStep_DTSExecuteSQLTask_3   DTSRun OnFinish:  DTSStep_DTSExecuteSQLTask_3   DTSRun OnStart:  DTSStep_DTSActiveScriptTask_2   DTSRun OnFinish:  DTSStep_DTSActiveScriptTask_2   DTSRun OnStart:  DTSStep_DTSActiveScriptTask_3   DTSRun OnFinish:  DTSStep_DTSActiveScriptTask_3   DTSRun OnStart:  DTSStep_DTSDataPumpTask_1   DTSRun OnProgress:  DTSStep_DTSDataPumpTask_1; 34 Rows have been transformed or copied.; …  Process Exit Code 1.  The step failed.

The problem was with the account executing the scheduled job, which was different than the one that created the job. The second account, the one that was executing the scheduled jobs did not have any knowledge of the ssh-rsa key of the remote server. Because of this lack of information, psftp.exe could not verify that we were indeed trying to connect to the correct server. To fix this issue, we modified the psftp.exe execution command to match the following one:

C:\putty\psftp.exe -i C:\connections\FTP\remote-server.ppk myuser@remote-server -batch -bc -be -b C:\putty\upload.txt -hostkey 39:e4:84:b2:6f:bc:87:04:1f:21:bf:32:83:79:0b:cf

To help any reader that is not familiar with the psftp.exe and powershell (or cmd) we will breakdown the arguments of the above command:

  • C:\putty\psftp.exe : is the exact location of the psftp.exe binary on that server
  • -i C:\connections\FTP\remote-server.ppk : PPK files are PuTTY Private Key Files developed by Putty and they serve as storage for the private keys the program generated. In this case, instead of using a combination of username and password to authenticate, the client was given a private key to use as proof of identity and authenticity.
  • myuser@remote-server : The username and the domain or IP of the remote server.
  • -batch : Disables interactive prompts as no person will be supervising the script.
  • -bc : It displays batch commands in the same way they are run. It is useful for logging and troubleshooting.
  • -be : When running a batch file, this additional option causes psftp.exe to continue processing even if a command fails to complete successfully. An example you might want this to happen is the following: you want to delete a file and don’t care if it is already not present.
  • -b C:\putty\upload.txt : It specifies a file with batch commands. This argument helps users automate tasks by allowing them to set commands in advance.
  • -hostkey 39:e4:84:b2:6f:bc:87:04:1f:21:bf:32:83:79:0b:cf : Here, we copied the rsa-ssh key of the server that was displayed on the error and we explicitly defined it to let psftp.exe that it is trying to connect to the correct server. If you are not sure if the value you get at the errors is indeed the correct value, consult your system administrator.


Stop Windows 10 Updates

Recently, we were working on a Windows 10 machine on a metered connection. Even though we are not fans of blocking updates, this time we had to stop the updates as they were sucking the data package dry. To do so we executed the commands of the block below in a command prompt with administrative rights.

To start a Command Prompt (cmd) with administrative rights we pressed Windows+X that showed the Quick Access menu, from the menu we clicked on Command Prompt (Admin). After that we got prompted by User Account Control window if it was OK to allow this application to make changes, where we clicked Yes.

In the new Command Prompt window we executed the following 3 commands that kill all services immediately related with the updates

net stop wuauserv
net stop bits
net stop dosvc

Explanation

  • net stop wuauserv stops the Windows Update service.
  • net stop bits stops the Background Intelligent Transfer Service service
  • net stop dosvc stops the Delivery Optimization service

Revert action and Start Windows 10 updates

To resume (actually restart them since we stopped them) the Windows 10 updates you can either restart the machine or in a command prompt with administrative rights execute the following:

net start wuauserc
net start bits
net start dosvc