virtualbox


VirtualBox on Windows: Stuck in capture mode as the keyboard does not have a right Ctrl button 1

Recently, we got a laptop that did not have a right Ctrl button and we found out after we started a VM with no Guest Additions installed.
Because of these two factors we could not escape the VM capture mode and return to the host OS.

To resolve the issue, we pressed Alt+Ctrl+Del to force the window to escape by entering that specialised Windows security screen and the hit Cancel.
Then, we went to the VirtualBox window and did the following procedure to change the button that allows you to escape the capture mode.

From the VirtualBox Window menu we went to: File –> Preferences –> Input and then clicked on the box next to HOST KEY COMBINATION and then typed the key we wanted to use.


A couple of notes on moving a VirtualBox ‘.vdi’ disk image to a GNOME Boxes virtual machine

Recently we had a CentOS virtual machine on VirtualBox which we wanted to use in GNOME Boxes.
We copied the .vdi disk image and we used it to create a new virtual machine in Boxes.

Note A:

By doing this we realized that the system did not reuse the .vdi image.
It merely created a copy at ~/.local/share/gnome-boxes/images/ that was suitable for GNOME Boxes.
So, be sure to have enough space when doing an import like this.
You will need at least twice the space of the .vdi image to complete the migration.

Note B:

When the guest OS started the window manager crashed and it did not allow us to login.
We assumed that this issue occurred due to the VirtualBox Guest Additions that were installed on the guest OS.
As we could not login with the graphical interface, we could not verify this claim.

Fortunately, CentOS (and many other Linux distributions) allow you to switch to a console login using the key combination alt + ctrl + F3.
(There are more than one valid key combinations to do this. In some systems alt + ctrl + F4 is also valid or alt + ctrl + F1 etc).
We hoped that by trying to login via a console login, the Guest Additions would not start and the system would not crash, which luckily this was the case, and we managed to login through the console!

After we logged in, we had to remove the Guest additions. To do so we had to execute the uninstall script that was located at /opt/VBoxGuestAdditions-X.Y.Z/uninstall.sh
(X.Y.Z is the version number of the installed VirtualBox Guest Additions).

When the removal was complete, we executed sudo reboot to restart the system and unload any VirtualBox services that could be executing at the time.
Once the system completed the restart we were able to login properly from the GUI of GNOME and use our virtual machine properly.


Reclaim empty space from VirtualBox VDI disk images by shrinking

Recently, we did some cleanup in certain GNU/Linux virtual machines, where we hoped that VirtualBox would release the disk space that is not used and shrink the size of the VDI files.
Unfortunately, that did not happen even after freeing more than 100GB of space from the guest machine.

We did manage though to reclaim the empty space manually, using the zerofree and VBoxManage utilities.

Following is the guide we followed to do so:

Part 1: Clean-up the guest machine using zerofree

We needed to find the unallocated, blocks with non-zero value content in the ext2, ext3 or ext4 filesystem (e.g. /dev/sda1) and fill them with zeroes.
Since the filesystem has to be unmounted or mounted as read-only for zerofree to work, we decided to use a Live CD to complete this task as it would be the simplest solution to follow.

Step 1: Download SystemRescueCd Live Image

We downloaded the SystemRescueCd Live Image and inserted it to the guest machine as a Live CD.

Step 2: Identify partitions and disks using fdisk -l

We booted the virtual machine from the Live CD, when the terminal appeared, we typed fdisk -l to see all available disks and partitions.

Depending on your configuration you will see the following

If you performed your installation using standard partition

Disk /dev/sda: 200 GiB, 214748364800 bytes, 419430400 sectors
Units: sectors of 1 * 512 = 512 bytes
Sector size (logical/physical): 512 bytes / 512 bytes
I/O size (minimum/optimal): 512 bytes / 512 bytes
Disklabel type: dos
Disk identifier: 0x64af3527

Device     Boot     Start       End   Sectors  Size Id Type
/dev/sda1  *         2048 411043839 411041792  196G 83 Linux
/dev/sda2       411045886 419428351   8382466    4G  5 Extended
/dev/sda5       411045888 419428351   8382464    4G 82 Linux swap / Solaris

or if you performed your installation using LVM

Disk /dev/sda: 214.7 GB, 214748364800 bytes, 419430400 sectors
Units = sectors of 1 * 512 = 512 bytes
Sector size (logical/physical): 512 bytes / 512 bytes
I/O size (minimum/optimal): 512 bytes / 512 bytes
Disk label type: dos
Disk identifier: 0x000523ce

   Device Boot      Start         End      Blocks   Id  System
/dev/sda1   *        2048     1026047      512000   83  Linux
/dev/sda2         1026048   419430399   209202176   8e  Linux LVM

Disk /dev/mapper/centos-root: 53.7 GB, 53687091200 bytes, 104857600 sectors
Units = sectors of 1 * 512 = 512 bytes
Sector size (logical/physical): 512 bytes / 512 bytes
I/O size (minimum/optimal): 512 bytes / 512 bytes


Disk /dev/mapper/centos-swap: 4160 MB, 4160749568 bytes, 8126464 sectors
Units = sectors of 1 * 512 = 512 bytes
Sector size (logical/physical): 512 bytes / 512 bytes
I/O size (minimum/optimal): 512 bytes / 512 bytes


Disk /dev/mapper/centos-home: 156.3 GB, 156304932864 bytes, 305283072 sectors
Units = sectors of 1 * 512 = 512 bytes
Sector size (logical/physical): 512 bytes / 512 bytes
I/O size (minimum/optimal): 512 bytes / 512 bytes

From the above results, we keep the paths to the real partitions and the paths to the LVM partitions, e.g.
/dev/sda1 which is 196GB, /dev/mapper/centos-home and /dev/mapper/centos-root

Step 3: Perform the cleanup

To perform the clean up, execute for each of the above paths the command zerofree, e.g.

zerofree /dev/sda1;
zerofree /dev/mapper/centos-home;
zerofree /dev/mapper/centos-root;

Give it some time to complete the task, the larger the partition, the more the time it will take.

Part 2: Shrink the guest machine disk images using VBoxManage

We used VBoxManage with the parameter --compact, which it is used to compact disk images, i.e. remove blocks that only contains zeroes. It shrinks dynamically allocated images by reducing the physical size of the image without affecting the logical size of the virtual disk. Compaction works both for base images and for diff images created as part of a snapshot. For this operation to be effective, it is required that free space in the guest system first be zeroed out and that is why we had to perform Step 1 using zerofree before.
Please note that compacting is currently only available for VDI images.

To use, just issue the command "C:\Program Files\Oracle\VirtualBox\VBoxManage.exe" modifyhd --compact <DISK_PATH> pointing to the disk you just cleaned up using zerofree
Please note that the virtual machine should be stopped before starting this operation.

Press the key combination Win + R to pop up the Run prompt.
Type cmd in the input box and hit the Enter key.

"C:\Program Files\Oracle\VirtualBox\VBoxManage.exe" modifyhd --compact "F:\Ubuntu\Ubuntu.vdi"
"C:\Program Files\Oracle\VirtualBox\VBoxManage.exe" modifyhd --compact "C:\Users\bytefreaks\VirtualBox VMs\CentOS\CentOS.vdi"

VirtualBox: Failed to attach the USB device to the virtual machine 29

Recently we were using a Windows 10 64bit machine which had Oracle VirtualBox installed.
At some point all USB devices stopped mounting on the guest systems.
We would get errors similar to the following:

Failed to attach the USB device OnePlus A0001 [0232] to the virtual machine Ubuntu.

USB device 'OnePlus A0001' with UUID {544e5582-9e77-4301-a538-5326cf2250c0} is busy with a previous request. Please try again later.

Result Code: E_INVALIDARG (0x80070057)
Component: HostUSBDeviceWrap
Interface: IHostUSBDevice {c19073dd-cc7b-431b-98b2-951fda8eab89}

Callee: IConsole {872da645-4a9b-1727-bee2-5585105b9eed}

USB device  with UUID  is busy with a previous request. Please try again later.

After a couple of restarts of both the guest and the host machines we realized that this time, a restart was not enough to fix the error.
Right before this error occurred, we had installed Wireshark with USBPcap support.
Apparently this was the root of our problem.

Resolution:

Following are the steps we followed to solve this issue:

Step A: Delete problematic system configuration.

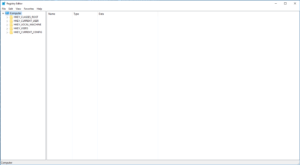
Press the key combination Win + R to pop up the Run prompt.
Type regedit in the input box and hit the Enter key.

regedit

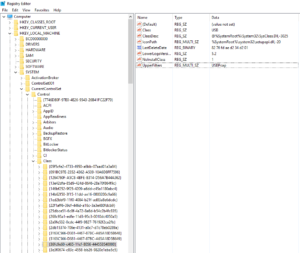
On the left side of the new window, navigate to the following location:

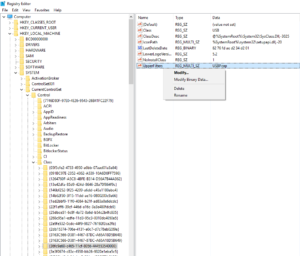
HKEY_LOCAL_MACHINE\System\CurrentControlSet\Control\Class\{36FC9E60-C465-11CF-8056-444553540000}

upperfilters

In the right part, select the UpperFilters entry, right click it and select Delete.

delete-upperfilters
When a prompt window appear asks you to confirm that you want to delete the value, click Yes.

confirm-delete-upperfilters

Step B: Manually re-install VirtualBox USB drivers (Optional)

Just in case there is an issue with the VirtualBox USB drivers, you can re-install them to be sure everything is OK.
To do that, you can either re-install the whole VirtualBox using their installer or manually re-install the driver itself.

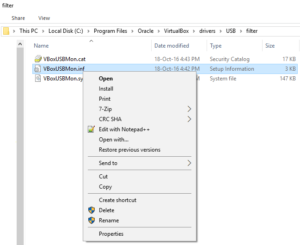
To re-install the VirtualBox USB driver manually, using Windows Explore navigate to this folder

C:\Program Files\Oracle\VirtualBox\drivers\USB\filter

Right click the file VBoxUSBMon.inf and select Install.

install-virtualbox-usb-driver
You will get a confirmation once the installation is complete.
Restart your machine, so that new changes will get applied.
Your USB devices should work as expected.