Qubes-OS 3.2: Setup Windows 7 64bit 1
Based on the following resources, we were able to create a Windows 7 64bit virtual machine on our Qubes OS 3.2 installation.
- Creating and using HVM (fully virtualized) domains
- Installing and using Windows-based AppVMs
- Cannot install Windows 7 HVM unless “cirrus” driver is used #2488
The following steps are to be executed in the dom0 terminal emulator, unless explicitly mentioned otherwise.
1. Create the empty Windows VM
qvm-create win7 --hvm --label purple;
2. Start the Windows VM using the Windows ISO
qvm-start win7 --cdrom=/home/bytefreaks/ISOs/W7.iso;
If it proceeds as normal, no worries.
Start the Windows VM (qvm-start win7) as many times as needed to finish the setup and skip to step 5.
If it gets stuck at the glowing Windows Logo:
- kill the Windows VM from the
dom0terminal emulator and - then follow
step 3.
qvm-kill win7;
3. Copy the configuration file to a temporary location that you can edit
cp /var/lib/qubes/appvms/win7/win7.conf /tmp/;
Modify the configuration file to change the model type of the video card from xen to cirrus
Original part of win7.conf
<video type='vga'>
  <model type='xen' vram='16384'/>
</video>
Modified part of win7.conf
<video type='vga'>
  <model type='cirrus' vram='16384'/>
</video>
4. Start the Windows VM using the custom configuration file as many times as needed to finish the installation
qvm-start win7 --custom-config=/tmp/win7.conf;

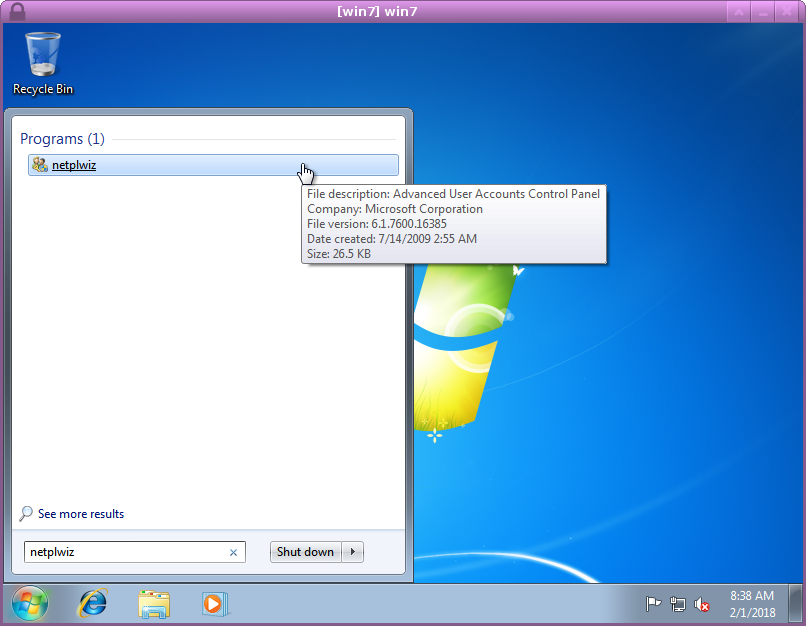
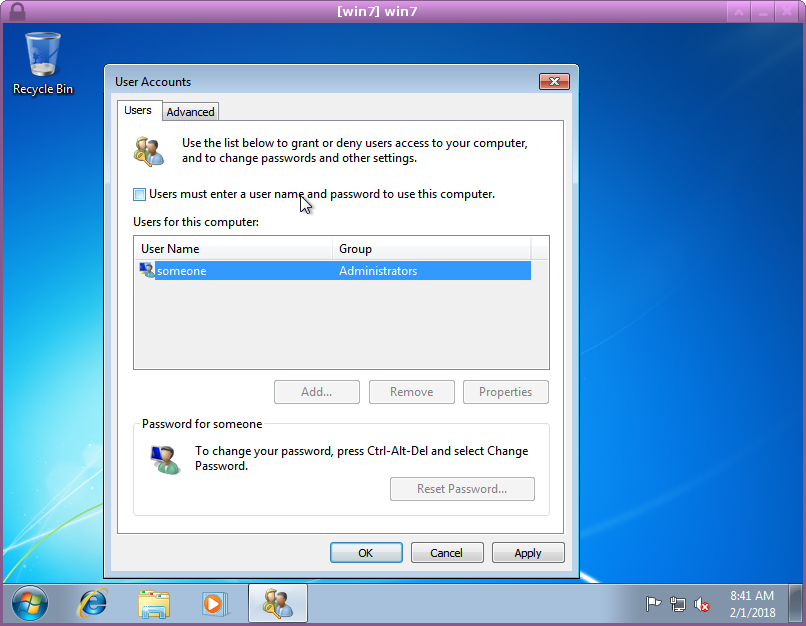
5. Enable auto-login on Windows using the netplwiz
At the Windows 7 start menu, type netplwiz, it will pop-up a configuration window from which we need to disable the option Users must enter a user name and password to use this computer. and click the OK button to apply the change (it may request for your password to verify the action).
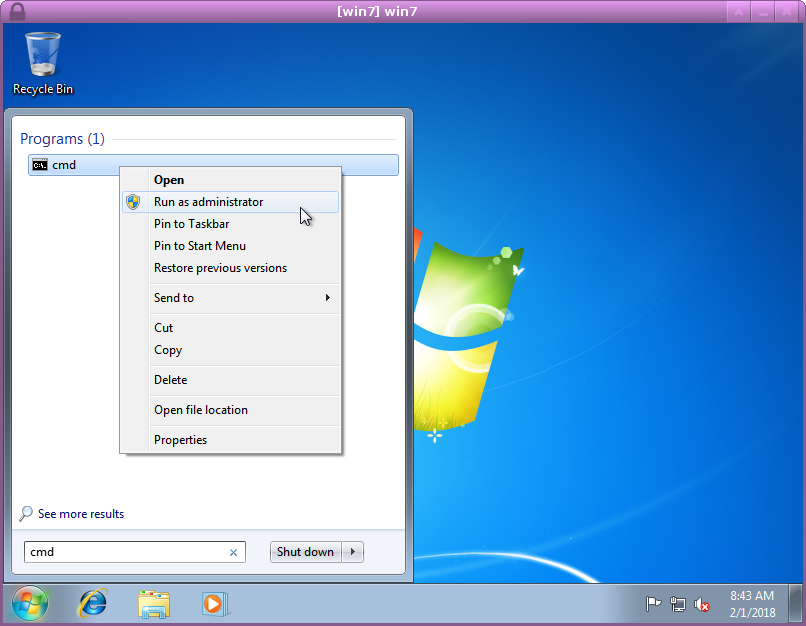
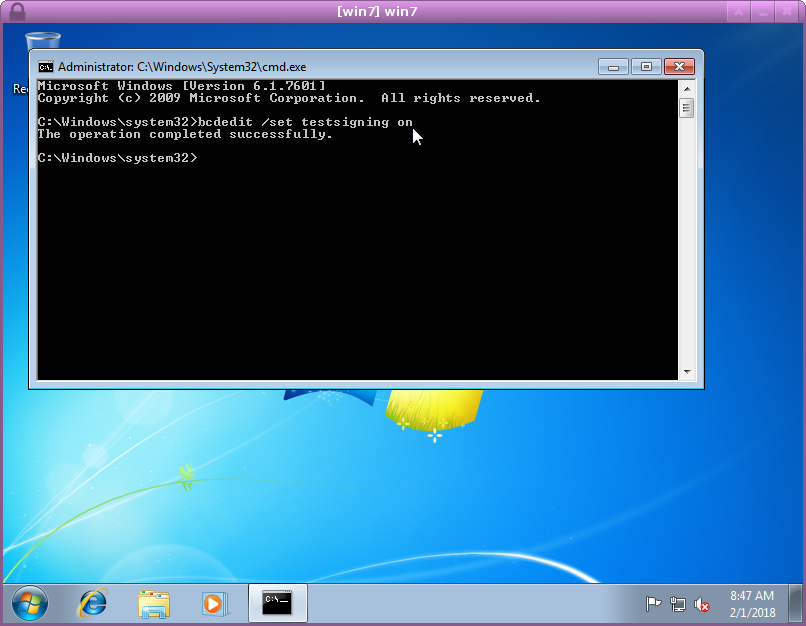
6. Disable driver signing using bcdedit /set testsigning on
Then, we need to disable driver signing as the Windows Tools Drivers are not digitally signed but we still need to install them.
To do so, we need to start a command prompt (cmd) as an administrator as seen in the images below and execute the command bcdedit /set testsigning on

7. Shut down the Windows VM and start it again using the Install Windows Tools directive
sudo qubes-dom0-update --enablerepo=qubes-dom0-current-testing qubes-windows-tools;
qvm-start win7 --install-windows-tools;
If it starts normally go to step 8, if it gets stuck again then
- kill the Windows VM and
- repeat
step 3andstep 4beforestep 8.
qvm-kill win7;
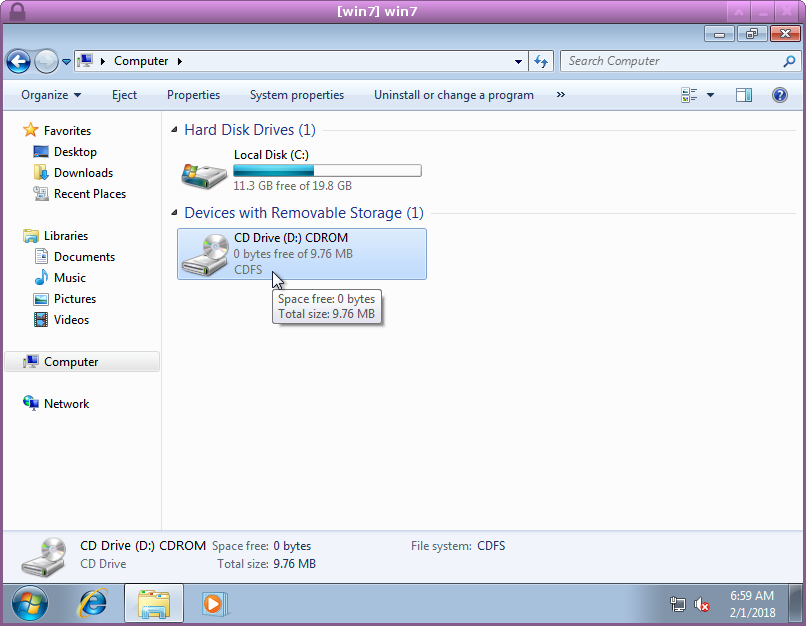
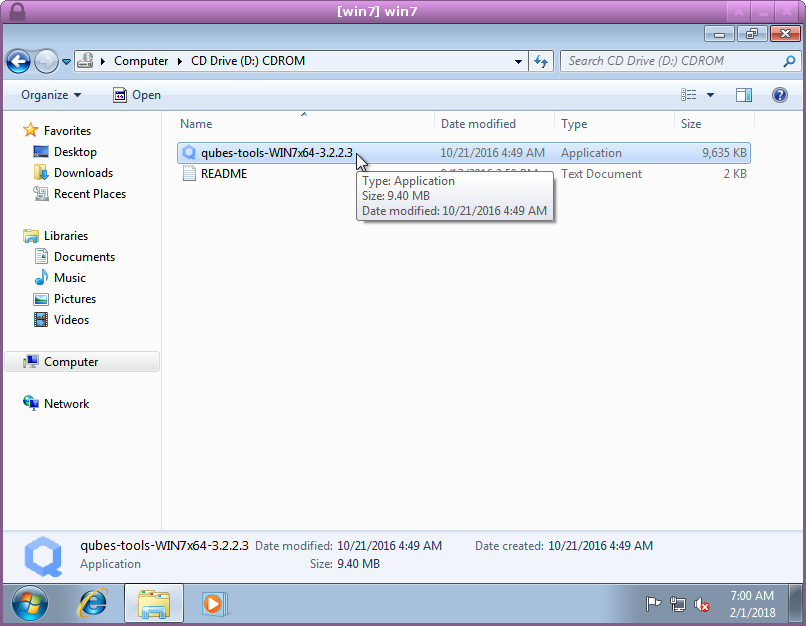
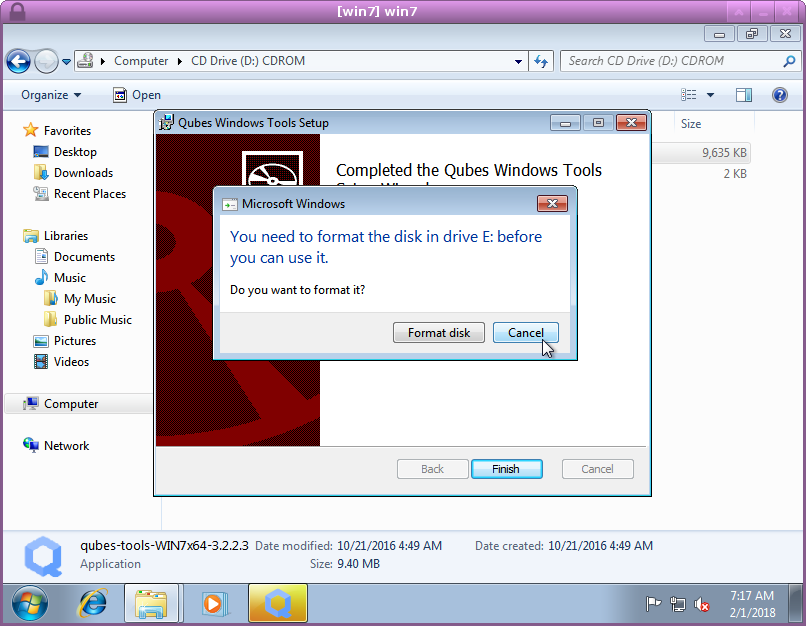
8. In My Computer you will see fake CD-ROM drive, install the application found in the image.
When you get prompted to restart by Xen PV Network, ignore it!
Also, when prompted to format the disk in drive E:, press cancel.
Finish the whole installation of all tools before restarting the Windows VM (it could create serious problems including crashing your VM completely on restart).
Once the setup is complete, shut down the Windows VM.

9. Increase the execution timeout for the Windows VM
qvm-prefs -s win7 qrexec_timeout 300;
As soon as the Windows VM starts for the first time after Windows Tools were installed, it will perform some time consuming actions like moving the user profiles to a different drive. We need to execute the above to give enough time to the system to complete its tasks.