mount


How to Reset Password on an Ubuntu with LVM

A few days ago, a client tasked us to recover the password of an Ubuntu server 20.04LTS. The machine owner only knew the username but had no idea about the complexity of the password. We’ve asked the client if it was OK for us to reset the password instead of recovering it (meaning that we would not even try to crack the mystery of what the previous password was and just set a new one), and thankfully, the client accepted our request.

The client set up the server using Ubuntu server edition 20.04LTS, and the disk partitions were using LVM (Logical Volume Manager). To our good luck, they were not using encrypted partitions. The procedure we followed to reset the password of that server was like so:

First of all, we shut down the server and booted it with a Live USB of an Ubuntu desktop 20.04LTS. Then we started a terminal and executed the following to get root access on the live system:

sudo su;

Then, we executed pvscan to list all physical volumes and gain some intelligence on which disk we needed to work on:

pvscan;
root@ubuntu:/home/ubuntu# pvscan
  /dev/sdc: open failed: No medium found
  PV /dev/sda3   VG ubuntu-vg       lvm2 [<3.64 TiB / 3.44 TiB free]
  Total: 1 [<3.64 TiB] / in use: 1 [<3.64 TiB] / in no VG: 0 [0   ]

Following that, we used vgscan to search for all volume groups:

vgscan;
root@ubuntu:/home/ubuntu# vgscan
  /dev/sdc: open failed: No medium found
  Found volume group "ubuntu-vg" using metadata type lvm2

From these two commands, it was clear that the disk /dev/sda3 contained an LVM partition with the logical volume group name ubuntu-vg. That logical volume group held the server’s filesystem, and it was the place we needed to access to change the user’s password.

So, we used vgchange to change the attributes of the volume group and activate it like so:

vgchange -a y;
root@ubuntu:/home/ubuntu# vgchange -a y
  /dev/sdc: open failed: No medium found
  /dev/sdc: open failed: No medium found
  1 logical volume(s) in volume group "ubuntu-vg" now active

Using lvscan, we were able to list all logical volumes in all volume groups and verify that we activated the volume group of interest successfully.

lvscan;
root@ubuntu:/home/ubuntu# lvscan
  /dev/sdc: open failed: No medium found
  ACTIVE            '/dev/ubuntu-vg/ubuntu-lv' [200.00 GiB] inherit

After these steps, we were ready to reset the password of the user finally. We continued to mount the logical volume group like any other disk on the /mnt folder:

mount /dev/ubuntu-vg/ubuntu-lv /mnt/;

Then, we used chroot to change the apparent root directory for the currently running process (and its children). This command allowed our terminal to work inside the logical volume as if we had booted the server OS itself.

chroot /mnt/;

Finally, using the passwd command, we changed the user password as so:

passwd -S bob;

To clean up, we exited the chroot environment:

exit;

Then, we unmounted the logical volume group:

umount /mnt;

And finally, we set the active flag of the volume group to no.

vgchange -a n;

After the above steps, we had safely applied all changes, so we rebooted the machine using its hard drive.

Ubuntu 18.04: Cannot mount Micro SD DC I Class 10

Recently we tried to mount a Micro SD card that was formatted using the exFat format. To do so we used the build in card reader of a laptop that was running Ubuntu 18.04. To our disappointment, the OS was able to “see” the device as ‘/dev/mmcblk0’ but it could not automatically mount it.

First step we did was of course to update the system using:

sudo apt update;

and then we made sure we had all the necessary packages installed:

sudo apt-get install exfat-fuse exfat-utils;

Unfortunately, we still could not automatically mount the device. So we decided to try and mount it manually which also failed:

sudo mount -t exfat /dev/mmcblk0 /mnt/vmfs;
FUSE exfat 1.2.8
ERROR: failed to read boot sector.

As we were not sure what was wrong we decided to do an experiment which turned out to be our solution: to use an external card reader and try again.. guess what? It worked!!

We will investigate further the issue with the build in card reader but for now we are able to work around the issue with the external card reader.


GNU/Linux: How to give access to a subfolder to a user where the user does not have execute permission over the parent folder

On GNU/Linux, you can traverse a directory if and only if you have execute permission on the whole path that you are going to use to access it. This rule applies a limitation to scenarios where for some reason you want to give execute access to a certain user on a subfolder but you do not want to enable the execute permission on the all the folders in the path.

In order to access the folder theFolder in the path /folderA/folderB/theFolder, if you are on the same level as folderA (or higher) you need to have execute permission both on folderA and folderA/folderB additionally to the permissions needed on theFolder. On another scenario if you are located in the same level as folderB (and you have execute rights to it) even if you do not have the execute rights to folder folderA you would still be able to access theFolder as your whole path (which is a relative path in this scenario) skips folderA. This feature is due to the fact that in GNU/Linux that the path that you use to access a folder determines your access constraints. In cases where the user does not have execute access to the whole path, creating symbolic links for them will not help you give them access. The kernel will still go through the access rights of the whole path that the symlink describes and it will act accordingly.

A hack-ish solution around this issue is to use mount to remount a part of the file hierarchy somewhere else using the bind parameter. For example: if we needed to give access to a user to the folder theFolder that resides in /folderA/folderB/theFolder without enabling execute rights on folderA nor /folderA/folderB we could execute the following command in a folder where that user already has execute access in (for example in the user’s home folder).


sudo mount --bind /folderA/folderB/theFolder finallyTheFolder;

Notes:

  • This solution circumvents security, be sure to think things through before implementing it
  • This solution ‘escapes’ normal good practices so it could lead to software bugs on your behalf
  • The bind will not persist after a reboot
  • To make this change permanent, you will need to add a configuration line in /etc/fstab
  • If the directory that you wish to bind contains mounted file systems, these file systems will not be transferred to the target. The mount points will appear as empty directories.

Android Studio – No space left on device 10

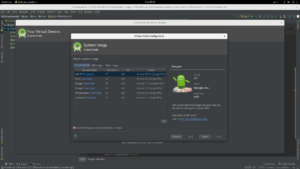
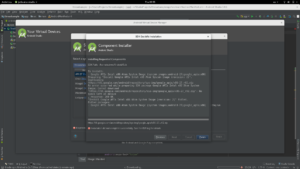
Recently we tried to install some packages from the Android SDK through Android Studio 3.0.1 and we got the error that the PC ran out of space while downloading the necessary packages and could not perform the operation.

Full Error Log:

To install:
- Google APIs Intel x86 Atom System Image (system-images;android-27;google_apis;x86)
Preparing "Install Google APIs Intel x86 Atom System Image (revision: 2)".
Downloading https://dl.google.com/android/repository/sys-img/google_apis/x86-27_r02.zip
An error occurred while preparing SDK package Google APIs Intel x86 Atom System Image: Cannot download 'https://dl.google.com/android/repository/sys-img/google_apis/x86-27_r02.zip': No space left on device
, response: 200 OK.
"Install Google APIs Intel x86 Atom System Image (revision: 2)" failed.
Failed packages:
- Google APIs Intel x86 Atom System Image (system-images;android-27;google_apis;x86)

Although the disk had a lot of free space, we got this error because the /tmp partition on our GNU/Linux Fedora 27 workstation was too small (~4GB).

$ df -h;
Filesystem Size Used Avail Use% Mounted on
devtmpfs 3.9G 0 3.9G 0% /dev
tmpfs 3.9G 107M 3.8G 3% /dev/shm
tmpfs 3.9G 1.9M 3.9G 1% /run
tmpfs 3.9G 0 3.9G 0% /sys/fs/cgroup
/dev/mapper/fedora-root 50G 35G 12G 75% /
tmpfs 3.9G 2.1M 3.9G 1% /tmp
/dev/sdb1 477M 179M 269M 41% /boot
/dev/mapper/fedora-home 178G 37G 132G 22% /home
tmpfs 794M 16K 794M 1% /run/user/42
tmpfs 794M 9.2M 785M 2% /run/user/1000

/tmp was not explicitly set so it was automatically configured to have half of the size of the RAM.
We didn’t not want to change the download path for the Java environment (and hence Android Studio and Android SDK tools) as after leaving the tmpfs folder it could mean that we would have to manually maintain the new path and clean it up. So we ended up in temporarily increasing the size of /tmp partition which did the trick and the virtual device was installed successfully.

Solution – temporarily increase the size of the /tmp partition:

The command we used to increase the size of the /tmp partition on Fedora 27 was the following:


sudo mount -o remount,size=8G,noatime /tmp;

After executing we, it we immediately saw that the results were applied without the need for a restart or any other operation and we could proceed to use the PC as normal.

$ df -h
Filesystem Size Used Avail Use% Mounted on
devtmpfs 3.9G 0 3.9G 0% /dev
tmpfs 3.9G 89M 3.8G 3% /dev/shm
tmpfs 3.9G 1.9M 3.9G 1% /run
tmpfs 3.9G 0 3.9G 0% /sys/fs/cgroup
/dev/mapper/fedora-root 50G 35G 12G 75% /
tmpfs 8.0G 2.0M 8.0G 1% /tmp
/dev/sdb1 477M 179M 269M 41% /boot
/dev/mapper/fedora-home 178G 37G 132G 22% /home
tmpfs 794M 16K 794M 1% /run/user/42
tmpfs 794M 6.9M 787M 1% /run/user/1000

The information for tmpfs we got it from: https://wiki.archlinux.org/index.php/Tmpfs

Full Correct Execution Log:

To install:
- Google APIs Intel x86 Atom System Image (system-images;android-27;google_apis;x86)
Preparing "Install Google APIs Intel x86 Atom System Image (revision: 2)".
Downloading https://dl.google.com/android/repository/sys-img/google_apis/x86-27_r02.zip
"Install Google APIs Intel x86 Atom System Image (revision: 2)" ready.
Installing Google APIs Intel x86 Atom System Image in /home/xeirwn/Android/Sdk/system-images/android-27/google_apis/x86
"Install Google APIs Intel x86 Atom System Image (revision: 2)" complete.
"Install Google APIs Intel x86 Atom System Image (revision: 2)" finished.