Monthly Archives: June 2017


NTFS Support on CentOS 7 1

Solution


sudo yum --enablerepo=extras install epel-release;
sudo yum install ntfs-3g -y;

Background – Explanation of commands

By default, CentOS does not have installed the necessary drivers to mount ntfs drives.

sudo yum --enablerepo=extras install epel-release;

To install them, you need to enable the Extra Packages for Enterprise Linux (EPEL).

Extra Packages for Enterprise Linux (or EPEL) is a Fedora Special Interest Group that creates, maintains, and manages a high quality set of additional packages for Enterprise Linux, including, but not limited to, Red Hat Enterprise Linux (RHEL), CentOS and Scientific Linux (SL), Oracle Linux (OL).

EPEL packages are usually based on their Fedora counterparts and will never conflict with or replace packages in the base Enterprise Linux distributions. EPEL uses much of the same infrastructure as Fedora, including buildsystem, bugzilla instance, updates manager, mirror manager and more.

From: https://fedoraproject.org/wiki/EPEL

You can install EPEL by running yum --enablerepo=extras install epel-release. The epel-release package is included in the CentOS Extras repository that is enabled by default. The package includes gpg keys for package signing and repository information. Installing this package for your Enterprise Linux version should allow you to use normal tools such as yum to install packages and their dependencies.

sudo yum install ntfs-3g -y;

After you’ve enabled the repository, you should be able to install the Linux NTFS userspace driver packaged in ntfs-3g. ntfs-3g is a stable, open source, GPL licensed, POSIX, read/write NTFS driver for Linux and many other operating systems. It provides safe handling of the Windows XP, Windows Server 2003, Windows 2000, Windows Vista, Windows Server 2008 and Windows 7 NTFS file systems. NTFS-3G can create, remove, rename, move files, directories, hard links, and streams; it can read and write normal and transparently compressed files, including streams and sparse files; it can handle special files like symbolic links, devices, and FIFOs, ACL, extended attributes; moreover it provides full file access right and ownership support.

To install it, we used the following command: yum install ntfs-3g -y.


C/C++: Change position of bytes 1 and 2 with bytes 3 and 4 in a 32bit unsigned integer

The following function will produce a new 32bit value where bytes 1 and 2 were moved in place of bytes 3 and 4 and vice versa.

[download id=”3642″]

#include <stdio.h>
#include <stdlib.h>

const unsigned int move_bytes_1_2_after_4 (const unsigned int input) {
  //We get the two leftmost bytes and move them to the positions of the two rightmost bytes.
  const unsigned int first_two_bytes = (input >> 16) & 0x0000FFFF;
  //We get the two rightmost bytes and move them to the positions of the two leftmost bytes.
  const unsigned int last_two_bytes = (input << 16) & 0xFFFF0000;
  //We combine the two temporary values together to produce the new 32bit value where bytes 1 and 2 were moved in place of bytes 3 and 4 and vice versa.
  return (first_two_bytes | last_two_bytes);
}

int main(void) {
  const unsigned int value = 0xABCD0123;
  printf ("Original: 0x%08x\n", value);
  const unsigned int modified = move_bytes_1_2_after_4(value);
  printf ("Modified: 0x%08x\n", modified);
  return EXIT_SUCCESS;
}

Executing the above code will produce the following output:

Original: 0xabcd0123
Modified: 0x0123abcd

[download id=”3642″]


Facebook gives hints about what a picture contains on the ‘alt’ field

Just a fun fact:

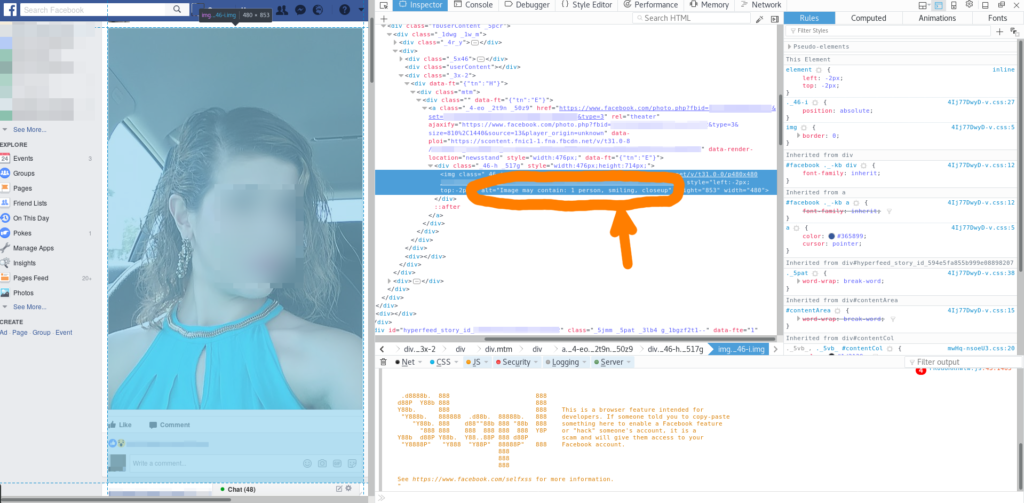
Facebook posts some of the information that it automatically derives from user pictures in the alt field of the pictures.
Below we post two samples from a stream that demonstrating this feature:

In the first one we can read in the alt the following Image may contain: 1 person, smiling, closeup.

In the second one we can read in the alt the following Image may contain: 1 person, sitting, pool, sky and outdoor.

We can see that in both cases the information is pretty much valid.


Making an animated torus in gnuplot and gimp

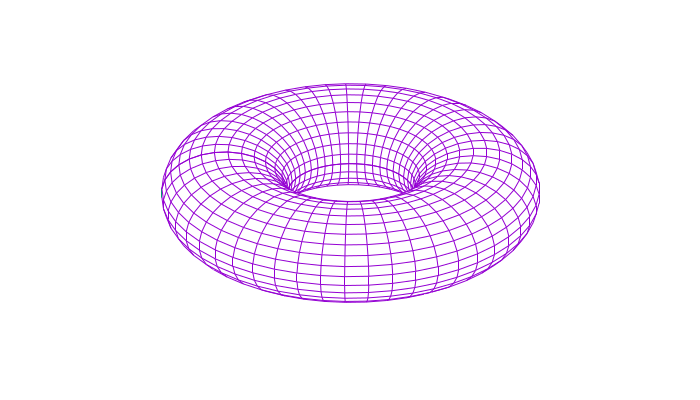
The gnuplot code in this article, creates several frames of a 3D torus with a visible structural grid from different viewing angles, like the one in the image below.

[download id=”3549″]

In geometry, a torus (plural tori) is a surface of revolution generated by revolving a circle in three-dimensional space about an axis coplanar with the circle. If the axis of revolution does not touch the circle, the surface has a ring shape and is called a torus of revolution.

From Wikipedia https://en.wikipedia.org/wiki/Torus

By modifying the circles and rings variables in the script you can increase and decrease the number of circles and rings that appear on your torus.
The above image was generated using 60 circles and 30 rings.

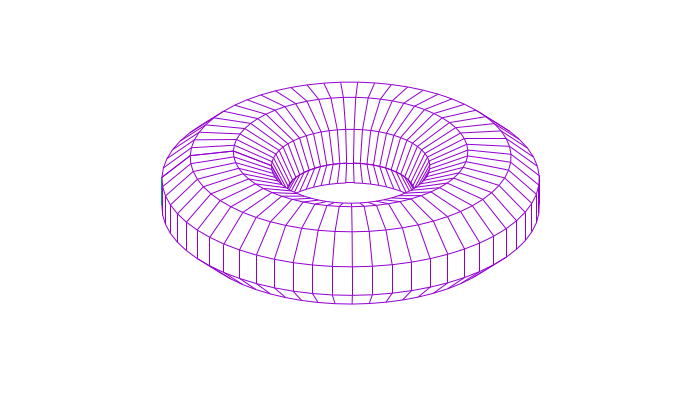
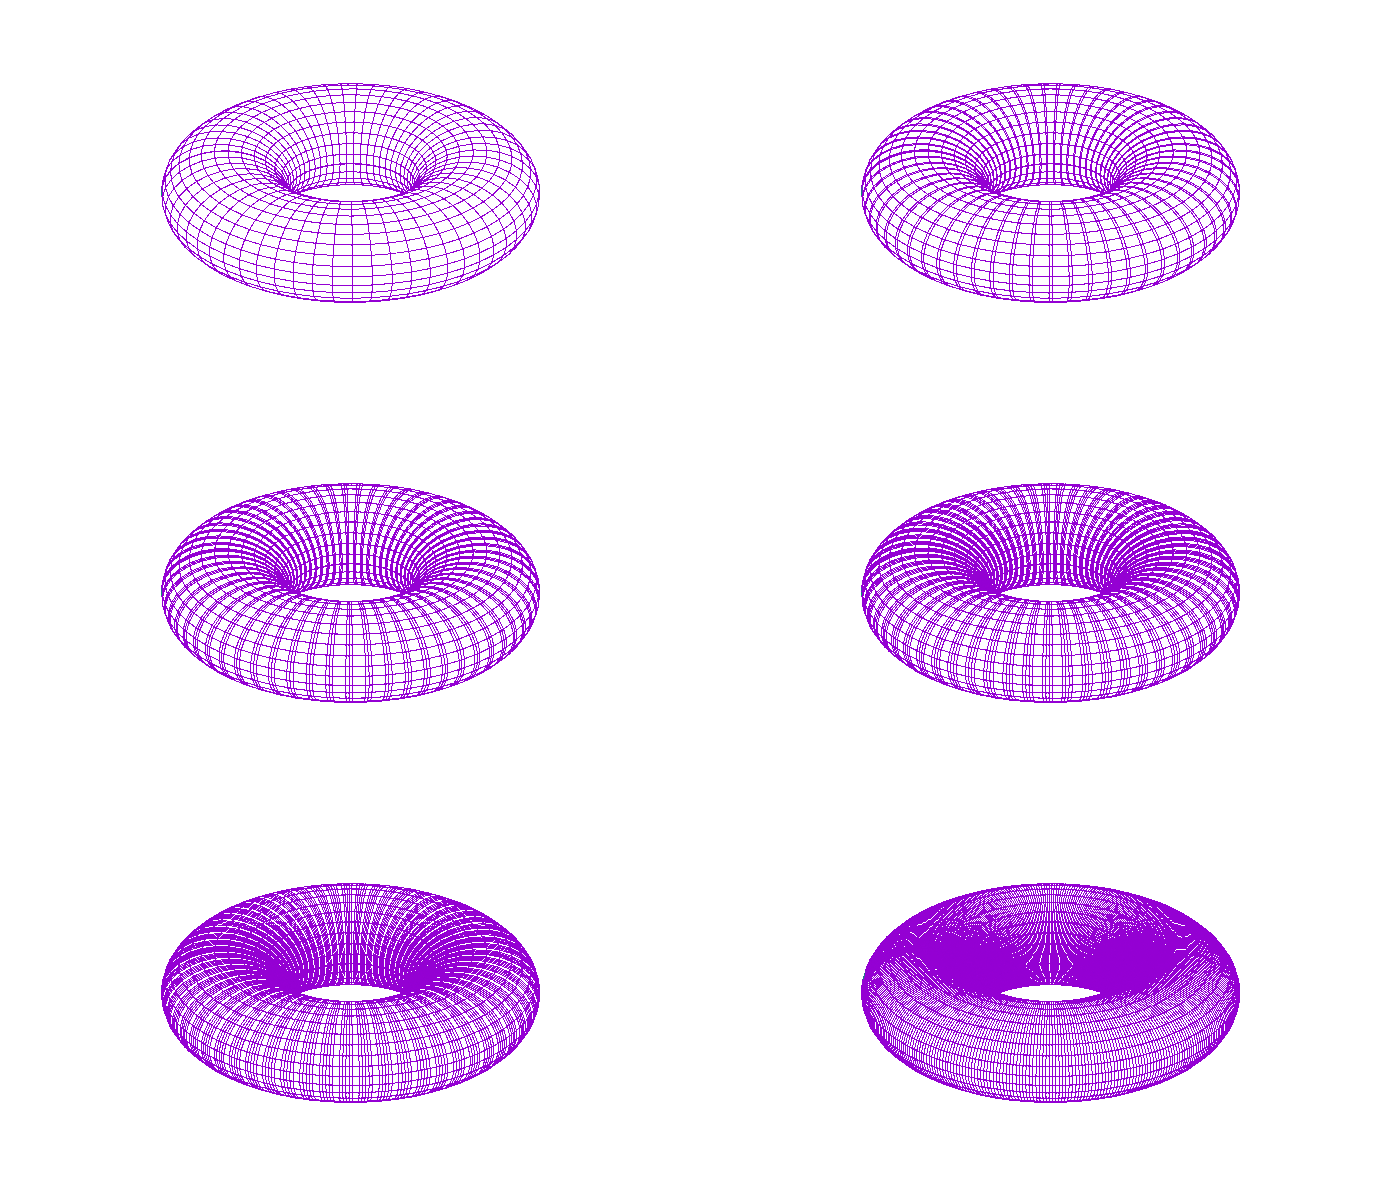
To better explain what a circle and what a ring is, please have a look at the following two examples.

The following torus has 10 circles and 30 rings.

The next one has 60 circles and 10 rings.

The last torus has 10 circles and 10 rings.

Using the script, you can also play around with the set view command and the for loop to change the number of frames that will be produced and what movement should the camera perform before printing.

[download id=”3549″]

set terminal pngcairo transparent enhanced font "arial,10" fontscale 1.0 size 700, 400

unset key
unset border
unset tics

set dummy u, v

circles=60
rings=30

set parametric
set isosamples circles, rings
set hidden3d back offset 1 trianglepattern 3 undefined 1 altdiagonal bentover
set urange [ -pi : pi ] noreverse nowriteback
set vrange [ -pi : pi ] noreverse nowriteback

do for [i=1:360/circles] {
 set view 25, i, 1, 1
 set output sprintf('game-of-life-torus.%03.0f.png', i)
 splot cos(u)+.5*cos(u)*cos(v),sin(u)+.5*sin(u)*cos(v),.5*sin(v) with lines
}

[download id=”3549″]

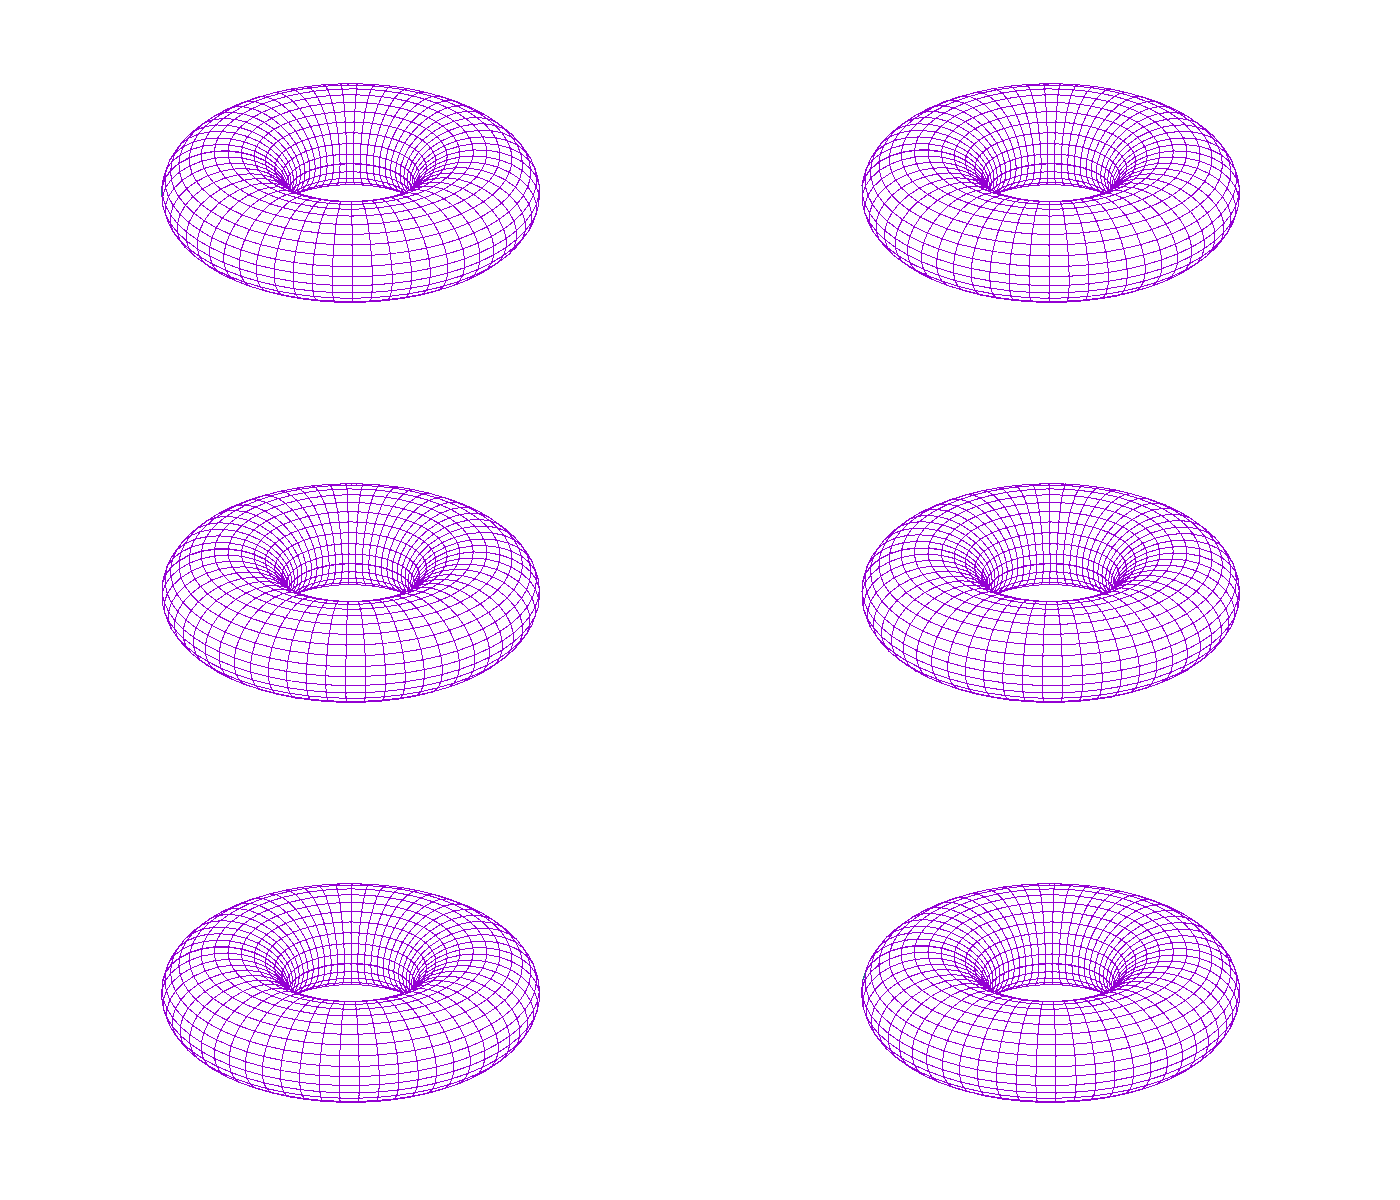
Below, you can see two examples of animation we build together using the gimp application.

Showing one frame at a time.

Accumulating all frames into one, until the loop is reset.

To create the animation we followed the next steps:

  1. Executed gnuplot torus.gnuplot to generated the frames.
  2. Then we started the gimp and from the menu File we chose the option Open as layers... (Ctrl + Alt + o).
  3. We selected all the images we wanted for our animation and pressed the Open button.
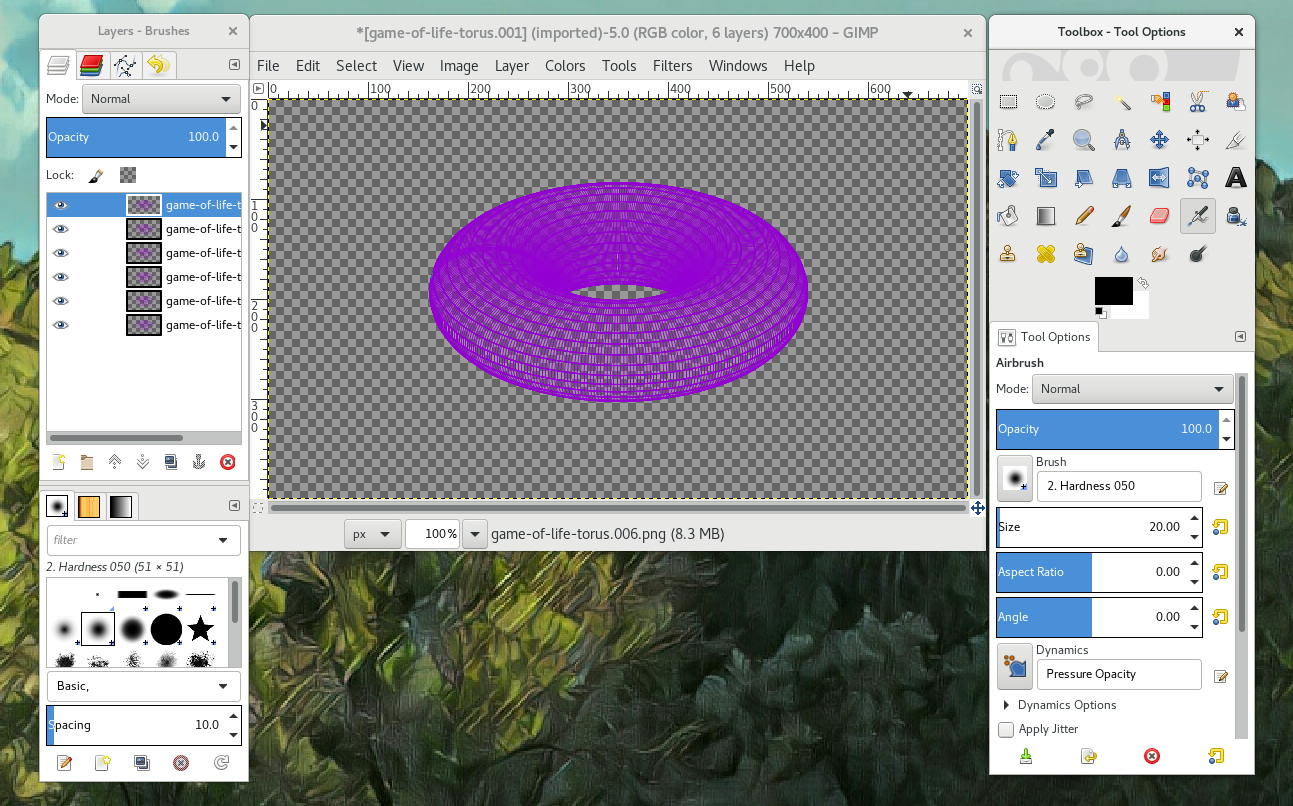
  4. The Layers - Brushes window got populated by the new frames. Please note that window you can use that to change the order of the frames (which are now the layers).
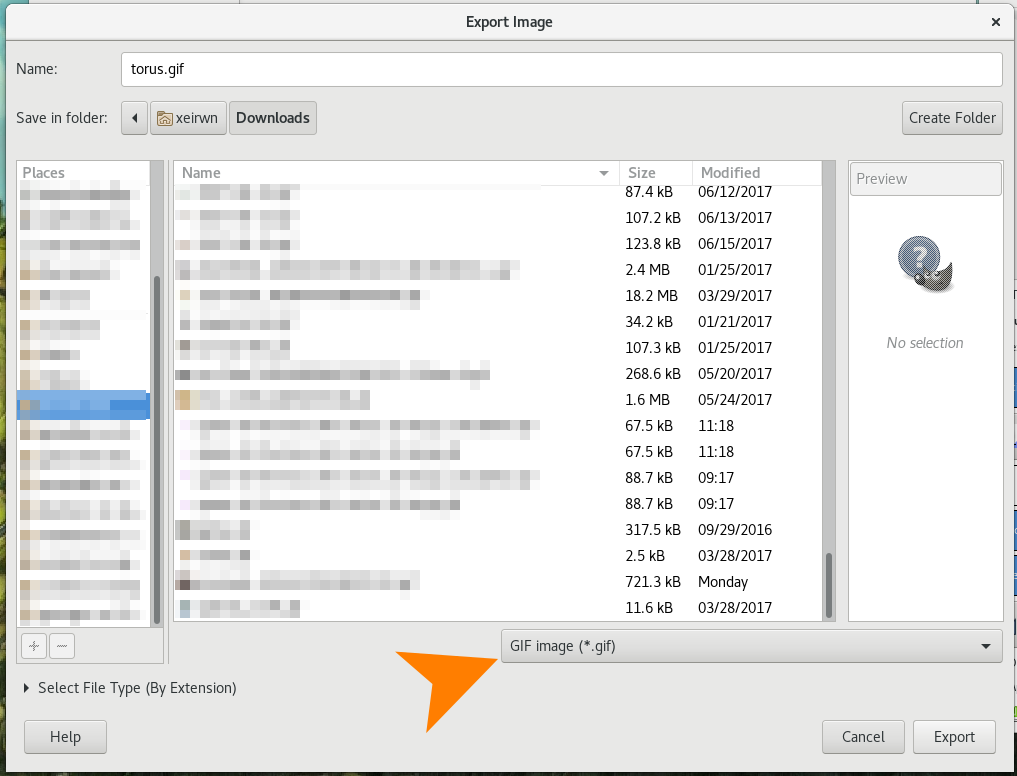
  5. Following, from the menu File we chose the option Export As... (Shift + Ctrl + E), from the pop-up window we selected the type of the file to be gif and pressed the Export button.
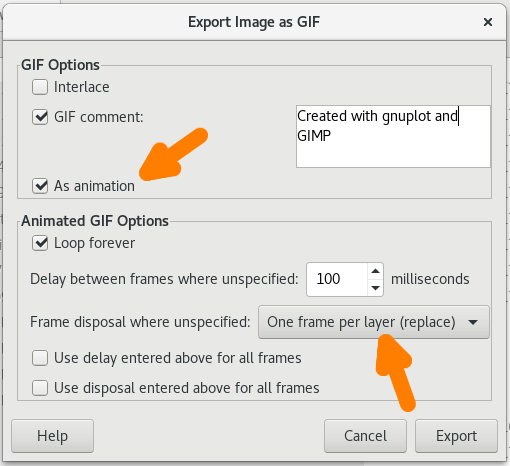
  6. At the final pop-up window, we enabled the As animation checkbox, then at the Frame disposal where unspecified dropdown menu we chose One frame per layer (replace) and hit the Export button which produce the first animation in this article (two images up).

This figure shows the ‘Layers – Brushes’ window that got populated by the new frames.

From the menu File we chose the option Export As… (Shift + Ctrl + E), from the pop-up window we selected the type of the file to be ‘gif’ and pressed the Export button.

At the final pop-up window, we enabled the As animation checkbox, then at the Frame disposal where unspecified dropdown menu we chose One frame per layer (replace) and hit the Export button which produce the first animation in this article (two images up).