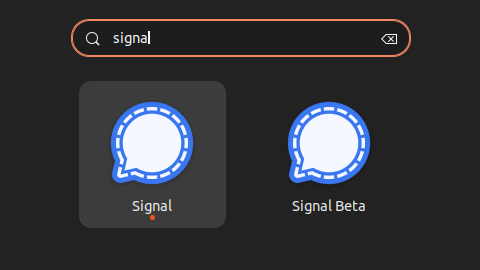
How to Run Three Instances of Signal on Ubuntu
Signal is a popular, privacy-focused messaging app. For various reasons, you might want to run multiple instances of Signal on your Ubuntu system. Here, we’ll guide you through the process of installing three different versions of Signal: the Snap package, the standard Debian-based installation, and the Signal Beta for Linux.
Prerequisites
- Ubuntu OS (We recommend a recent version, like 20.04 or later)
- Basic understanding of Linux terminal commands
1. Installing Signal from Snap
Snap is a package management system that makes it easy to install applications in Linux. Follow these steps to install Signal using Snap:
- Open Terminal: Use
Ctrl+Alt+Tto open the terminal. - Install Signal: Enter the command:
sudo snap install signal-desktop. - Launch Signal: You can find Signal in your applications menu or launch it from the terminal with
signal-desktop.
2. Installing Signal Using Linux (Debian-based) Install Instructions
For the second instance, we will use the Debian-based installation method (https://signal.org/download/):
- Add Signal’s Official Repository:
- Open Terminal.
- Enter:
wget -O- https://updates.signal.org/desktop/apt/keys.asc | gpg --dearmor > signal-desktop-keyring.gpg;
cat signal-desktop-keyring.gpg | sudo tee /usr/share/keyrings/signal-desktop-keyring.gpg > /dev/null; - Add the repository:
echo 'deb [arch=amd64 signed-by=/usr/share/keyrings/signal-desktop-keyring.gpg] https://updates.signal.org/desktop/apt xenial main' | sudo tee /etc/apt/sources.list.d/signal-xenial.list;
- Update and Install Signal:
- Update package database:
sudo apt update. - Install Signal:
sudo apt install signal-desktop.
- Update package database:
- Launch the Application: Find Signal in your application menu or type
signal-desktopin the terminal.

3. Installing Signal Beta for Linux (Debian-based)
Finally, let’s install the Beta version (https://support.signal.org/hc/en-us/articles/360007318471-Signal-Beta):
- Add Signal Beta Repository:
- Open Terminal.
- Enter:
wget -O- https://updates.signal.org/desktop/apt/keys.asc | gpg --dearmor > signal-desktop-keyring.gpg;
cat signal-desktop-keyring.gpg | sudo tee -a /usr/share/keyrings/signal-desktop-keyring.gpg > /dev/null; - Add the Beta repository:
echo 'deb [arch=amd64 signed-by=/usr/share/keyrings/signal-desktop-keyring.gpg] https://updates.signal.org/desktop/apt xenial main' | sudo tee -a /etc/apt/sources.list.d/signal-xenial.list
- Update and Install Signal Beta:
- Update the system:
sudo apt update. - Install Signal Beta:
sudo apt install signal-desktop-beta.
- Update the system:
- Launch Signal Beta: It should appear in your applications menu or can be started from the terminal with
signal-desktop-beta.
Tips for Managing Multiple Instances
- Different Profiles: Each instance of Signal will require a different phone number for registration.
- System Resources: Running multiple instances can consume more system resources. Monitor your system’s performance.
- Updates: Regularly check for updates to each version to ensure security and functionality.
Conclusion
With these steps, you should now have three different versions of Signal running on your Ubuntu system. This setup is ideal for separating personal, work, and testing environments within the same machine. Enjoy your enhanced and versatile messaging experience!