python


Revisiting neural-style-tf in 2021

We decided to revisit this post (https://bytefreaks.net/applications/neural-style-tf-another-open-source-alternative-to-prisma-for-advanced-users) in 2021 and provide the installation manual for Ubuntu 20.04LTS.

Setup

Conda / Anaconda

First of all, we installed and activated anaconda on an Ubuntu 20.04LTS desktop. To do so, we installed the following dependencies from the repositories:

sudo apt-get install libgl1-mesa-glx libegl1-mesa libxrandr2 libxrandr2 libxss1 libxcursor1 libxcomposite1 libasound2 libxi6 libxtst6;

Then, we downloaded the 64-Bit (x86) Installer from (https://www.anaconda.com/products/individual#linux).

Using a terminal, we followed the instructions here (https://docs.anaconda.com/anaconda/install/linux/) and performed the installation.

Python environment and OpenCV for Python

Following the previous step, we used the commands below to create a virtual environment for our code. We needed python version 3.7 (even though anaconda highlights version 3.9 here https://www.anaconda.com/products/individual#linux) and OpenCV for python.

source ~/anaconda3/bin/activate;
# We need python 3.7 at max to support TensorFlow version 1
conda create --yes --name Style python=3.7;
conda activate Style;
# Version 1 of TensorFlow is needed for the project that we will clone, version 1.15 is the latest and greatest version of TensorFlow 1.
pip install tensorflow==1.15 tensorflow-gpu==1.15 scipy numpy opencv-python;

Cloning the project and all necessary files

git clone https://github.com/cysmith/neural-style-tf.git;
cd neural-style-tf/;
wget http://www.vlfeat.org/matconvnet/models/imagenet-vgg-verydeep-19.mat;
#After everything is complete, it is time to create our first 'artistic' image.
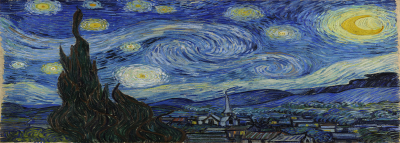
python neural_style.py --content_img "/home/bob/Pictures/Aphrodite Hills Golf Course - Paphos, Cyprus.jpg" --style_imgs "/home/bob/Pictures/Van_Gogh_-_Starry_Night_-_Google_Art_Project.jpg" --max_size 400 --max_iterations 500 --device /cpu:0 --verbose;

Results

Result
Original Content
Adapted Style Input

Problems that you might get

If you get the following error:

ImportError: libGL.so.1: cannot open shared object file: No such file or directory

You will need to install some additional dependencies for OpenCV as your Ubuntu installation might have been minimal. To fix this issue, install the following package from the repositories:

sudo apt-get update;
sudo apt-get install -y python3-opencv;


Playing with MASK RCNN on videos .. again

Source code for the implementation that created this video will be uploaded soon.

A first attempt at using a pre-trained implementation of Mask R-CNN on Python 3, Keras, and TensorFlow. The model generates bounding boxes and segmentation masks for each instance of an object in each frame. It’s based on Feature Pyramid Network (FPN) and a ResNet101 backbone.

Setup

Conda / Anaconda

First of all, we installed and activated anaconda on an Ubuntu 20.04LTS desktop. To do so, we installed the following dependencies from the repositories:

sudo apt-get install libgl1-mesa-glx libegl1-mesa libxrandr2 libxrandr2 libxss1 libxcursor1 libxcomposite1 libasound2 libxi6 libxtst6;

Then, we downloaded the 64-Bit (x86) Installer from (https://www.anaconda.com/products/individual#linux).

Using a terminal, we followed the instructions here (https://docs.anaconda.com/anaconda/install/linux/) and performed the installation.

Python environment and OpenCV for Python

Following the previous step, we used the commands below to create a virtual environment for our code. We needed python version 3.9 (as highlighted here https://www.anaconda.com/products/individual#linux) and OpenCV for python.

source ~/anaconda3/bin/activate;
conda create --name MaskRNN python=3.9;
conda activate MaskRNN;
pip install numpy opencv-python;

Problems that we did not anticipate

When we tried to execute our code in the virtual environment:

python3 main.py --video="/home/bob/Videos/Live @ Santa Claus Village 2021-11-13 12_12.mp4";

We got the following error:

Traceback (most recent call last):
  File "/home/bob/MaskRCNN/main.py", line 6, in <module>
    from cv2 import cv2
  File "/home/bob/anaconda3/envs/MaskRNN/lib/python3.9/site-packages/cv2/__init__.py", line 180, in <module>
    bootstrap()
  File "/home/bob/anaconda3/envs/MaskRNN/lib/python3.9/site-packages/cv2/__init__.py", line 152, in bootstrap
    native_module = importlib.import_module("cv2")
  File "/home/bob/anaconda3/envs/MaskRNN/lib/python3.9/importlib/__init__.py", line 127, in import_module
    return _bootstrap._gcd_import(name[level:], package, level)
ImportError: libGL.so.1: cannot open shared object file: No such file or directory

We realized that we were missing some additional dependencies for OpenCV as our Ubuntu installation was minimal. To fix this issue, we installed the following package from the repositories:

sudo apt-get update;
sudo apt-get install -y python3-opencv;

AttributeError: module ‘html5lib.treebuilders’ has no attribute ‘_base’

Recently, we were receiving the above error on a GNU/Linux Ubuntu 20.04 LTS.

AttributeError: module 'html5lib.treebuilders' has no attribute '_base'

We had installed beautifulsoup4 and html5lib using pip. To solve the issue, we had to uninstall the html5lib that was installed by pip and install it through apt.

# Remove html5lib if you have installed it with pip3:
pip3 uninstall html5lib;

pip3 install --upgrade beautifulsoup4
sudo apt-get install python3-html5lib

How to check if PyTorch is using the GPU?

The following basic code, will import PyTorch into a project and test if GPU capabilities are enabled and available.

import torch

# Should produce "True"
torch.cuda.is_available()

# Should produce the number of available devices, if you have one device it should produce the value "1"
torch.cuda.device_count()

# If there is a device and it is the first one, it should produce the "0"
torch.cuda.current_device()

# Assuming that there is at least one device, with the following two commands we will get some information on the first available device

# Should produce something similar to "<torch.cuda.device object at 0x7f12b1a298d0>"
torch.cuda.device(0)

# Should produce something similar to "'GeForce GTX 1050 Ti'"
torch.cuda.get_device_name(0)

We are using Ubuntu 20.04 LTS and the NVidia drivers were installed automatically during installation.