GNU/Linux


Linux mouse jiggler

Keep-Presence is an innovative program that automatically detects when you’re away from your computer and moves the mouse or presses a key to keep it active. This is especially helpful when you need to keep your computer running but don’t want it to lock or sleep due to inactivity.

What’s excellent about Keep-Presence is that it won’t interfere with your work while using your computer. Instead, it only activates when it detects that you’re away, so you can rest assured that your computer will remain active even if you step away from your desk for a few minutes.

This program is beneficial if you’re working remotely and need to step away from your computer frequently. With Keep-Presence, you can trick your machine into thinking you’re still working on it, which can be helpful if you need to step away for a short period and don’t want to constantly re-login or restart your work.

In summary, Keep-Presence is a helpful program that keeps your computer active even when you’re away. It’s an excellent tool for those who work remotely or need to step away from their desk frequently, and it won’t interfere with your work while using your computer.

This software is available in GitHub and the snap package manager.

https://github.com/carrot69/keep-presence/

To install using snap, execute the following command:

sudo snap install keep-presence;
#Just execute the following to start the application with default settings
keep-presence;
#Use Ctrl+C to stop it.

We used it in Ubuntu 22.04LTS with success.

Optional arguments

-h, --help                        show this help message and exit
            
-s SECONDS, --seconds SECONDS     Define in seconds how long to wait after a user is
                                  considered idle. Default 300.

-p PIXELS, --pixels PIXELS        Set how many pixels the mouse should move. Default 1.

-c, --circular                    Move mouse in a circle. Default move diagonally.

-m MODE, --mode MODE              Available options: keyboard, mouse, both; default is mouse. 
                                  This is the action that will be executed when the user is idle. 
                                  If keyboard is selected, the program will press the shift key. 
                                  If mouse is selected, the program will move the mouse. 
                                  If both is selected, the program will do both actions.

-r RANDOM RANDOM, --random RANDOM RANDOM
                                  Usage: two numbers (ex. -r 3 10). Execute actions based on a 
                                  random interval between start and stop seconds. 
                                  Note: Overwrites the seconds argument.

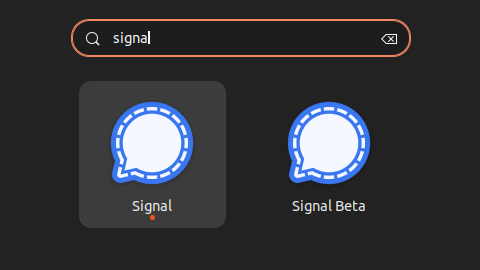
Two Signal accounts on Ubuntu 22.04LTS

Signal is a widely used messaging app that prioritizes user privacy and security. However, there may be times when one needs to use multiple Signal accounts on the same device. In this blog post, we will discuss the problem of needing two Signal accounts on Ubuntu 22.04LTS and how to solve it by installing the beta version.

The Problem:

Let’s say you have two Signal accounts, one for personal use and the other for work. Unfortunately, Signal does not provide a built-in feature for running multiple accounts on the same device. This can be a frustrating problem for Ubuntu 22.04LTS users who want to use multiple Signal accounts. Fortunately, there is a solution, and that is to install the beta version of Signal on your device.

Installation Steps:

  1. Open the Terminal.
    The first step is to open the Terminal by clicking the Terminal icon or pressing the “Ctrl+Alt+T” keys.
  2. Add the Signal repository.
    To install the beta version of Signal on Ubuntu 22.04LTS, you need to add the Signal repository to your system. Run the following command to add the repository:

echo 'deb [arch=amd64 signed-by=/usr/share/keyrings/signal-desktop-keyring.gpg] https://updates.signal.org/desktop/apt xenial main' | sudo tee -a /etc/apt/sources.list.d/signal-xenial.list;

  1. Add Signal’s public key.
    Next, you need to add Signal’s public key to your system. This key is used to verify the authenticity of the packages in the repository. Run the following command to add the public key:

wget -O- https://updates.signal.org/desktop/apt/keys.asc | gpg --dearmor > signal-desktop-keyring.gpg;
cat signal-desktop-keyring.gpg | sudo tee -a /usr/share/keyrings/signal-desktop-keyring.gpg > /dev/null;

  1. Update the package list.
    After adding the repository and public key, you must update the package list. Run the following command to update the package list:

sudo apt update;

  1. Install the beta version of Signal.
    Finally, you can install the beta version of Signal by running the following command:

sudo apt install signal-desktop-beta;

This will install the beta version of Signal on your system, which you can use to run multiple Signal accounts.

Conclusion:

In conclusion, running multiple Signal accounts on Ubuntu 22.04LTS can be a problem. However, installing the beta version of Signal can solve this problem. Following the above installation steps, you can easily install the beta version of Signal on your device and use multiple Signal accounts without hassle.


Linux: Delete all files that are older than X days

The command find /data/ -type f -mtime +15 -exec rm -f '{}' \; is used to search and delete all the files in the “/data/” directory that have a modification time of more than 15 days old. The following is an explanation of each part of the command:

  1. “find /data/” – This specifies the directory that the search will start from; in this case, it’s the “/data/” directory.
  2. “-type f” – This option specifies that the search should be limited to files, not directories.
  3. “-mtime +15” – This option specifies that the files should be older than 15 days based on the modification time. The “+” sign indicates that we are looking for files older than 15 days.
  4. “-exec rm -f ‘{}’ \;” – This option is used to execute a command on the files found. The command “rm -f ‘{}'” is used to delete the files and the “{}” is a placeholder for the files that are found. The “” at the end of the line is used to escape the semicolon and avoid a syntax error.

The “find /data/ -type f -ctime +15 -exec rm -f ‘{}’ \;” command is similar to the above command, but it searches for files based on their creation time instead of modification time. The “ctime” option specifies that the search should be based on the file creation time instead of the modification time.

In conclusion, both commands are used to delete files in the “/data/” directory that are older than 15 days. Still, the difference is that the first command searches for files based on their modification time, while the second command searches for files based on their creation time.


Create an SSH tunnel for HTTP web server proxy

Once upon a time, in a kingdom of computers and networks, there lived a brave knight named “ssh”. He was known throughout the land for his bravery and cunning abilities to securely transport data between two distant lands.

One day, a young prince came to the knight with a request. The prince had a precious website that was housed in a remote castle, accessible only by a specific host known as “remotehost”. He wanted his people to be able to visit the website, but the path was treacherous and insecure.

The prince asked the knight if he could help him. The knight thought for a moment and then said, “Fear not, young prince! I can help you. I shall use my magical command ‘ssh -L 80:remotehost:80 user@myserver’ to create a secure pathway for your people to visit the website.”

The prince was overjoyed and asked the knight to explain how it worked.

“The ‘-L’ flag stands for Local Forwarding. It creates a tunnel between the local computer and the remote server, which we shall call ‘myserver’. This tunnel shall forward all requests from the local port 80 to the remote host ‘remotehost’ on port 80,” explained the knight.

“And ‘user@myserver’?”, asked the prince.

“Ah, yes. That is the credentials of the user that we shall use to log in to the remote server ‘myserver’. This shall ensure that the communication between your local computer and the remote host is secure and protected,” the knight replied with a nod.

The prince was grateful and thanked the knight for his help. The knight then used his magical command and created a secure pathway for the prince’s people to visit the website, which they did happily ever after.

And that, dear reader, is the story of the command “ssh -L 80:remotehost:80 user@myserver”.

ssh -L 80:remotehost:80 user@myserver;

The command ssh -L 80:remotehost:80 user@myserver is an example of using the ssh utility to create a secure shell connection to a remote server. The command also establishes a local port forward, which forwards all incoming traffic on the local port 80 to the remote host remotehost on port 80.

ssh (Secure Shell) is a protocol for securely accessing a remote computer. The basic usage of ssh is to log in to a remote server using a username and password or an SSH key. The ssh command allows you to securely log in to a remote server, execute commands on the remote server, and transfer files between your local computer and the remote server.

In this particular command, the -L flag is used to specify a local port forward. A local port forward is a way of forwarding traffic from a local port to a remote host and port. In this case, the traffic is being forwarded from the local port 80 to the remote host remotehost on port 80.

The user@myserver part of the command is the credentials that are used to log in to the remote server myserver. The user is the username and myserver is the hostname or IP address of the remote server. The combination of the username and remote server information allows ssh to securely log in to the remote server.

Once the secure shell connection has been established and the local port forward has been created, any traffic sent to the local port 80 will be forwarded to the remote host remotehost on port 80. This allows the local computer to access services on the remote host as if they were running on the local computer.

In summary, the ssh -L 80:remotehost:80 user@myserver command is an example of using the ssh utility to create a secure shell connection to a remote server and establish a local port forward. The local port forward allows the local computer to access services on the remote host as if they were running on the local computer.

ssh -L 80:remotehost:80 user@myserver;

Once the connection has been established using the command ssh -L 80:remotehost:80 user@myserver, you can access the website hosted on the remote host remotehost by browsing to http://localhost in your web browser.

Since the local port 80 has been forwarded to the remote host remotehost on port 80, all traffic sent to http://localhost will be forwarded to the remote host. This allows you to access the website hosted on the remote host as if it were running on your local computer.

Keep in mind that the secure shell connection created using the ssh command must be active and running in order to access the website hosted on the remote host. If the connection is closed or terminated, the website will no longer be accessible through the local port forward.