Machine Learning


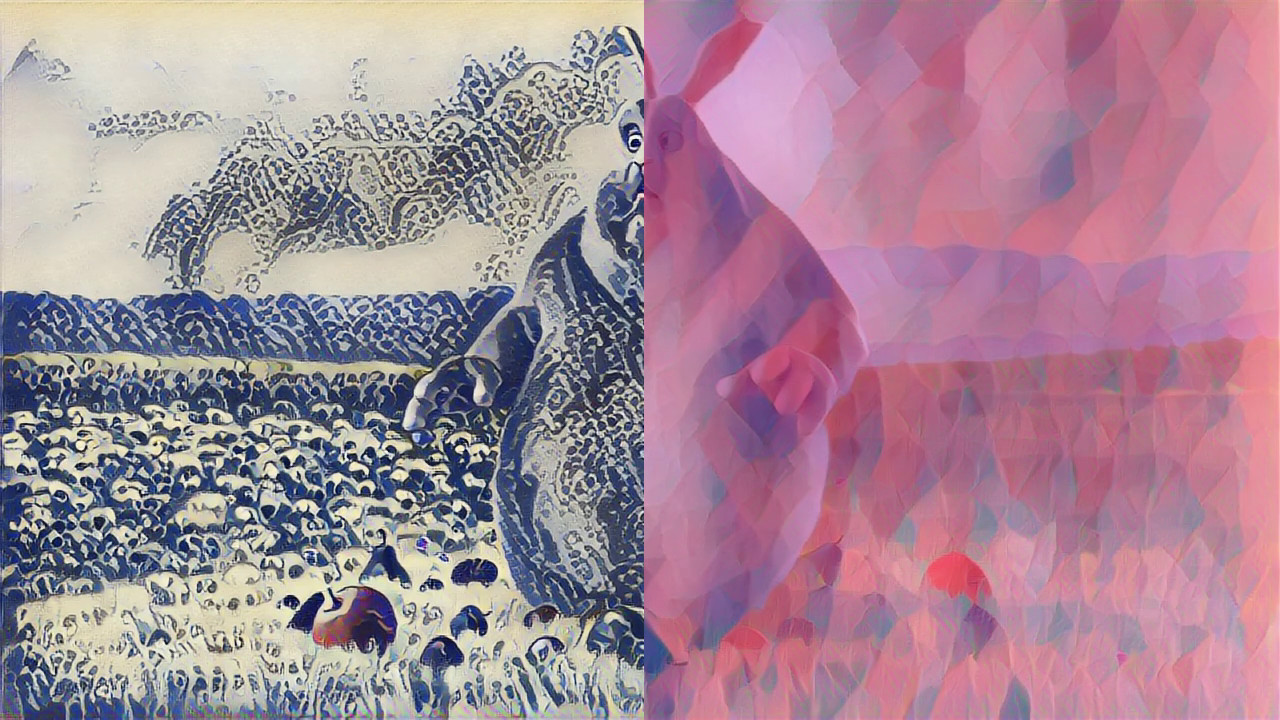
Using Neural Style Transfer on videos

We decided to revisit some old work on Neural Style Transfer and TensorFlow. Using the sample code for Fast Neural Style Transfer from this page https://www.tensorflow.org/tutorials/generative/style_transfer#fast_style_transfer_using_tf-hub and the image stylization model from here https://tfhub.dev/google/magenta/arbitrary-image-stylization-v1-256/2, we created a tool.

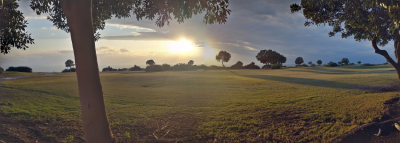
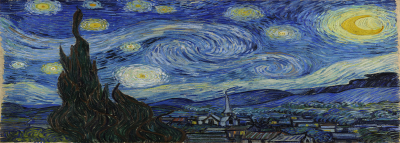
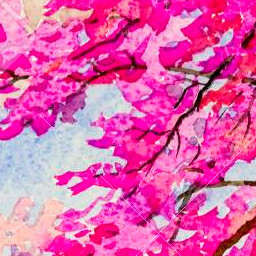
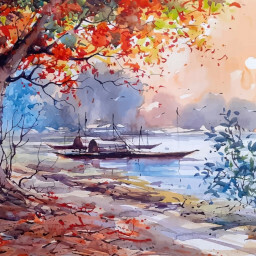
The goal of our venture was to simplify the procedure of changing the style of media. The input could either be an image, a series of images, a video, or a group of videos.

This tool (for which the code is below) comprises a bash script and a python code.
On a high level, it reads all videos from one folder and all styles from another. Then it recreates all those videos with all those styles making new videos out of combinations of the two.

Hardware

Please note that we enabled CUDA and GPU processing on our computer before using the tool. Without them, execution would be prolonged dramatically due to the inability of a general-purpose CPU to make many mathematic operations as fast as the GPU.
To enable CUDA, we followed the steps found in these notes: https://bytefreaks.net/gnulinux/rough-notes-on-how-to-install-cuda-on-an-ubuntu-20-04lts

Software

Conda / Anaconda

We installed and activated anaconda on an Ubuntu 20.04LTS desktop. To do so, we installed the following dependencies from the repositories:

sudo apt-get install libgl1-mesa-glx libegl1-mesa libxrandr2 libxrandr2 libxss1 libxcursor1 libxcomposite1 libasound2 libxi6 libxtst6;

Then, we downloaded the 64-Bit (x86) Installer from (https://www.anaconda.com/products/individual#linux).

Using a terminal, we followed the instructions here (https://docs.anaconda.com/anaconda/install/linux/) and performed the installation.

Python environment and OpenCV for Python

Following the previous step, we used the commands below to create a virtual environment for our code. We needed python version 3.9 (as highlighted here https://www.anaconda.com/products/individual#linux) and the following packages tensorflow matplotlib tensorflow_hub for python.

source ~/anaconda3/bin/activate;
conda create --yes --name FastStyleTransfer python=3.9;
conda activate FastStyleTransfer;
pip install --upgrade pip;
pip install tensorflow matplotlib tensorflow_hub;

faster.py

import matplotlib.pylab as plt
import numpy as np
import tensorflow as tf
import tensorflow_hub as hub

from os import listdir
from os.path import isfile, join

import argparse

print("TF Version: ", tf.__version__)
print("TF Hub version: ", hub.__version__)
print("Eager mode enabled: ", tf.executing_eagerly())
print("GPU available: ", tf.config.list_physical_devices('GPU'))

# Parsing command line arguments while making sure they are mandatory/required
parser = argparse.ArgumentParser()
parser.add_argument(
    "--input",
    type=str,
    required=True,
    help="The directory that contains the input video frames.")
parser.add_argument(
    "--output",
    type=str,
    required=True,
    help="The directory that will contain the output video frames.")
parser.add_argument(
    "--style",
    type=str,
    required=True,
    help="The location of the style frame.")


# Press the green button in the gutter to run the script.
if __name__ == '__main__':
    
    args = parser.parse_args()
    input_path = args.input + '/'
    output_path = args.output + '/'
    # List all files from the input directory. This directory should contain at least one image/video frame.
    onlyfiles = [f for f in listdir(input_path) if isfile(join(input_path, f))]

    # Loading the input style image.
    style_image_path = args.style  # @param {type:"string"}
    style_image = plt.imread(style_image_path)

    # Convert to float32 numpy array, add batch dimension, and normalize to range [0, 1]. Example using numpy:
    style_image = style_image.astype(np.float32)[np.newaxis, ...] / 255.

    # Optionally resize the images. It is recommended that the style image is about
    # 256 pixels (this size was used when training the style transfer network).
    # The content image can be any size.
    style_image = tf.image.resize(style_image, (256, 256))
    
    # Load image stylization module.
    # Enable the following line and disable the next two to load the stylization module from a local folder.
    # hub_module = hub.load('magenta_arbitrary-image-stylization-v1-256_2')
    # Disable the above line and enable these two to load the stylization module from the internet.
    hub_handle = 'https://tfhub.dev/google/magenta/arbitrary-image-stylization-v1-256/2'
    hub_module = hub.load(hub_handle)
 

    for inputfile in onlyfiles:
        content_image_path = input_path + inputfile  # @param {type:"string"}
        content_image = plt.imread(content_image_path)
        # Convert to float32 numpy array, add batch dimension, and normalize to range [0, 1]. Example using numpy:
        content_image = content_image.astype(np.float32)[np.newaxis, ...] / 255.

        # Stylize image.
        outputs = hub_module(tf.constant(content_image), tf.constant(style_image))
        stylized_image = outputs[0]

        # Saving stylized image to disk.
        content_outimage_path = output_path + inputfile  # @param {type:"string"}
        tf.keras.utils.save_img(content_outimage_path, stylized_image[0])


The above code can be invoked as follows:

python3 faster.py --input "$input_frames_folder" --output "$output_frames_folder" --style "$style";

It requires the user to define:

  1. The folder in which all input images should be.
  2. The folder where the user wants the stylized images to be saved in. Please note that the folder needs to be created by the user before the execution.
  3. The path to the image that will be used as input to the neural style transfer.

execute.sh

#!/bin/bash
#source ~/anaconda3/bin/activate;
#conda create --yes --name FastStyleTransfer python=3.9;
#pip install --upgrade pip;
#pip install tensorflow matplotlib tensorflow_hub;
#conda activate FastStyleTransfer;

source ~/anaconda3/bin/activate;
conda activate FastStyleTransfer;

input_videos="./input/videos/*";
input_styles="./input/styles/*";
input_frames="./input/frames";
input_audio="./input/audio";
output_frames="./output/frames";
output_videos="./output/videos";

# Loop on each video in the input folder.
for video in $input_videos;
do
  echo "$video";
  videoname=$(basename "$video");

  # Extract all frames from the video file and save them in a new folder using 8-digit numbers with zero padding in an incremental order.
  input_frames_folder="$input_frames/$videoname";
  mkdir -p "$input_frames_folder";
  ffmpeg -v quiet -i "$video" "$input_frames_folder/%08d.ppm";

  # Extract the audio file from the video to the format of an mp3. We will need this audio later to add it to the final product.
  input_audio_folder="$input_audio/$videoname";
  mkdir -p "$input_audio_folder";

  audio="";
  # Only VP8 or VP9 or AV1 video and Vorbis or Opus audio and WebVTT subtitles are supported for WebM.
  if [[ $videoname == *.webm ]]; then
    audio="$input_audio_folder/$videoname.ogg";
    ffmpeg -v quiet -i "$video" -vn -c:a libvorbis -y "$audio";  
  else
    audio="$input_audio_folder/$videoname.mp3";
    ffmpeg -v quiet -i "$video" -vn -c:a libmp3lame -y "$audio";
  fi

  # Retrieve the frame rate from the input video. We will need it to configure the final video later.
  frame_rate=`ffprobe -v 0 -of csv=p=0 -select_streams v:0 -show_entries stream=r_frame_rate "$video"`;

  # Loop on each image style from the input styles folder.
  for style in $input_styles;
  do
    echo "$style";
    stylename=$(basename "$style");
    output_frames_folder="$output_frames/$videoname/$stylename";
    mkdir -p "$output_frames_folder";

    # Stylize all frames using the input image and write all processed frames to the output folder.
    python3 faster.py --input "$input_frames_folder" --output "$output_frames_folder" --style "$style";

    # Combine all stylized video frames and the exported audio into a new video file.
    output_videos_folder="$output_videos/$videoname/$stylename";
    mkdir -p "$output_videos_folder";
    ffmpeg -v quiet -framerate "$frame_rate" -i "$output_frames_folder/%08d.ppm" -i "$audio" -pix_fmt yuv420p -acodec copy -y "$output_videos_folder/$videoname";
    
    rm -rf "$output_frames_folder";
  done
  rm -rf "$output_frames/$videoname";
  rm -rf "$input_frames_folder";
  rm -rf "$input_audio_folder";
done

The above script does not accept parameters, but you should load the appropriate environment before calling it. For example:

source ~/anaconda3/bin/activate;
conda activate FastStyleTransfer;
./execute.sh;

Please note that this procedure consumes significant space on your hard drive; once you are done with a video, you should probably delete all data from the output folders.


Notes on how to get HarpyTM running on an Ubuntu 20.04LTS GNU/Linux

Easy Setup – Slow Execution by using the CPUs only

Getting CUDA support in OpenCV for Python can be tricky as you will need to make several changes to your PC. On many occasions, it can fail if you are not comfortable troubleshooting the procedure. For this reason, we are presenting an alternative solution that is easy to implement and should work on most machines. The problem with this solution is that it will ignore your GPU and utilize your CPUs only. This means that executions will most probably be slower than the GPU-enabled one.

Conda / Anaconda

First of all, we installed and activated anaconda on an Ubuntu 20.04LTS desktop. To do so, we installed the following dependencies from the repositories:

sudo apt-get install libgl1-mesa-glx libegl1-mesa libxrandr2 libxrandr2 libxss1 libxcursor1 libxcomposite1 libasound2 libxi6 libxtst6;

Then, we downloaded the 64-Bit (x86) Installer from (https://www.anaconda.com/products/individual#linux).

Using a terminal, we followed the instructions here (https://docs.anaconda.com/anaconda/install/linux/) and performed the installation.

Python environment and OpenCV for Python

Following the previous step, we used the commands below to create a virtual environment for our code. We needed python version 3.9 (as highlighted here https://www.anaconda.com/products/individual#linux) and OpenCV for python.

source ~/anaconda3/bin/activate;
conda create --yes --name HarpyTM python=3.9;
conda activate HarpyTM;
pip install numpy scipy scikit-learn opencv-python==4.5.1.48;

Please note that we needed to limit the package for opencv-python to 4.5.1.48 because we were getting the following error on newer versions:

python3 Monitoring.py 
./data/DJI_0406_cut.MP4
[INFO] setting preferable backend and target to CUDA...
Traceback (most recent call last):
  File "/home/bob/Traffic/HarpyTM/Monitoring.py", line 51, in <module>
    detectNet = detector(weights, config, conf_thresh=conf_thresh, netsize=cfg_size, nms_thresh=nms_thresh, gpu=use_gpu, classes_file=classes_file)
  File "/home/bob/Traffic/HarpyTM/src/detector.py", line 24, in __init__
    self.layers = [ln[i[0] - 1] for i in self.net.getUnconnectedOutLayers()]
  File "/home/bob/Traffic/HarpyTM/src/detector.py", line 24, in <listcomp>
    self.layers = [ln[i[0] - 1] for i in self.net.getUnconnectedOutLayers()]
IndexError: invalid index to scalar variable.

Usage

git clone https://github.com/rafcy/HarpyTM;
cd HarpyTM/;
# We manually create the following folders and set their priviledges as we were  getting errors when they were autogenerated by the code of HarpyTM.
mkdir -p results/Detections/videos;
chmod 777 results/Detections/videos;

After successfully cloning the project, we modified the config.ini to meet our needs, specifically, we changed all paths to be inside the folder of HarpyTM and used the full resolution for the test video:

[Video]
video_filename 		= ./data/DJI_0406_cut.MP4
resize 			= True
image_width 		= 1920
image_height 		= 1080
display_video		= False
display_width 		= 1920
display_height 		= 1080


[Export]
save_video_results	= True
video_export_path 	= ./results/Detections/videos/
csv_path 		= ./results/
export			= True
display_track		= True

[Detector]
#darknet
darknet_config 		= ./data/Configs/vehicles_ty3.cfg
darknet_weights 	= ./data/Configs/vehicles_ty3.weights
classes_file 		= ./data/Configs/vehicles.names
cfg_size_width		= 608
cfg_size_height		= 608
iou_thresh 		= 0.3
conf_thresh 		= 0.3
nms_thresh 		= 0.4
use_gpu 		= True 

[Tracker]
flight_height 		= 150
sensor_height 		= 0.455
sensor_width		= 0.617
focal_length		= 0.567
reset_boxes_frames	= 40
calc_velocity_n		= 25
draw_tracks		= True
export_data		= True

Finally, we were able to execute the code as follows:

python3 Monitoring.py;

After the execution was done, we found in the folder ./results/Detections/videos/ the video showing the bounding boxes etc. The resulting video was uploaded here:


Playing the QMIX Two-step game on Ray

We are trying to expand the code of the Two-step game (which is an example from the QMIX paper) using the Ray framework. The changes we want to apply should extract the best checkpoint from some trial of a tune.run(), restore it on a new QMixTrainer, and then use it on a new environment to compute the subsequent actions.

The code we tried to use is the following:

"""The two-step game from QMIX: https://arxiv.org/pdf/1803.11485.pdf

Configurations you can try:
    - normal policy gradients (PG)
    - contrib/MADDPG
    - QMIX

See also: centralized_critic.py for centralized critic PPO on this game.
"""

import argparse
from gym.spaces import Tuple, MultiDiscrete, Dict, Discrete
import os

import ray
from ray import tune
from ray.rllib.agents.qmix import QMixTrainer
from ray.tune import register_env, grid_search
from ray.rllib.env.multi_agent_env import ENV_STATE
from ray.rllib.examples.env.two_step_game import TwoStepGame
from ray.rllib.utils.test_utils import check_learning_achieved

import numpy as np

parser = argparse.ArgumentParser()
parser.add_argument("--run", type=str, default="QMIX")
parser.add_argument("--num-cpus", type=int, default=0)
parser.add_argument("--as-test", action="store_true")
parser.add_argument("--torch", action="store_true")
parser.add_argument("--stop-reward", type=float, default=7.0)
parser.add_argument("--stop-timesteps", type=int, default=50000)

if __name__ == "__main__":
    args = parser.parse_args()

    grouping = {
        "group_1": [0, 1],
    }
    obs_space = Tuple([
        Dict({
            "obs": MultiDiscrete([2, 2, 2, 3]),
            ENV_STATE: MultiDiscrete([2, 2, 2])
        }),
        Dict({
            "obs": MultiDiscrete([2, 2, 2, 3]),
            ENV_STATE: MultiDiscrete([2, 2, 2])
        }),
    ])
    act_space = Tuple([
        TwoStepGame.action_space,
        TwoStepGame.action_space,
    ])
    register_env(
        "grouped_twostep",
        lambda config: TwoStepGame(config).with_agent_groups(
            grouping, obs_space=obs_space, act_space=act_space))

    if args.run == "contrib/MADDPG":
        obs_space_dict = {
            "agent_1": Discrete(6),
            "agent_2": Discrete(6),
        }
        act_space_dict = {
            "agent_1": TwoStepGame.action_space,
            "agent_2": TwoStepGame.action_space,
        }
        config = {
            "learning_starts": 100,
            "env_config": {
                "actions_are_logits": True,
            },
            "multiagent": {
                "policies": {
                    "pol1": (None, Discrete(6), TwoStepGame.action_space, {
                        "agent_id": 0,
                    }),
                    "pol2": (None, Discrete(6), TwoStepGame.action_space, {
                        "agent_id": 1,
                    }),
                },
                "policy_mapping_fn": lambda x: "pol1" if x == 0 else "pol2",
            },
            "framework": "torch" if args.torch else "tf",
            # Use GPUs iff `RLLIB_NUM_GPUS` env var set to > 0.
            "num_gpus": int(os.environ.get("RLLIB_NUM_GPUS", "0")),
        }
        group = False
    elif args.run == "QMIX":
        config = {
            "rollout_fragment_length": 4,
            "train_batch_size": 32,
            "exploration_config": {
                "epsilon_timesteps": 5000,
                "final_epsilon": 0.05,
            },
            "num_workers": 0,
            "mixer": grid_search([None, "qmix", "vdn"]),
            "env_config": {
                "separate_state_space": True,
                "one_hot_state_encoding": True
            },
            # Use GPUs iff `RLLIB_NUM_GPUS` env var set to > 0.
            "num_gpus": int(os.environ.get("RLLIB_NUM_GPUS", "0")),
            "framework": "torch" if args.torch else "tf",
        }
        group = True
    else:
        config = {
            # Use GPUs iff `RLLIB_NUM_GPUS` env var set to > 0.
            "num_gpus": int(os.environ.get("RLLIB_NUM_GPUS", "0")),
            "framework": "torch" if args.torch else "tf",
        }
        group = False

    ray.init(num_cpus=args.num_cpus or None)

    stop = {
        "episode_reward_mean": args.stop_reward,
        "timesteps_total": args.stop_timesteps,
    }

    config = dict(config, **{
        "env": "grouped_twostep" if group else TwoStepGame,
    })

    results = tune.run(args.run, stop=stop, config=config, verbose=1, checkpoint_freq=1, checkpoint_at_end=True)

    if args.as_test:
        check_learning_achieved(results, args.stop_reward)

    best_checkpoint = results.get_best_checkpoint(results.trials[0], mode="max")
    print(f".. best checkpoint was: {best_checkpoint}")

    env = TwoStepGame(config).with_agent_groups(grouping, obs_space=obs_space, act_space=act_space)
    obs = env.reset()

    rllib_config = config.copy()
    rllib_config["mixer"] = "qmix"
    new_trainer = QMixTrainer(config=rllib_config)
    new_trainer.restore(best_checkpoint)

    a1 = new_trainer.compute_action(observation=obs['group_1'])
    a2 = new_trainer.compute_action(observation=np.concatenate([obs['group_1'], [1]]))

    ray.shutdown()

To make it easier for you to see the changes from the original, this is the patch of the changes:

Index: main.py

<+>UTF-8
===================================================================
diff --git a/main.py b/main.py
--- a/main.py	(revision 80b3473ef3eede5f94e4805797556940bee91bc8)
+++ b/main.py	(date 1637485442837)
@@ -14,13 +14,16 @@
 
 import ray
 from ray import tune
+from ray.rllib.agents.qmix import QMixTrainer
 from ray.tune import register_env, grid_search
 from ray.rllib.env.multi_agent_env import ENV_STATE
 from ray.rllib.examples.env.two_step_game import TwoStepGame
 from ray.rllib.utils.test_utils import check_learning_achieved
 
+import numpy as np
+
 parser = argparse.ArgumentParser()
-parser.add_argument("--run", type=str, default="PG")
+parser.add_argument("--run", type=str, default="QMIX")
 parser.add_argument("--num-cpus", type=int, default=0)
 parser.add_argument("--as-test", action="store_true")
 parser.add_argument("--torch", action="store_true")
@@ -120,9 +123,23 @@
         "env": "grouped_twostep" if group else TwoStepGame,
     })
 
-    results = tune.run(args.run, stop=stop, config=config, verbose=1)
+    results = tune.run(args.run, stop=stop, config=config, verbose=1, checkpoint_freq=1, checkpoint_at_end=True)
 
     if args.as_test:
         check_learning_achieved(results, args.stop_reward)
 
+    best_checkpoint = results.get_best_checkpoint(results.trials[0], mode="max")
+    print(f".. best checkpoint was: {best_checkpoint}")
+
+    env = TwoStepGame(config).with_agent_groups(grouping, obs_space=obs_space, act_space=act_space)
+    obs = env.reset()
+
+    rllib_config = config.copy()
+    rllib_config["mixer"] = "qmix"
+    new_trainer = QMixTrainer(config=rllib_config)
+    new_trainer.restore(best_checkpoint)
+
+    a1 = new_trainer.compute_action(observation=obs['group_1'])
+    a2 = new_trainer.compute_action(observation=np.concatenate([obs['group_1'], [1]]))
+
     ray.shutdown()

When we execute, we get the following errors:

a1 = new_trainer.compute_action(observation=obs['group_1'])

Produces:

ValueError: ('Observation ({}) outside given space ({})!', [0, 3], Tuple(Dict(obs:MultiDiscrete([2 2 2 3]), state:MultiDiscrete([2 2 2])), Dict(obs:MultiDiscrete([2 2 2 3]), state:MultiDiscrete([2 2 2]))))
a2 = new_trainer.compute_action(observation=np.concatenate([obs['group_1'], [1]]))

Produces:

ValueError: ('Observation ({}) outside given space ({})!', array([0, 3, 1]), Tuple(Dict(obs:MultiDiscrete([2 2 2 3]), state:MultiDiscrete([2 2 2])), Dict(obs:MultiDiscrete([2 2 2 3]), state:MultiDiscrete([2 2 2]))))

We are currently trying to figure out how we should change the observation to get accepted by the check_shape() function of the preprocessor.

def check_shape(self, observation: Any) -> None:
"""Checks the shape of the given observation."""
if self._i % VALIDATION_INTERVAL == 0:
    if type(observation) is list and isinstance(
            self._obs_space, gym.spaces.Box):
        observation = np.array(observation)
    try:
        if not self._obs_space.contains(observation):
            raise ValueError(
                "Observation ({}) outside given space ({})!",
                observation, self._obs_space)
    except AttributeError:
        raise ValueError(
            "Observation for a Box/MultiBinary/MultiDiscrete space "
            "should be an np.array, not a Python list.", observation)
self._i += 1

When calling the check_shape() function, these are the values that are processed:

observation:
value = [0, 3]
type = <class 'list'>

self._obs_space:
value = Tuple(Dict(obs:MultiDiscrete([2 2 2 3]), state:MultiDiscrete([2 2 2])), Dict(obs:MultiDiscrete([2 2 2 3]), state:MultiDiscrete([2 2 2])))
type = <class 'gym.spaces.tuple.Tuple'>

and this line fails:

if not self._obs_space.contains(observation)

Any positive feedback is welcome!


Revisiting neural-style-tf in 2021

We decided to revisit this post (https://bytefreaks.net/applications/neural-style-tf-another-open-source-alternative-to-prisma-for-advanced-users) in 2021 and provide the installation manual for Ubuntu 20.04LTS.

Setup

Conda / Anaconda

First of all, we installed and activated anaconda on an Ubuntu 20.04LTS desktop. To do so, we installed the following dependencies from the repositories:

sudo apt-get install libgl1-mesa-glx libegl1-mesa libxrandr2 libxrandr2 libxss1 libxcursor1 libxcomposite1 libasound2 libxi6 libxtst6;

Then, we downloaded the 64-Bit (x86) Installer from (https://www.anaconda.com/products/individual#linux).

Using a terminal, we followed the instructions here (https://docs.anaconda.com/anaconda/install/linux/) and performed the installation.

Python environment and OpenCV for Python

Following the previous step, we used the commands below to create a virtual environment for our code. We needed python version 3.7 (even though anaconda highlights version 3.9 here https://www.anaconda.com/products/individual#linux) and OpenCV for python.

source ~/anaconda3/bin/activate;
# We need python 3.7 at max to support TensorFlow version 1
conda create --yes --name Style python=3.7;
conda activate Style;
# Version 1 of TensorFlow is needed for the project that we will clone, version 1.15 is the latest and greatest version of TensorFlow 1.
pip install tensorflow==1.15 tensorflow-gpu==1.15 scipy numpy opencv-python;

Cloning the project and all necessary files

git clone https://github.com/cysmith/neural-style-tf.git;
cd neural-style-tf/;
wget http://www.vlfeat.org/matconvnet/models/imagenet-vgg-verydeep-19.mat;
#After everything is complete, it is time to create our first 'artistic' image.
python neural_style.py --content_img "/home/bob/Pictures/Aphrodite Hills Golf Course - Paphos, Cyprus.jpg" --style_imgs "/home/bob/Pictures/Van_Gogh_-_Starry_Night_-_Google_Art_Project.jpg" --max_size 400 --max_iterations 500 --device /cpu:0 --verbose;

Results

Result
Original Content
Adapted Style Input

Problems that you might get

If you get the following error:

ImportError: libGL.so.1: cannot open shared object file: No such file or directory

You will need to install some additional dependencies for OpenCV as your Ubuntu installation might have been minimal. To fix this issue, install the following package from the repositories:

sudo apt-get update;
sudo apt-get install -y python3-opencv;