Revisiting neural-style-tf in 2021
We decided to revisit this post (https://bytefreaks.net/applications/neural-style-tf-another-open-source-alternative-to-prisma-for-advanced-users) in 2021 and provide the installation manual for Ubuntu 20.04LTS.
Setup
Conda / Anaconda
First of all, we installed and activated anaconda on an Ubuntu 20.04LTS desktop. To do so, we installed the following dependencies from the repositories:
sudo apt-get install libgl1-mesa-glx libegl1-mesa libxrandr2 libxrandr2 libxss1 libxcursor1 libxcomposite1 libasound2 libxi6 libxtst6;
Then, we downloaded the 64-Bit (x86) Installer from (https://www.anaconda.com/products/individual#linux).
Using a terminal, we followed the instructions here (https://docs.anaconda.com/anaconda/install/linux/) and performed the installation.
Python environment and OpenCV for Python
Following the previous step, we used the commands below to create a virtual environment for our code. We needed python version 3.7 (even though anaconda highlights version 3.9 here https://www.anaconda.com/products/individual#linux) and OpenCV for python.
source ~/anaconda3/bin/activate;
# We need python 3.7 at max to support TensorFlow version 1
conda create --yes --name Style python=3.7;
conda activate Style;
# Version 1 of TensorFlow is needed for the project that we will clone, version 1.15 is the latest and greatest version of TensorFlow 1.
pip install tensorflow==1.15 tensorflow-gpu==1.15 scipy numpy opencv-python;
Cloning the project and all necessary files
git clone https://github.com/cysmith/neural-style-tf.git;
cd neural-style-tf/;
wget http://www.vlfeat.org/matconvnet/models/imagenet-vgg-verydeep-19.mat;
#After everything is complete, it is time to create our first 'artistic' image.
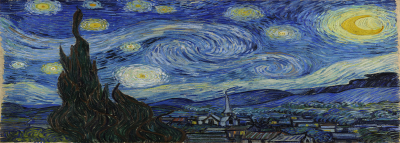
python neural_style.py --content_img "/home/bob/Pictures/Aphrodite Hills Golf Course - Paphos, Cyprus.jpg" --style_imgs "/home/bob/Pictures/Van_Gogh_-_Starry_Night_-_Google_Art_Project.jpg" --max_size 400 --max_iterations 500 --device /cpu:0 --verbose;
Results
Problems that you might get
If you get the following error:
ImportError: libGL.so.1: cannot open shared object file: No such file or directory
You will need to install some additional dependencies for OpenCV as your Ubuntu installation might have been minimal. To fix this issue, install the following package from the repositories:
sudo apt-get update;
sudo apt-get install -y python3-opencv;


