Tux


GNU Linux/Bash: A function that splits a word in half

The following function takes one argument – a text file.
The text file should contain one word on each line.
The function reads the text file (argument) line by line.
Then it checks if the line has one word; if this is true, it splits the word in half.
Finally, it prints the two new words with a space between them.

#!/bin/bash

splitWordsInHalf () {
  # This function takes one argument - a text file.
  # The text file contains one word on each line.
  # It reads the text file (argument) line by line.
  # Then it checks if the line contains one word, if this is true, it splits the word in half.
  # Finally, it prints the two new words with a space between them
  while read line
  do
    words=( $line )
    if [ ${#words[@]} == 1 ]
    then
      echo ${line:0:${#line}/2} ${line:${#line}/2}
    fi
  done < $1
}

splitWordsInHalf input.txt

Example

Using the following input file:

banana
apple
ball
car
door

We will get the following output when we execute splitWordsInHalf input.txt:

ban ana
ap ple
ba ll
c ar
do or

Notes

The following parts of the code are in charge of looping on the data of the incoming file. The parameter (the input file) given to the function is translated into the variable $1. The while loop gets one line of text on each iteration and assigns the text to the variable that is named line. You could have chosen any other name that suits you instead of the word line.

splitWordsInHalf () {
  while read line
  do
    ...
  done < $1
}

The next part of the code (words=( $line )) converts the string value that is contained in the line variable into an array of words, and it assigns that array to the variable named words. Then, it counts the number of elements in the array (the number of words in the line) using the following ${#words[@]} and it checks that there is only one item.

words=( $line )
if [ ${#words[@]} == 1 ]
then
  ...
fi

The following line will print two strings. The first string is a sub-string of variable line that is composed by the first half of the value. The second sub-string is the second half of the value contained in the variable named line.

echo ${line:0:${#line}/2} ${line:${#line}/2}

The ${#line} will return the length of the string contained in the variable.

The structure ${VARIABLE:START:END} defines the slice of the string that we want returned.


Microsoft Windows “God Mode” and other shortcuts

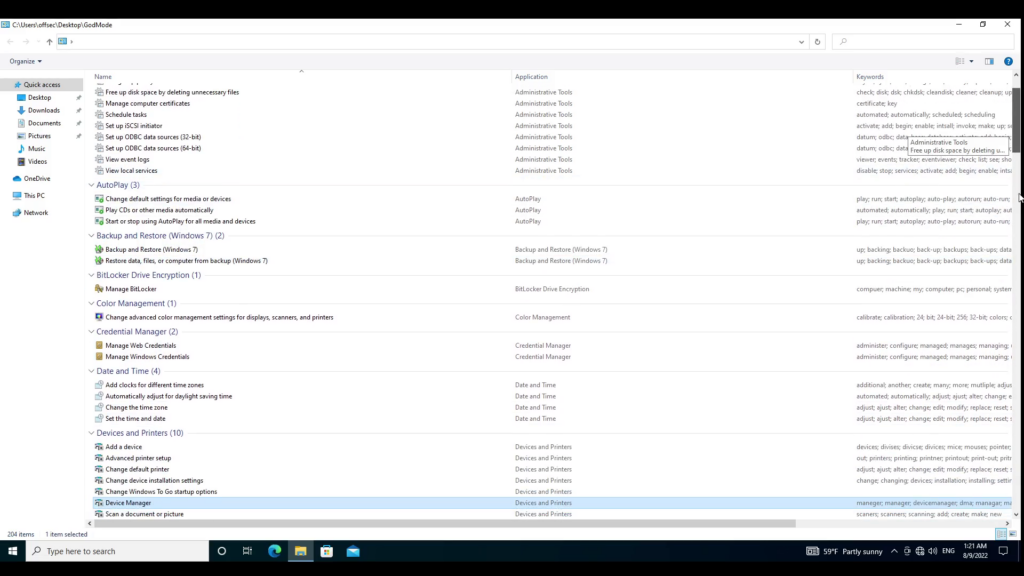
Recently, it came to our attention the existence of the so-called Windows “God Mode.” In reality, the “God Mode” is an alternative Control Panel with many options listed on one page. The most important feature of this “God Mode” Control Panel is that it makes it easier to find specific options and settings that Microsoft Windows developers hid for no apparent reason.

In the following video, we tried two methods to create the shortcut to the “God Mode” option, which was most likely named like this by people online rather than Microsoft.

Folder Method

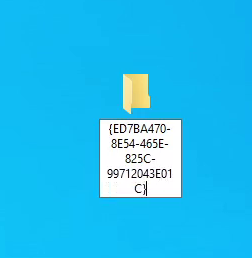
The first method was to create a new folder and add the following string as the name of the folder:

GodMode.{ED7BA470-8E54-465E-825C-99712043E01C}

The result was the following: the folder’s icon changed, and the folder’s name disappeared.

When we double-clicked the new icon, it opened a window with the variety of options that we mentioned before.

Shortcut Method

The second method involved creating a shortcut. We used that method to preserve the folder’s name and select the icon we would keep.
The first step was to create a new shortcut on the Desktop.
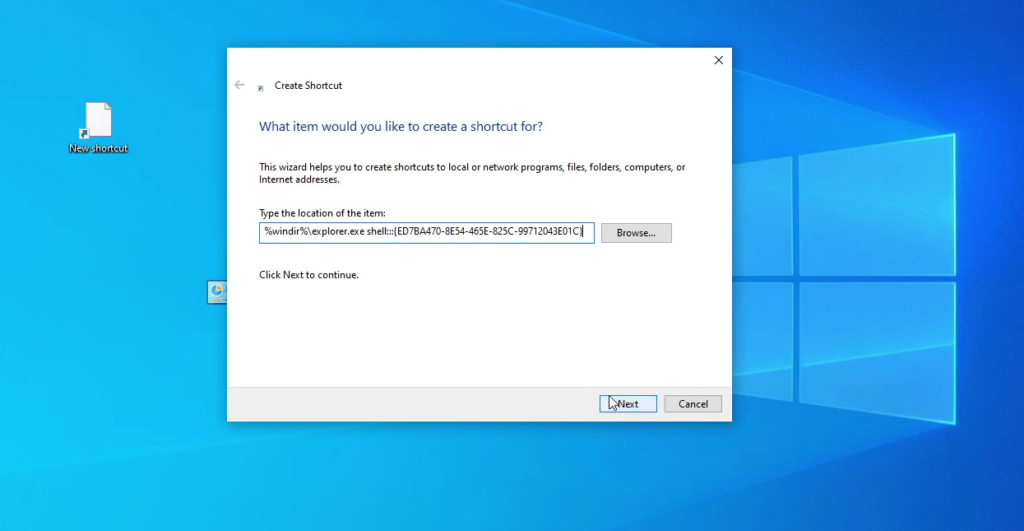
In the popup window, we set the following value at the “Type the location of the item:” option:

%windir%\explorer.exe shell:::{ED7BA470-8E54-465E-825C-99712043E01C}

Then we clicked on the “Next” button.
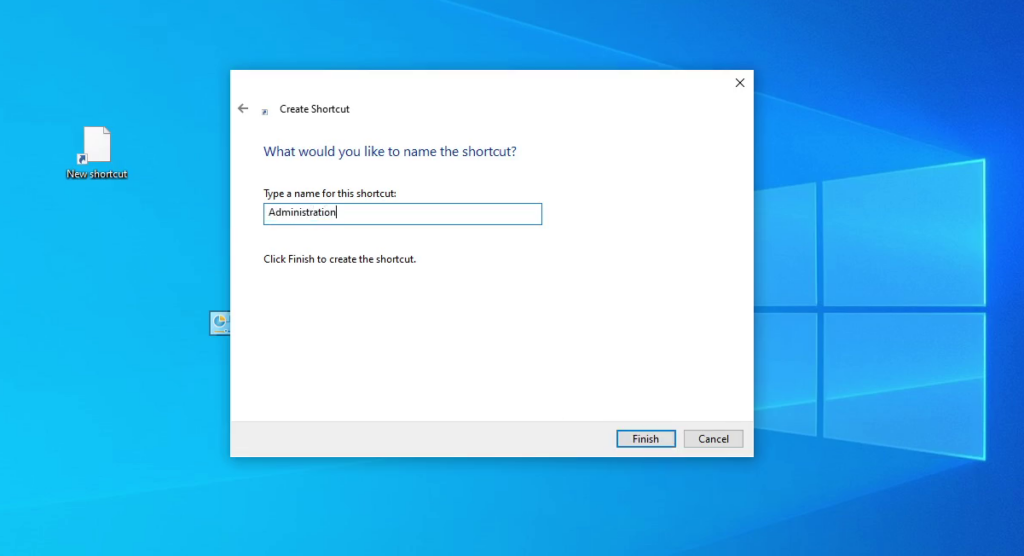
On the new page, we filled the “Type a name for this shortcut:” option with the value that we wanted to appear on the shortcut name. In our example, we used the word “Administration.”

After this, we clicked on the “Finish” button.
On the Desktop, our new shortcut appeared with the correct name. As we did not like the predefined icon, we right-clicked the shortcut and selected the “Properties” option. We clicked the “Change Icon…” button in the new window. Another window opened, we pressed the “Browse…” button and navigated to the file:

%windir%\System32\imageres.dll

After clicking the “Open” button, a new list of icons appeared from which we selected one that we liked, then clicked on the “OK” button. We clicked the “Apply” button on the remaining window, and Windows applied the icon change to our shortcut.

Additional “God Mode” codes

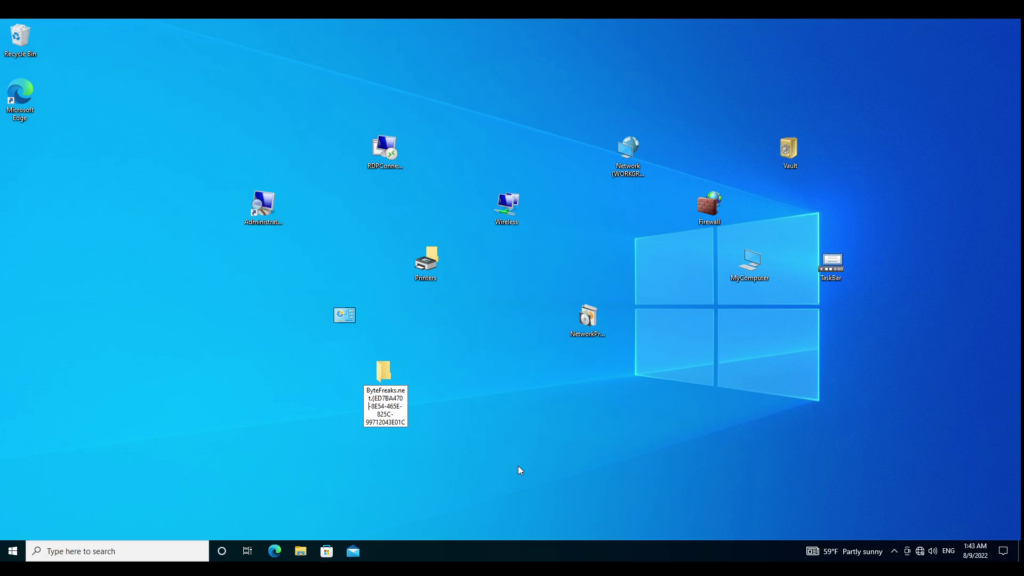
The following values allow you to create folders to specific items on your Windows PC.

Bytefreaks.net.{ED7BA470-8E54-465E-825C-99712043E01C}
TaskBarIcons.{05D7B0F4-2121-4EFF-BF6B-ED3F69B894D9}.
MyComputer.{20D04FE0-3AEA-1069-A2D8-08002B30309D}.
WinVault.{1206F5F1-0569-412C-8FEC-3204630DFB70}.
Firewall.{4026492F-2F69-46B8-B9BF-5654FC07E423}.
Network.{208D2C60-3AEA-1069-A2D7-08002B30309D}.
NetworkApplicationInstallation.{15EAE92E-F17A-4431-9F28-805E482DAFD4}.
Wireless.{1FA9085F-25A2-489B-85D4-86326EEDCD87}.
RDPConnecitions.{241D7C96-F8BF-4F85-B01F-E2B043341A4B}.
Printers.{2227A280-3AEA-1069-A2DE-08002B30309D}.

Using Sysinternals from the command line

Recently, we connected to a Windows machine using SSH and downloaded a fresh copy of the Sysinternal suite. When we tried to use PSexec from our command line shell, it would get stuck without warning. We were unaware that the Sysuinteral suite does not prompt the user to accept the EULA agreement without a graphical interface. For this reason, we did not know that we had to take some action, and we were waiting indefinitely for the modules to finish, killing the processes and restarting them.

Eventually, we realized that if we added the following key in the Windows registry, PSexec would be considered by the Sysinternal suite as a EULA agreement acceptance and thus becoming operational again.

reg ADD HKCU\Software\Sysinternals\PSexec /v EulaAccepted /t REG_DWORD /d 1 /f