Tux


Microsoft invented a new way to force users into using their online accounts

It became apparent that new Microsoft installations are getting increasingly aggressive, forcing users to create an online Microsoft account on their machines.

Please note that we created a new online Microsoft account in the end… We do not have a working solution to this issue.

Backstory: we purchased a new laptop that had Microsoft Windows 10 pre-installed. The first time we booted it, we did not want to sign in using a Microsoft online account, so we did not give internet to the laptop. Doing so allowed us to create a local account on the computer without associating it with an online account.

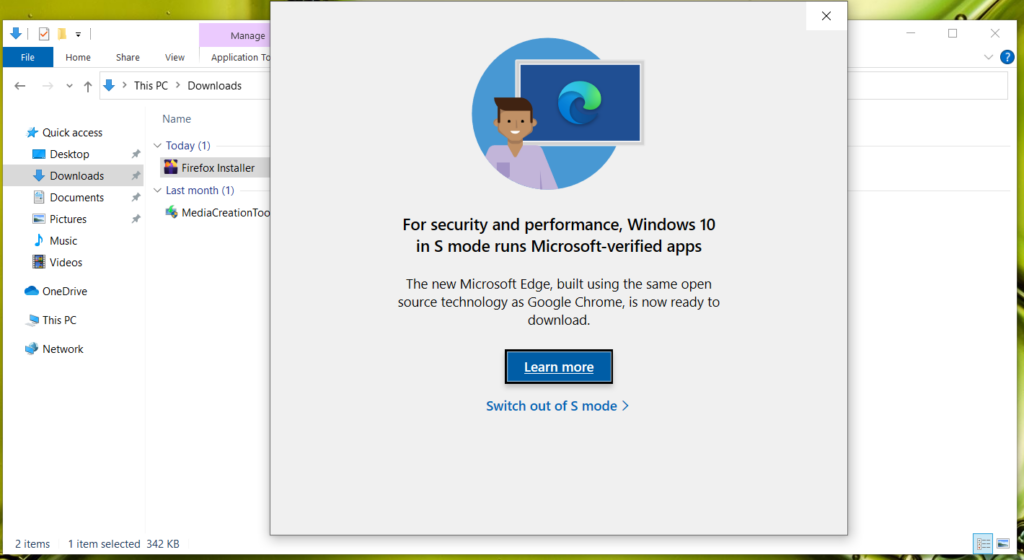
After several updates, we tried to install Firefox, and besides the usual annoying Microsoft advertisements about Bing, we got the following messages for Microsoft Windows S Mode.

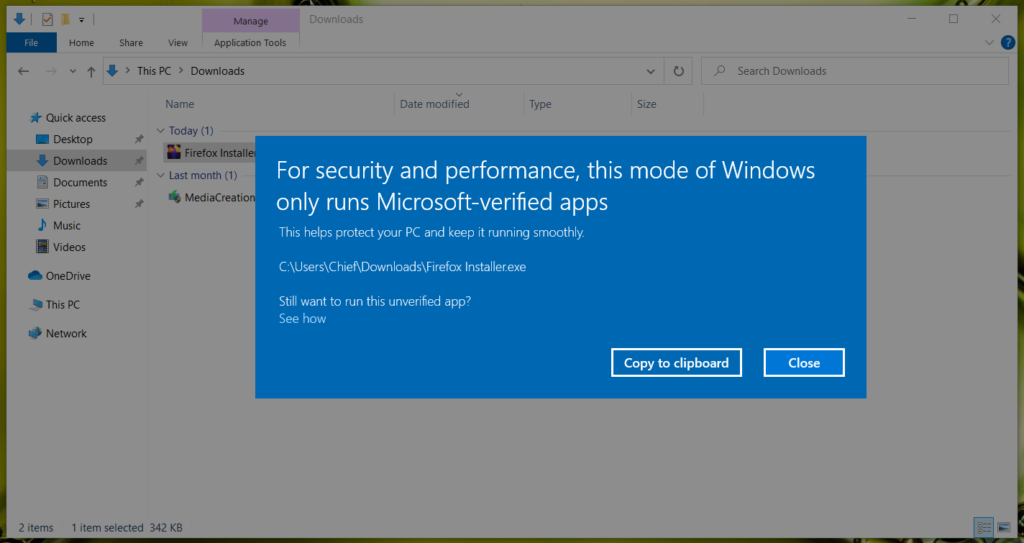
For security and performance, this mode of Windows only runs Microsoft-verified apps
Initial notification of Microsoft S Mode – For security and performance, Windows 10 in S mode runs Microsoft-verified apps

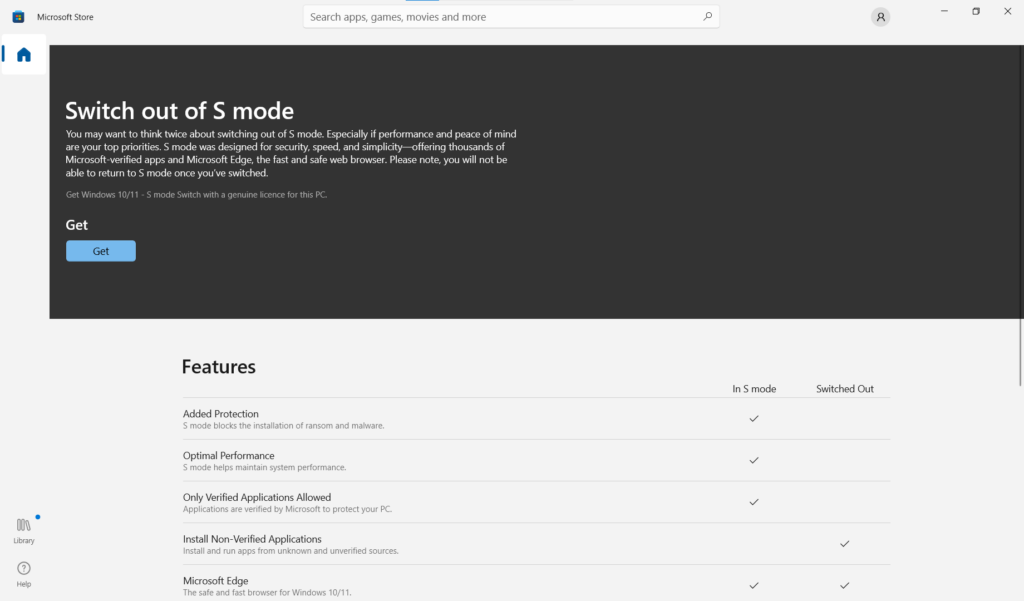
After clicking on the “Learn More” button, we got the following:

Microsoft S Mode – Switch out prompt

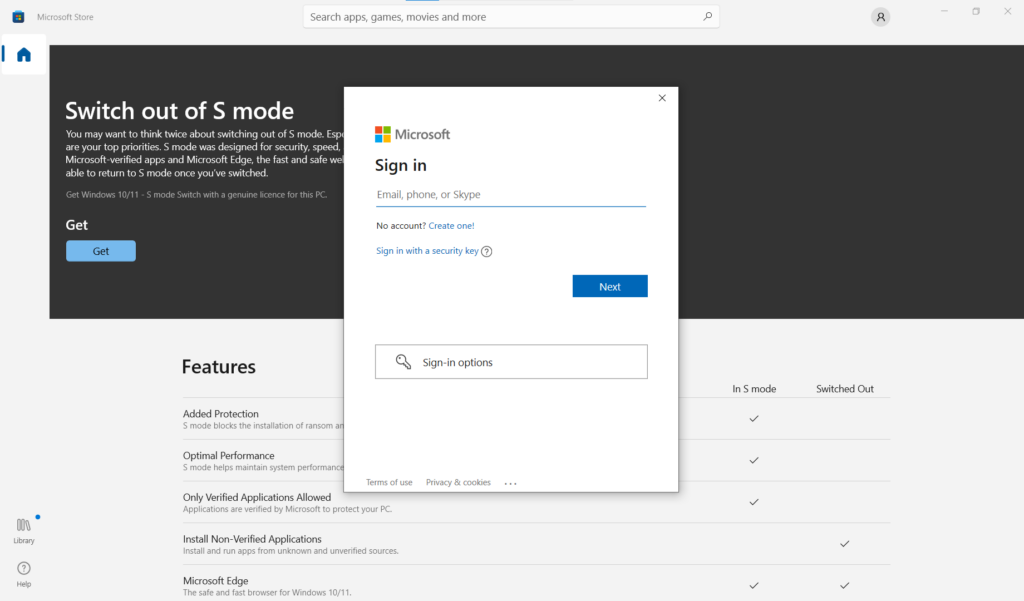
Clicking on the “Get” button got us to the Microsoft Online Account login form…

Microsoft sign-in form appears when you try to switch out of S mode.

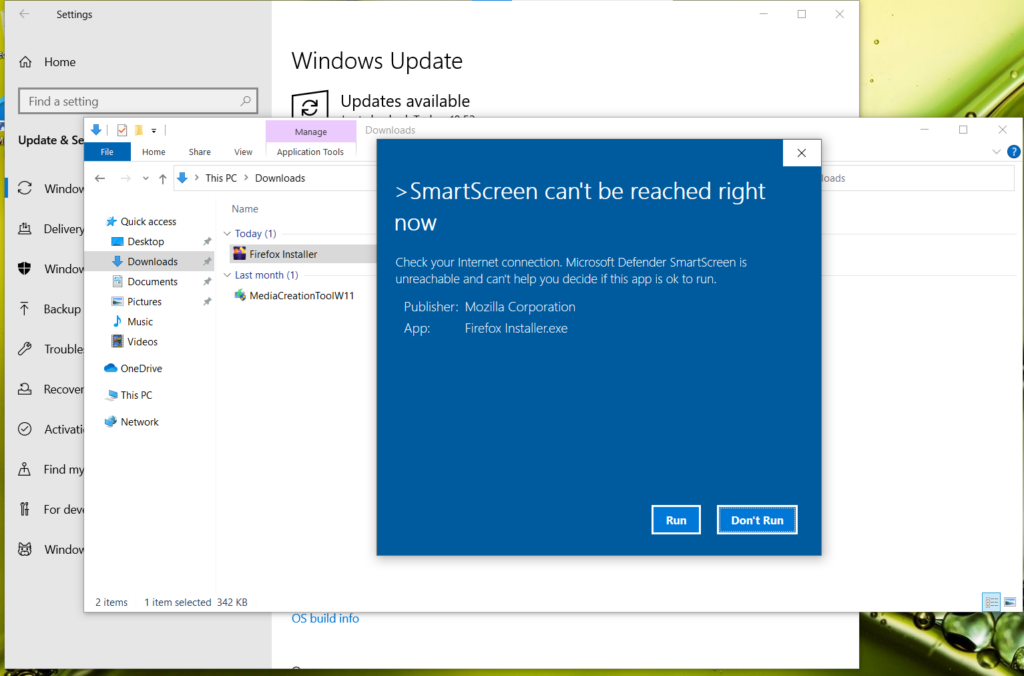
We then closed all windows, disabled internet access, and tried installing Firefox again. This time, we got the following message:

After disabling the internet connection, we tried to bypass the SmartScreen and the S mode settings

After clicking on the “Run” button, we got stopped again by the Microsoft Windows S Mode settings.

As this post mentioned, we eventually created a new online Microsoft account and used it to log in and disable Microsoft S Mode.


Συμμετοχή της Κύπρου στον Πανευρωπαϊκό Διαγωνισμό Κυβερνοασφάλειας ECSC 2022

Την ερχόμενη Δευτέρα 12 Σεπτεμβρίου 2022, η Εθνική Ομάδα Κυβερνοασφάλειας μεταβαίνει στη Βιέννη για να συμμετέχει στον Πανευρωπαϊκό Διαγωνισμό Κυβερνοασφάλειας 2022.

Στο διαγωνισμό ECSC συμμετέχουν 33 χώρες με άτομα ηλικίας 14-25 χρονών μαθητές, φοιτητές, επαγγελματίες, hackers, ερευνητές ασφαλείας, καθώς και αυτοδίδακτους στον τομέα της κυβερνοασφάλειας.

Η Κυπριακή αποστολή αποτελείται από τους: Simon Λοϊζίδη (Αρχηγός Ομάδας), Βασίλη Χαράλαμπο, Αντρέα Τσούλουπα, Οδυσσέα Σταύρου, Ελένη Ιωακείμ, Χριστόδουλο Σωτηρίου, Παναγιώτη Γαβριήλ, Χρίστο Φαλά, Joseph Μοδέστου, Μάριο Καϊλη και Ευάγγελο Λιουδάκη. Την ομάδα θα συνοδεύουν οι μέντορες: Μάριος Νικολαΐδης, Χρίστος Μακρίδης και Νικόλας Μαρκιτανής και εκ μέρους της Ευρωπαϊκής Συντονιστικής Επιτροπής ο Γιώργος Μιχαήλ.

Ο αντίστοιχος Παγκύπριος διαγωνισμός CCSC διοργανώνεται ετησίως από τον Κυπριακό Σύνδεσμο Πληροφορικής (Cyprus Computer Society – CCS) και το CyberMouflons Hacking Community. Η διοργάνωση CCSC 2022 τελεί υπό την αιγίδα του Υπουργείου Άμυνας, του Υπουργείου Παιδείας Πολιτισμού, Αθλητισμού και Νεολαίας, της Αστυνομίας Κύπρου και της Αρχής Ψηφιακής Ασφάλειας μέσω του Γραφείου του Επιτρόπου Επικοινωνιών.

Θερμές ευχαριστίες στους χορηγούς: Adacom Cyber ​​Security, Defense.com, Deloitte, European University Cyprus, Exness, Frederick University, Grant Thornton, KPMG, Odyssey Cybersecurity, Oracle Academy, Try Hack Me, University of Central Lancashire (UCLan) Cyprus και XM καθώς και στους υποστηρικτές ΗostingB2B, MVPS.net, ICSI, Offensive Security, RedPoint, Robo Cy and SCP Academy, Silensec, Cyber ​​Ranges.

Καλή επιτυχία στους συμμετέχοντες!

Μπορείτε να δείτε το επίσημο video clip της ομάδας εδώ:

Πληροφορίες στην ιστοσελίδα https://www.ccsc.org.cy και τα κοινωνικά δίκτυα σε Facebook (@CCSC.Cyprus) και Twitter (@CCSC_Cyprus).


Cloudflare certificate on tomcat windows server

Use Keytool to Create a New Keystore at your Windows Server

Step 1

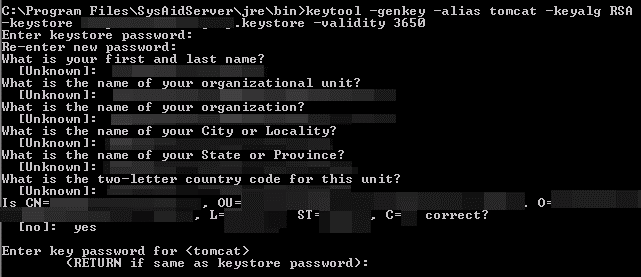
At your server, generate the Keystore file using keytool command at your command line window with the following command:

keytool -genkey -alias tomcat -keyalg RSA -keystore your_site_name.keystore -validity 3650

In the command above, your_site_name should be the name of the domain you want to secure with this SSL/TLS certificate.
When prompted for the first and last name, type the Fully Qualified Domain Name (FQDN) for the site you are securing with this certificate (e.g., www.yourdomain.com, mail.yourdomain.com).

Step 2

Generate a Certificate Signing Request (CSR) from your New Keystore using the keytool command:

keytool -certreq -alias tomcat -file certreq.csr -keystore your_site_name.keystore -keysize 2048

When prompted, enter the password you created earlier (when you created your new Keystore).
In your current directory, certreq.csr now contains your CSR.

Create the certificate from Cloudflare using the certificate request that you created from your Windows Server

Step 3

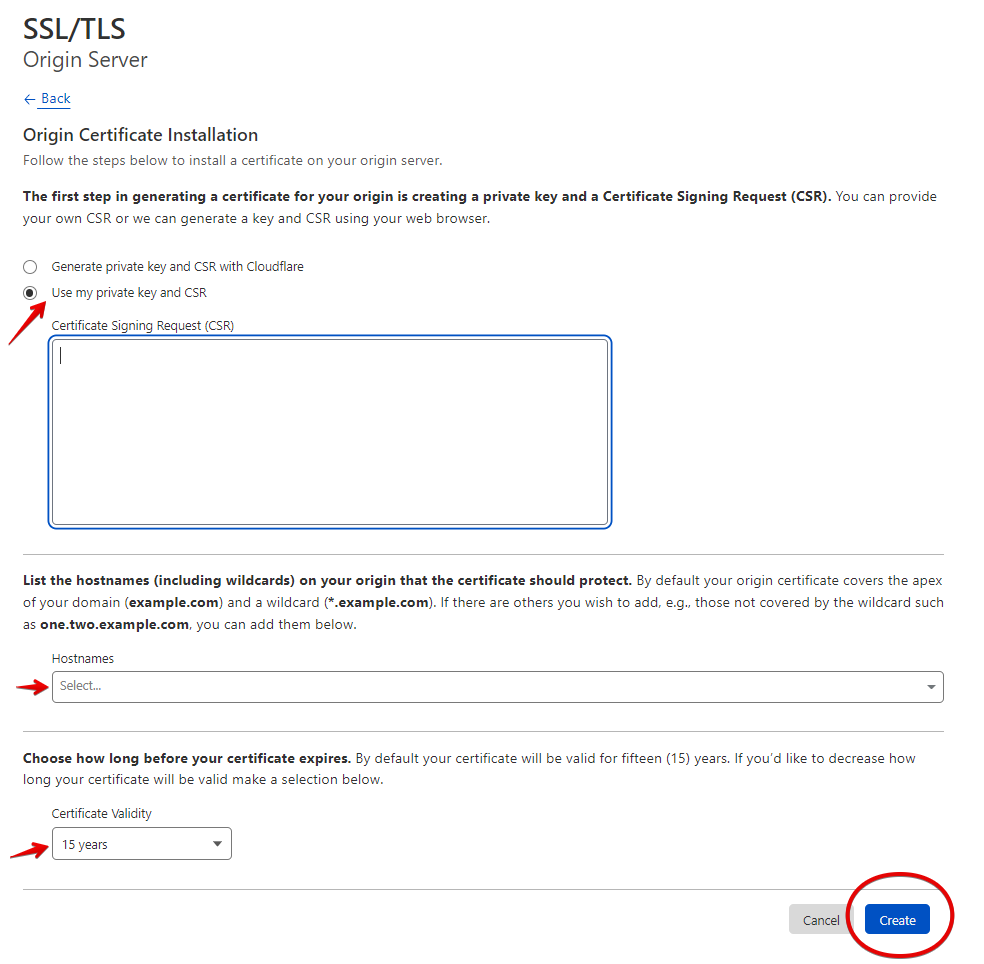
Open your Cloudflare account, select your domain, open the SSL/TLS tab and click on Origin Server to create the certificate

Step 4

Select the option I have my own private key and CSR where you will Copy-Paste the certificate you saved on the txt file from your Windows Server (certreq.csr), fill in the hostnames, select the expiration years, and press Create

Step 5

Copy-Paste in PKCS#7 key format the certificate in a text file and save the file

Import Cloudflare Origin CA root certificate at your Windows server

Step 6

Copy the Cloudflare Origin CA — RSA Root certificate from the Cloudflare website, save to a file and transfer it to your Windows Server.
[https://developers.cloudflare.com/ssl/origin-configuration/origin-ca/#4-required-for-some-add-cloudflare-origin-ca-root-certificates]
Filename: origin_ca_rsa_root.pem

Step 7

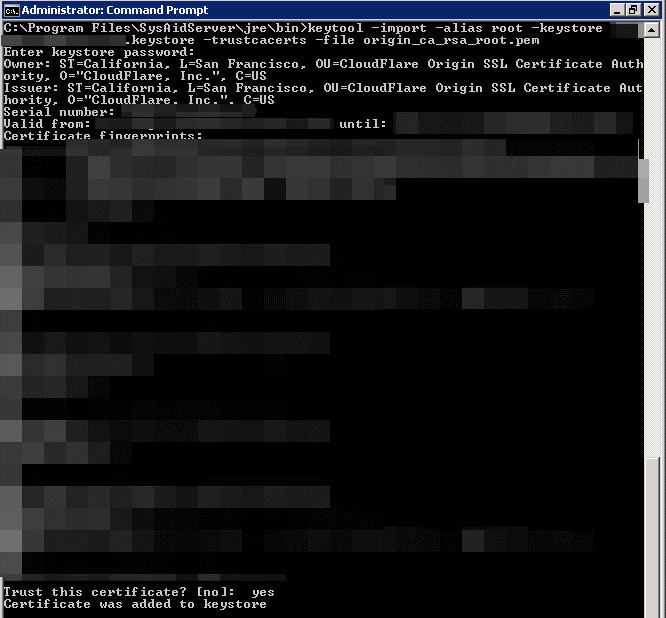
Import the root certificate into your Keystore file.

keytool -import -alias root -keystore your_site_name.keystore -trustcacerts -file origin_ca_rsa_root.pem

Add the public certificate from Cloudflare to your Windows Server

Step 8

Copy the file with the PKCS#7 certificate from Cloudflare at your Windows Server

Step 9

Run the following command to import the public certificate at your Keystore

keytool -import -alias tomcat -keystore your_site_name.keystore -file your_site_name.p7b

You should get a confirmation that the “Certificate reply was installed in Keystore.”

Use the newly created server origin certificate from Cloudflare for your website.

Step 10

Find your Tomcat server configuration (server.xml file), make the following changes at your Connector, and save the file.

<Connector executor="tomcatThreadPool" port="443" protocol="HTTP/1.1" SSLEnabled="true"
maxThreads="150" scheme="https" secure="true"
clientAuth="false" sslProtocol="TLS" keystoreFile="C:\Program Files\SysAidServer\ keystore your_site_name.keystore" keystorePass="XXXXXXXXXXXXXX" />

Step 11

Restart the Tomcat service