Ετήσια αρχεία: 2016


Status of an executing dd 1

Recently, we were cloning a large hard disk on another using dd.
This operation took a really long time, at some point we got curious on what the status of the execution was.
Due to the minimal output dd offers, there was no indication for us whether the system was still copying and if it had a long way to go or not.

Fortunately, the developers of dd added a feature where sending a USR1 signal to a running dd process makes it print I/O statistics to standard error and then resume copying.

To achieve that we used a second terminal and followed these steps:

  1. We used pgrep to look up the running process based on its name and get the dd running process ID (PID): pgrep ^dd$ .
  2. We passed that PID to kill -USR1 which triggered the printing of the statistics on the terminal where dd was executing: kill -USR1 $(pgrep ^dd$).

Solution

kill -USR1 $(pgrep ^dd$);

Bonus

Additionally, we wanted to have dd statistics printed automatically every minute.
To achieve that, we used watchwatch executes a program periodically, showing it’s output in full-screen.
We defined the interval in seconds using the parameter -n. (Please note that, the command will not allow less than 0.1 second interval.)

In the end, our command became as follows:

watch -n 60 kill -USR1 $(pgrep ^dd$)

The above command was sending a USR1 signal to dd via the kill application every minute (60 seconds) forcing it to print on standard output the I/O statistics.

Example

On terminal 1, we executed the command dd if=/dev/sda of=/dev/sdb;, which will copy disk sda over sdb.

On terminal 2, we executed the command kill -USR1 $(pgrep ^dd$);, which forced dd to print I/O statistics back on terminal 1.

0+49728 records in
7218+0 records out
3695616 bytes (3.7 MB) copied, 2.85812 s, 1.3 MB/s
0+78673 records in
11443+0 records out
5858816 bytes (5.9 MB) copied, 4.49477 s, 1.3 MB/s
0+99003 records in
14386+0 records out
7365632 bytes (7.4 MB) copied, 5.75575 s, 1.3 MB/s
^C0+172104 records in
24918+0 records out
12758016 bytes (13 MB) copied, 10.197 s, 1.3 MB/s

Samsung Galaxy: Move device contacts to Google (GMail) account

The following guide is a step by step tutorial on how to make move your phone device contacts to your Google (GMail) account.

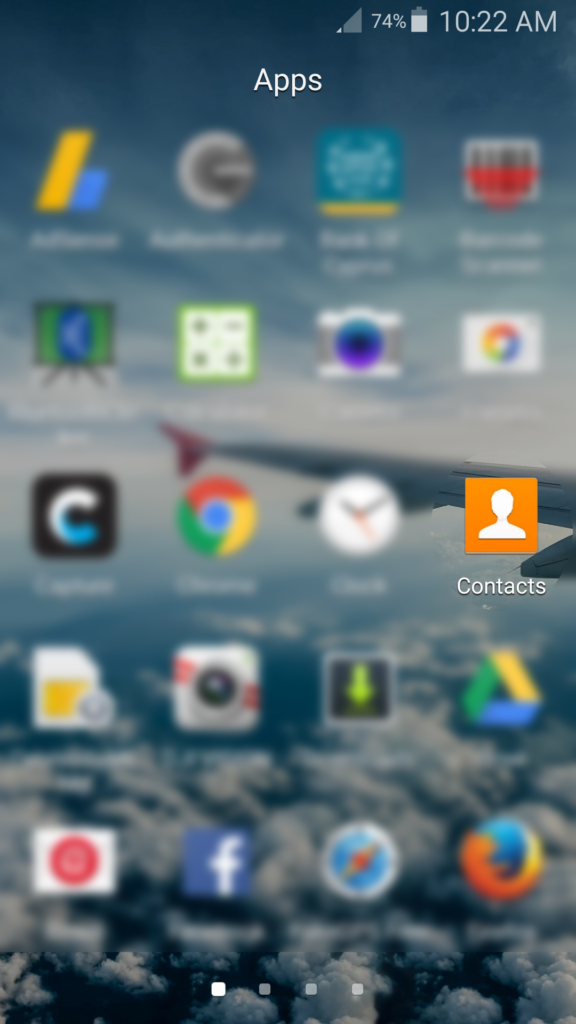
Step 0: Start the ‘Contacts’ Application

Start the 'Contacts' Application

Start the ‘Contacts’ Application

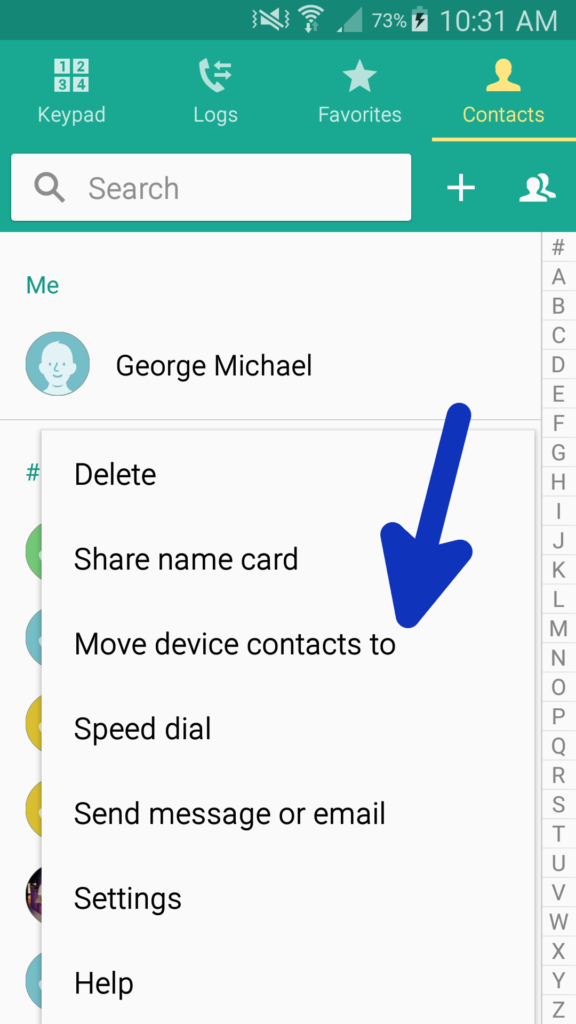
Step 1: Press the Menu button on your phone and press on ‘Move Device Contacts to’

Press the Menu button on your phone and press on 'Move Device Contacts to'

Press the Menu button on your phone and press on ‘Move Device Contacts to’

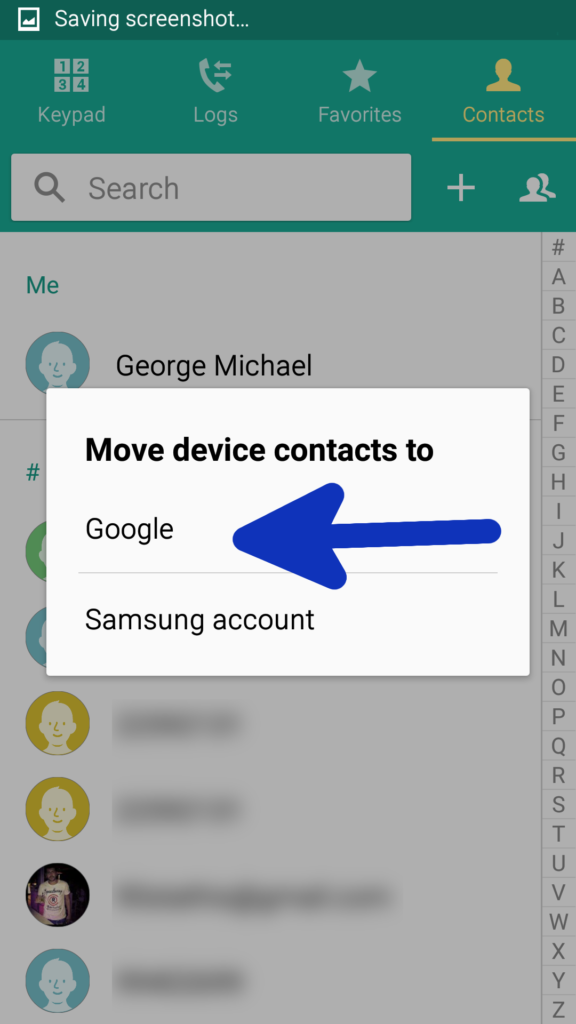
Step 2: Select ‘Google’

Select 'Google'

Select ‘Google’

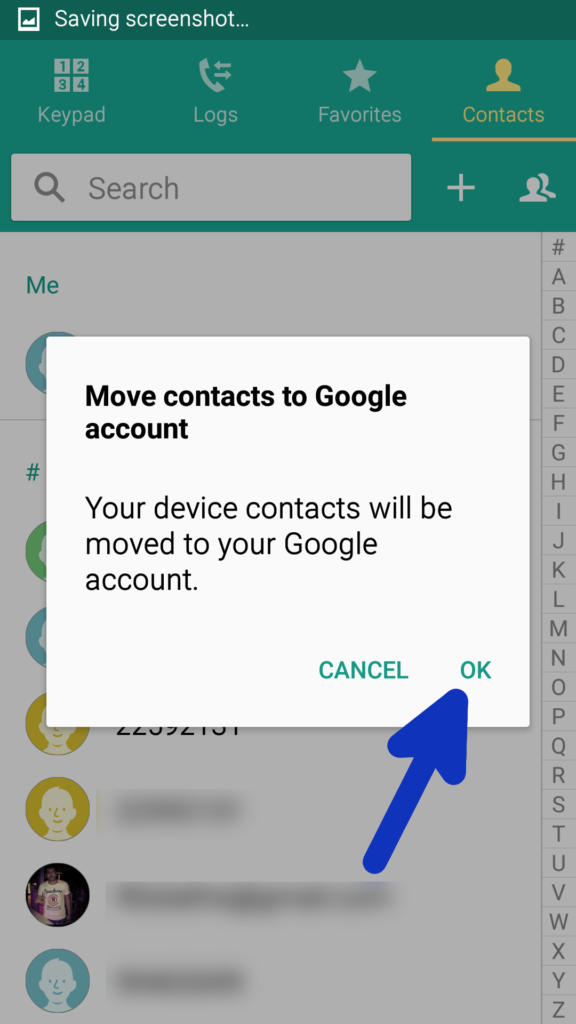
Step 3: Press ‘OK’

Press 'OK'

Press ‘OK’

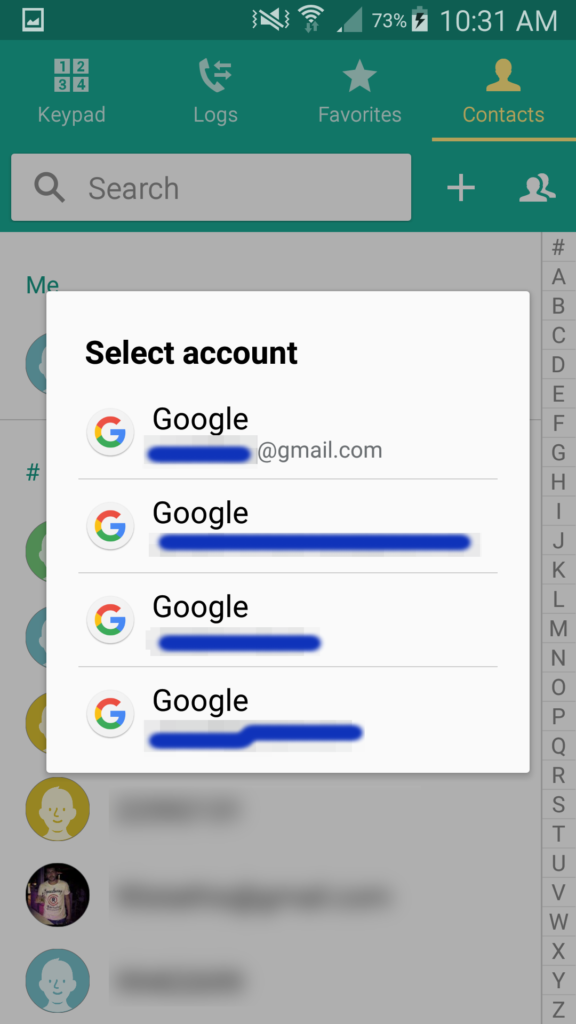
Step 4: Select the account where you want to move your device contacts to

Select the account where you want to move your device contacts to

Select the account where you want to move your device contacts to


Samsung Galaxy: Make sure contacts from all accounts are visible

The following guide is a step by step tutorial on how to make all contact visible on your phone device.

Step 0: Start the ‘Contacts’ Application

Start the 'Contacts' Application

Start the ‘Contacts’ Application

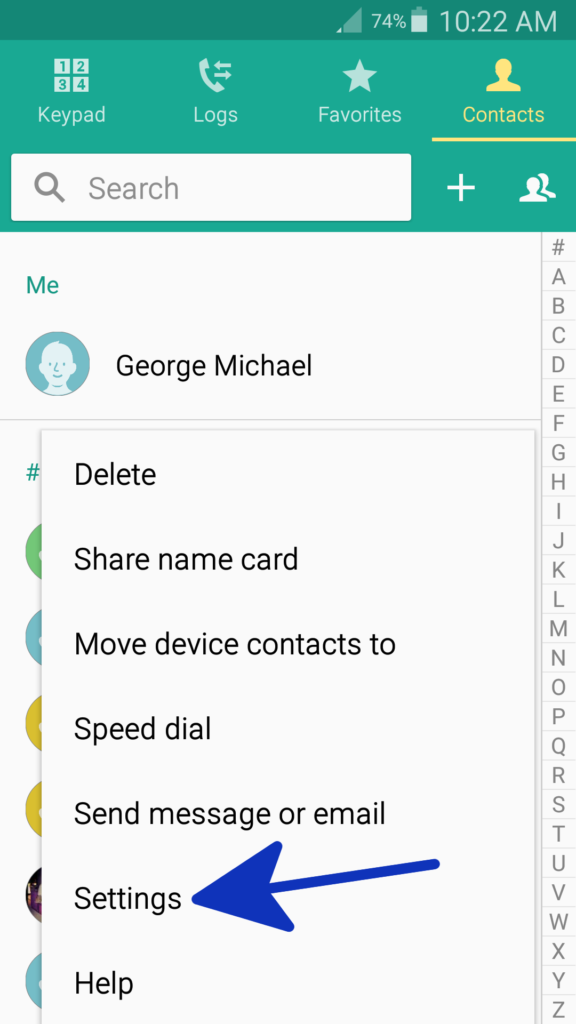
Step 1: Press the Menu button on your phone and press on ‘Settings’

Press the Menu button on your phone and press on 'Settings'

Press the Menu button on your phone and press on ‘Settings’

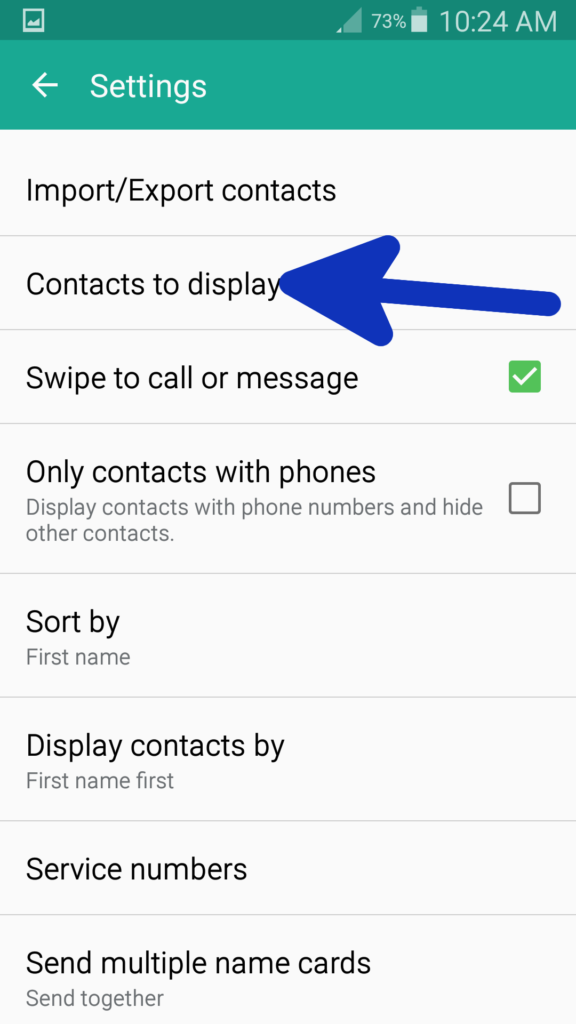
Step 2: Select ‘Contacts to display’

Select 'Contacts to display'

Select ‘Contacts to display’

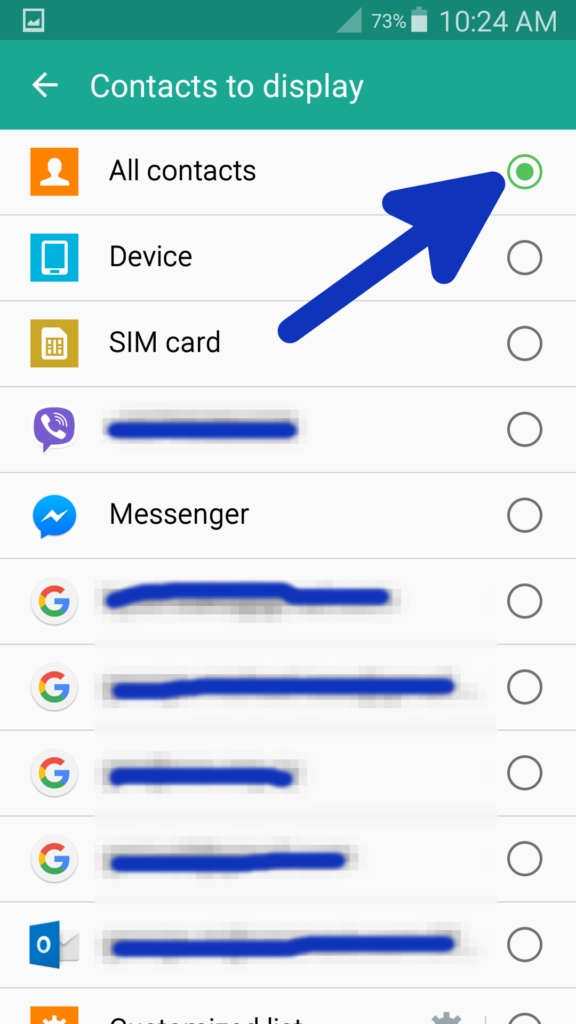
Step 3: Make sure ‘All Contacts’ is selected

Make sure 'All Contacts' is selected

Make sure ‘All Contacts’ is selected


Samsung Galaxy: Synchronize Google (GMail) contacts with phone device

The following guide is a step by step tutorial on how to synchronize your Google (GMail) account contacts with your phone device.

Step 0: Start the ‘Contacts’ Application

Start the 'Contacts' Application

Start the ‘Contacts’ Application

Step 1: Press the Menu button on your phone and press on ‘Settings’

Press the Menu button on your phone and press on 'Settings'

Press the Menu button on your phone and press on ‘Settings’

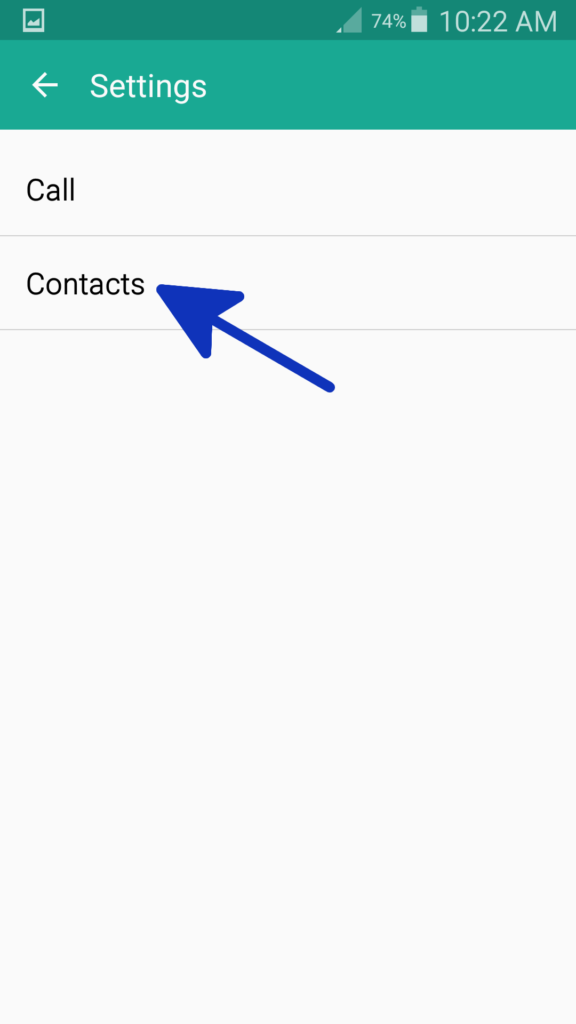
Step 2: Select ‘Contacts’

02-select-contacts

Select ‘Contacts’

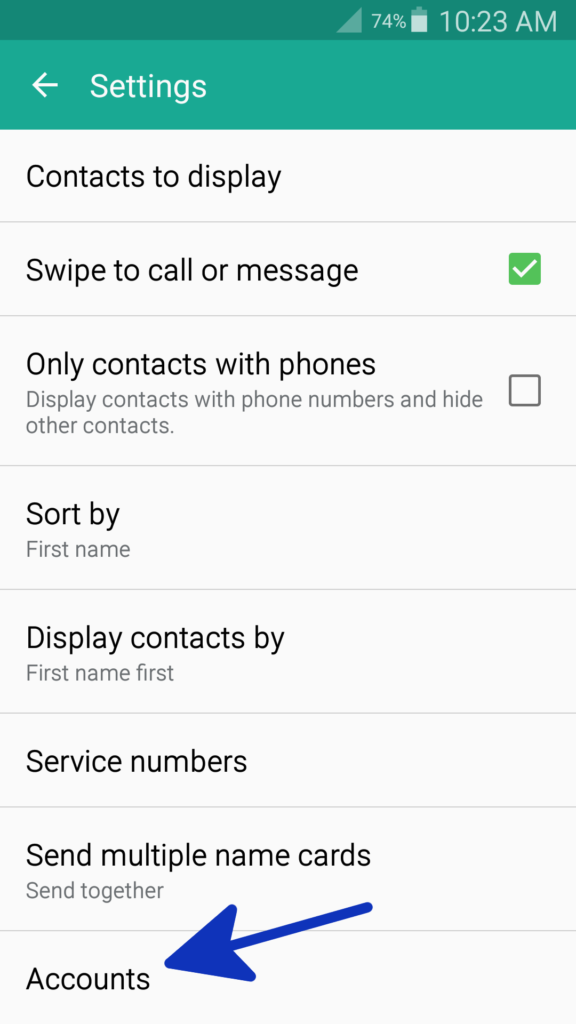
Step 3: Select ‘Accounts’

Select 'Accounts'

Select ‘Accounts’

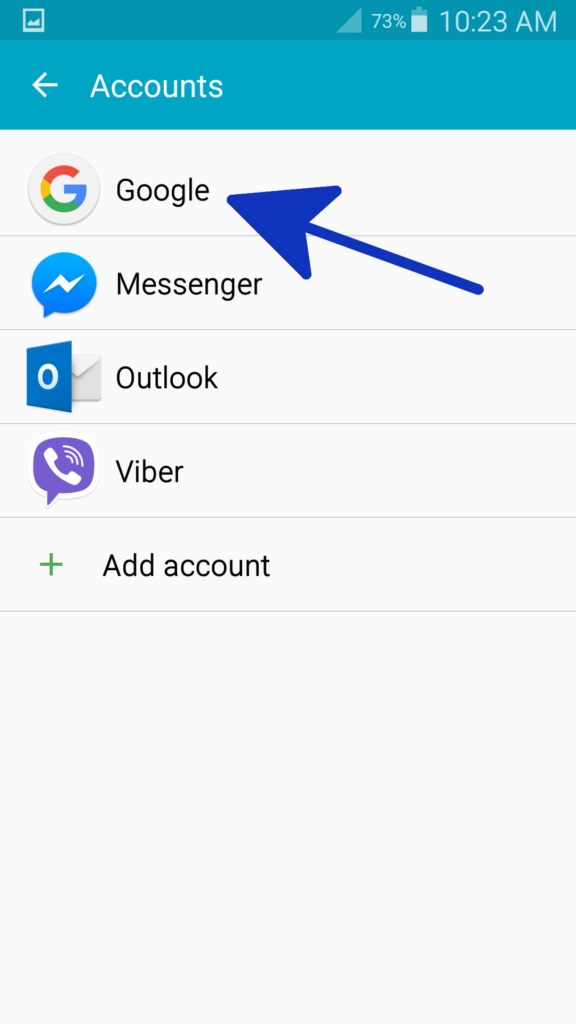
Step 4: Select ‘Google’

Select 'Google'

Select ‘Google’

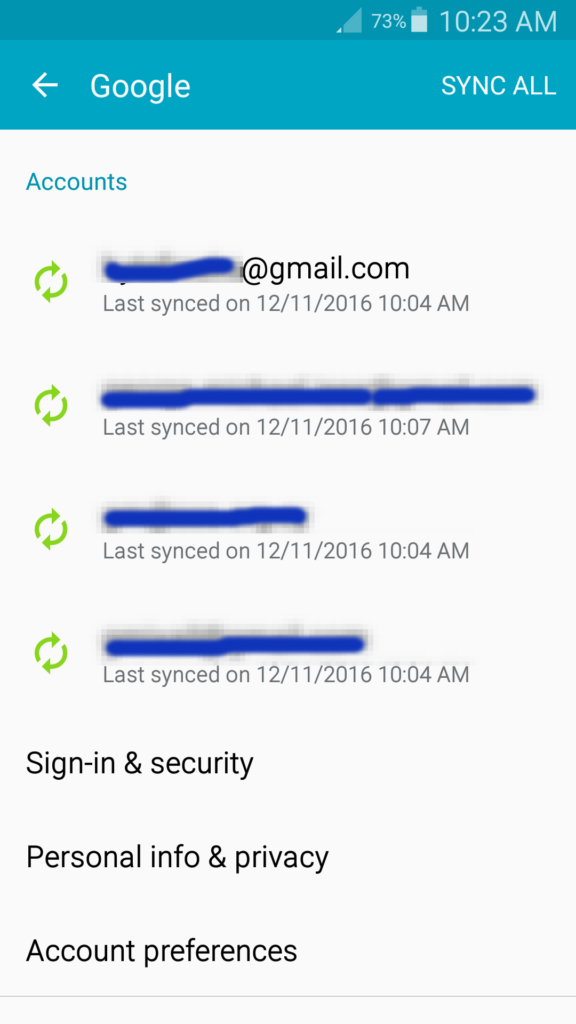
Step 5: Select the account you want to sync with

Select the account you want to sync with

Select the account you want to sync with

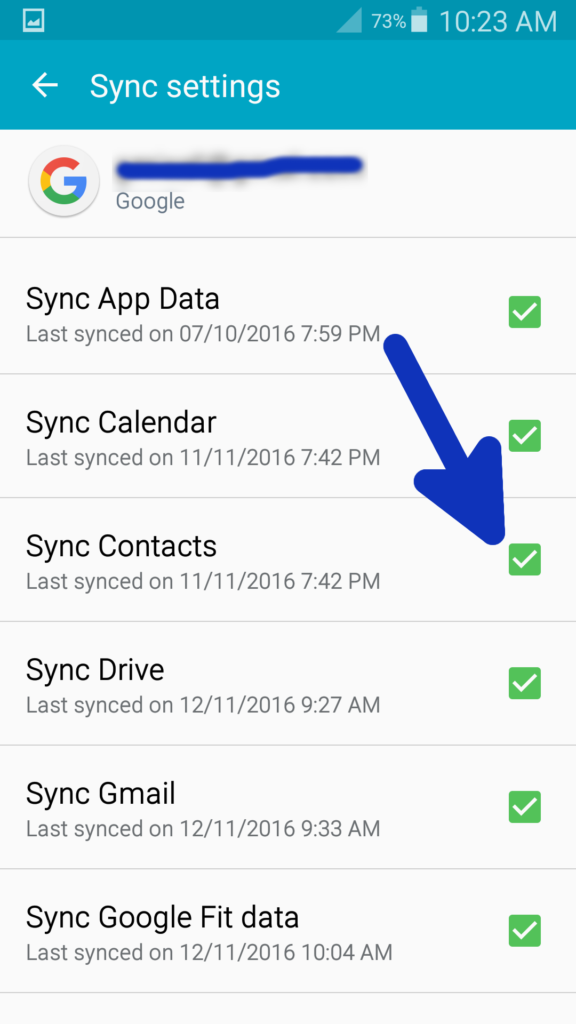
Step 6: Make sure that the ‘Sync Contacts’ option is enabled

Make sure that the 'Sync Contacts' option is enabled

Make sure that the ‘Sync Contacts’ option is enabled

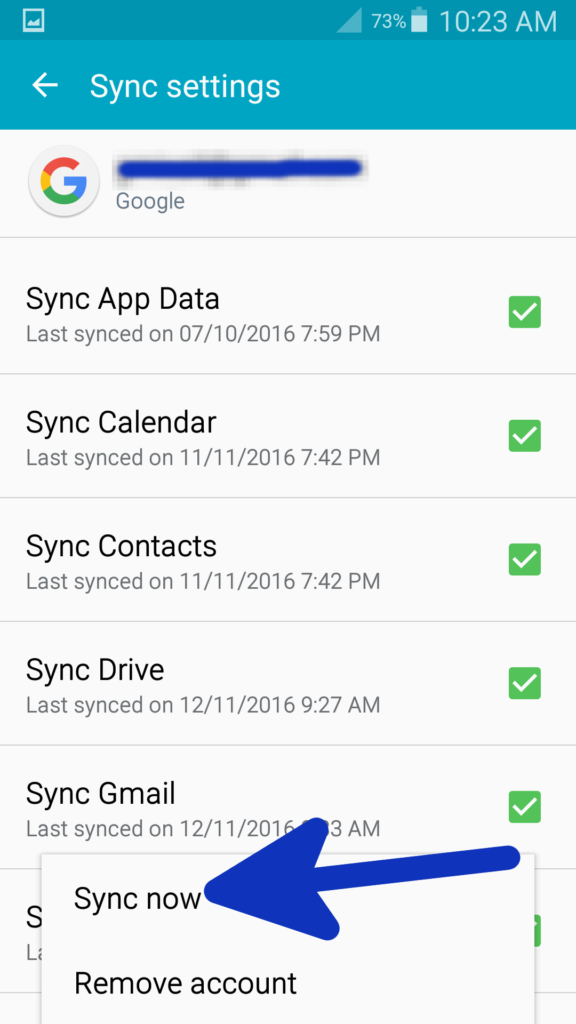
Step 7: Press the Menu button on your phone and press ‘Sync Now’

Press the Menu button on your phone and press 'Sync Now'

Press the Menu button on your phone and press ‘Sync Now’