Recently, we wanted to merge two images into one using a custom black and white mask. To avoid using heavy GUI-based software, we decided to do it using the composite command of the ImageMagick package. Using the composite program, you can overlap one image over another. The command used is straightforward once you get the order of the parameters in the command line.
convert black.jpg white.jpg mask.png -composite masked.jpg;
The above command accepts four parameters:
convert "${BLACK_PART}" "${WHITE_PART}" "${MASK}" -composite "${OUTPUT}";
The first parameter (${BLACK_PART}) is the input picture you want to be placed in all black parts of the mask. The second parameter (${WHITE_PART}) is the input photo you wish to use on all white parts of the mask. The third parameter (${MASK}) is the black and white image that you will be used to merge the previous two images. The final parameter (${OUTPUT}) is the filename to write the final results.
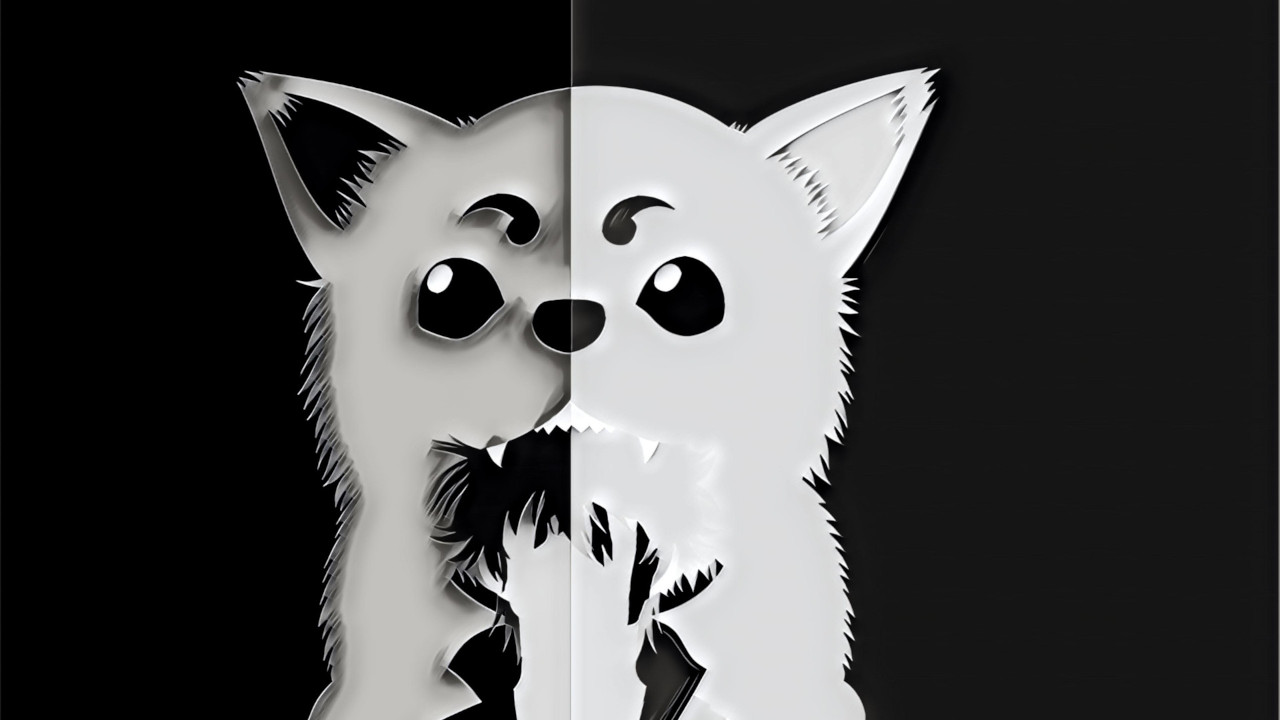
Below we present the results of a demo we created using the above command:
${BLACK_PART}) is the input picture you want to be placed in all black parts of the mask.
${WHITE_PART}) is the input photo you wish to use on all white parts of the mask.
${MASK}) is the black and white image that you will be used to merge the previous two images.
${OUTPUT}) is the filename to write the final results.This post is also available in: Greek