Set Up OpenVPN Connect with .ovpn profile for Apple iOS (iPhone, iPad) 5

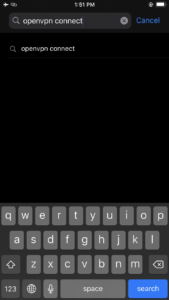
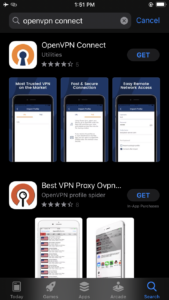
Search and install OpenVPN Connect from the App Store,
or download and install it from here:
https://apps.apple.com/us/app/open-vpn-connect/id590379981

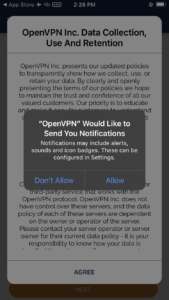
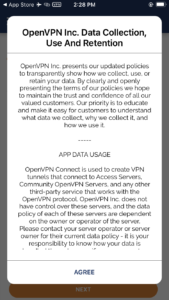
After the OpenVPN Connect is installed, open the application and proceed to accept the data license agreement and configure your settings for the notifications.

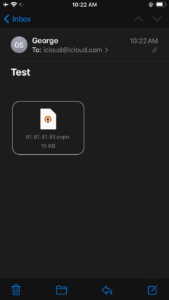
In the past you could import a profile that was available on your device (e.g. if you had the .ovpn file in the Downloads folder) through the Files application.

Unfortunately, this is no more. If you press and hold the .ovpn configuration file and click on Share, you will not get the option Copy to OpenVPN

It appears that you either need to do this through iTunes or an email that arrives to the Mail application! If the email arrives to another mail client it will not work..

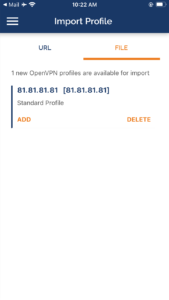
The configuration profile will now be opened in OpenVPN Connect.
Click on Add.

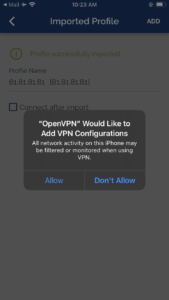
And the click on Add again:

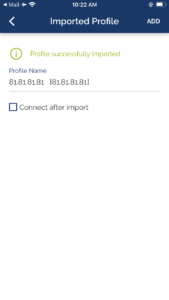
Click on Allow so that the OpenVPN Connect application will be able to create the necessary VPN configurations.

After this step, the profile should be operational and working properly.


Programming Course Series [beta]

Computer programming is important today because so much of our world is automated. Humans need to be able to control the interaction between people and machines. Since computers and machines are able to do things so efficiently and accurately, we use computer programming to harness that computing power.

This is the first of hopefully many programming courses that can introduce technically inclined people to Python programming.

Date and Time

Location

Information on our VPN service (instructions for iOS devices) will be provided to the registrants that cannot join us along with instructions on our BigBlueButton platform.

Hosts

Registration

 Speakers

George Michael

Topic:

Everybody can program (An introduction using Python)


Agenda

Introduction to programming and reasons to write programs?

These are the course-wide materials as well as Introductions’s first section where we discuss what writing programs mean. In the third part of the class, we will finish the Introduction and have the quiz and first task.

Installing and Using Python

We’re going to set up stuff so that you can write Python programs.

Introduction to programming and reasons to write programs? (continued)

We try to cover the “big picture” of programming so that you get a “table of contents” from what to expect to learn. Don’t worry if, the first time you hear it, not everything makes perfect sense. This part is very broad.

Variables and Expressions

We will explain how a program uses the memory of the machine to store, retrieve and process information in this section.

Conditional Code

We will move from sequential code in this section that simply runs one line of code after another to conditional code where some steps are skipped. It is a very basic idea – but it is how “choices” are made by computer software.

Functions

We are going to learn about what functions are and how we can use them. Functions will be an essential way for us to make sense of our code, as we move into more and more complicated programs.

Loops and Iteration

Our four fundamental programming patterns are completed by loops and iteration. Loops are the way we say Python over and over to do something. Loops are the manner in which we create programs that remain with a problem until the problem is solved.


BigBlueButton 3

BigBlueButton is a free software web conferencing system for Linux servers. Its intended use is online learning. BigBlueButton is an affiliate member of the Open Source Initiative.

Features

BigBlueButton offers certain core features including:

  • real-time sharing of audio, video, screen
  • public/private chat
  • Upload of PDF and Microsoft Office documents
  • Interactive whiteboard
  • Integration with phone systems (using FreeSWITCH)

Certain use cases are intended for teachers using the software, including:

  • Tutoring/virtual office hours
  • Flipped classroom
  • Group collaboration
  • Full online classes

BigBlueButton is a pure HTML5 client; no application is required to use it. It uses the browser’s support for web real-time communications WebRTC to send/receive audio, video, and screen.

Architecture

As a web page application, BigBlueButton front-end uses React and the backend uses MongoDB and Node.js. It also uses Redis to maintain an internal list of its meetings, attendees, and any other relevant information.

The BigBlueButton server runs on Ubuntu 16.04 64-bit and can be installed either from packages or install script. There is work underway to move to Ubuntu 18.04 in BigBlueButton 2.3.

Security

In October 2020 the German tech news portal golem.de published an article about several vulnerabilities in BigBlueButton. They criticized the unsafe use of LibreOffice, cookies without a secure flag and the use of old Ubuntu and Node.js versions. “I found a bunch of other security issues in BigBlueButton and proposed some hardening changes.” wrote Hanno Böck. “This took a lot of back and forth, but all significant issues are resolved now.”

The above material were retrieved from Wikipedia, the free encyclopedia (https://en.wikipedia.org/wiki/BigBlueButton)


Latex/Beamer: Notes page would not use whole space when in 16:9 aspect ratio

In a recent presentation we did, we added a lot of long notes…
At the specific document we had changed the aspect ratio to 16:9 using the following documentclass.

%[aspectratio=169] changes aspect ratio for slides from 4:3 to 16:9, should be better with columns
\documentclass[aspectratio=169]{beamer}

When we compiled the presentation showing the notes on the second screen, we noticed that the notes were not utilizing all of the white space. There was a huge empty column to the right, most probably it was the space that was added after changing the aspect ratio from 4:3 to 16:9.

The template we were using for the notes page was plain. To fix this issue we used the following commands to create a new version for the plain template, called wideplain.

\makeatletter
\defbeamertemplate{note page}{wideplain}{
	\vskip.25em
	\nointerlineskip
	\begin{minipage}{.9\paperwidth}
		\insertnote
	\end{minipage}
}
\makeatother

After we used this new template, the notes became wider and they used all of the available space.

%Enable to produce notes
\usepackage{pgfpages}
\setbeameroption{show notes on second screen=right}
\setbeamertemplate{note page}[wideplain]

Note:

In the code we defined the new template, initially we used \textwidth instead of \paperwidth which resulted in the same result as the plain template. So we assume that there is an issue somewhere that the notes template does not adapt its \textwidth properly when changing the paper aspect ratio.