Easy Setup – Slow Execution by using the CPUs only
Getting CUDA support in OpenCV for Python can be tricky as you will need to make several changes to your PC. On many occasions, it can fail if you are not comfortable troubleshooting the procedure. For this reason, we are presenting an alternative solution that is easy to implement and should work on most machines. The problem with this solution is that it will ignore your GPU and utilize your CPUs only. This means that executions will most probably be slower than the GPU-enabled one.
Conda / Anaconda
First of all, we installed and activated anaconda on an Ubuntu 20.04LTS desktop. To do so, we installed the following dependencies from the repositories:
sudo apt-get install libgl1-mesa-glx libegl1-mesa libxrandr2 libxrandr2 libxss1 libxcursor1 libxcomposite1 libasound2 libxi6 libxtst6;
Then, we downloaded the 64-Bit (x86) Installer from (https://www.anaconda.com/products/individual#linux).
Using a terminal, we followed the instructions here (https://docs.anaconda.com/anaconda/install/linux/) and performed the installation.
Python environment and OpenCV for Python
Following the previous step, we used the commands below to create a virtual environment for our code. We needed python version 3.9 (as highlighted here https://www.anaconda.com/products/individual#linux) and OpenCV for python.
source ~/anaconda3/bin/activate;
conda create --yes --name HarpyTM python=3.9;
conda activate HarpyTM;
pip install numpy scipy scikit-learn opencv-python==4.5.1.48;
Please note that we needed to limit the package for opencv-python to 4.5.1.48 because we were getting the following error on newer versions:
python3 Monitoring.py
./data/DJI_0406_cut.MP4
[INFO] setting preferable backend and target to CUDA...
Traceback (most recent call last):
  File "/home/bob/Traffic/HarpyTM/Monitoring.py", line 51, in <module>
    detectNet = detector(weights, config, conf_thresh=conf_thresh, netsize=cfg_size, nms_thresh=nms_thresh, gpu=use_gpu, classes_file=classes_file)
  File "/home/bob/Traffic/HarpyTM/src/detector.py", line 24, in __init__
    self.layers = [ln[i[0] - 1] for i in self.net.getUnconnectedOutLayers()]
  File "/home/bob/Traffic/HarpyTM/src/detector.py", line 24, in <listcomp>
    self.layers = [ln[i[0] - 1] for i in self.net.getUnconnectedOutLayers()]
IndexError: invalid index to scalar variable.
Usage
git clone https://github.com/rafcy/HarpyTM;
cd HarpyTM/;
# We manually create the following folders and set their priviledges as we were  getting errors when they were autogenerated by the code of HarpyTM.
mkdir -p results/Detections/videos;
chmod 777 results/Detections/videos;
After successfully cloning the project, we modified the config.ini to meet our needs, specifically, we changed all paths to be inside the folder of HarpyTM and used the full resolution for the test video:
[Video]
video_filename 		= ./data/DJI_0406_cut.MP4
resize 			= True
image_width 		= 1920
image_height 		= 1080
display_video		= False
display_width 		= 1920
display_height 		= 1080


[Export]
save_video_results	= True
video_export_path 	= ./results/Detections/videos/
csv_path 		= ./results/
export			= True
display_track		= True

[Detector]
#darknet
darknet_config 		= ./data/Configs/vehicles_ty3.cfg
darknet_weights 	= ./data/Configs/vehicles_ty3.weights
classes_file 		= ./data/Configs/vehicles.names
cfg_size_width		= 608
cfg_size_height		= 608
iou_thresh 		= 0.3
conf_thresh 		= 0.3
nms_thresh 		= 0.4
use_gpu 		= True

[Tracker]
flight_height 		= 150
sensor_height 		= 0.455
sensor_width		= 0.617
focal_length		= 0.567
reset_boxes_frames	= 40
calc_velocity_n		= 25
draw_tracks		= True
export_data		= True
Finally, we were able to execute the code as follows:
python3 Monitoring.py;
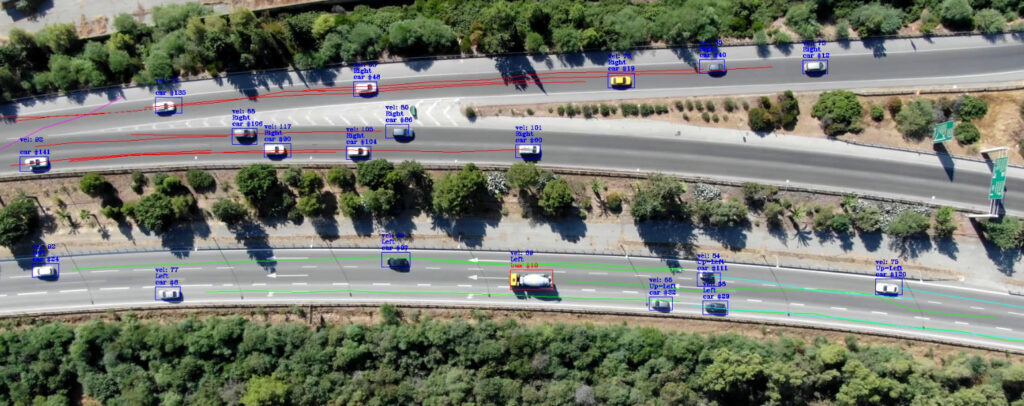
After the execution was done, we found in the folder ./results/Detections/videos/ the video showing the bounding boxes etc. The resulting video was uploaded here:
This post is also available in: Αγγλικα

