Cloudflare API DNS Update
Cloudflare is a content delivery network (CDN) that provides a wide range of services, including domain name system (DNS) management. The Cloudflare API allows developers to programmatically manage DNS records, making it possible to automate updating DNS records. This blog post will explain how to use the Cloudflare API to update a DNS record.
Log in to Cloudflare and get your Global API Key
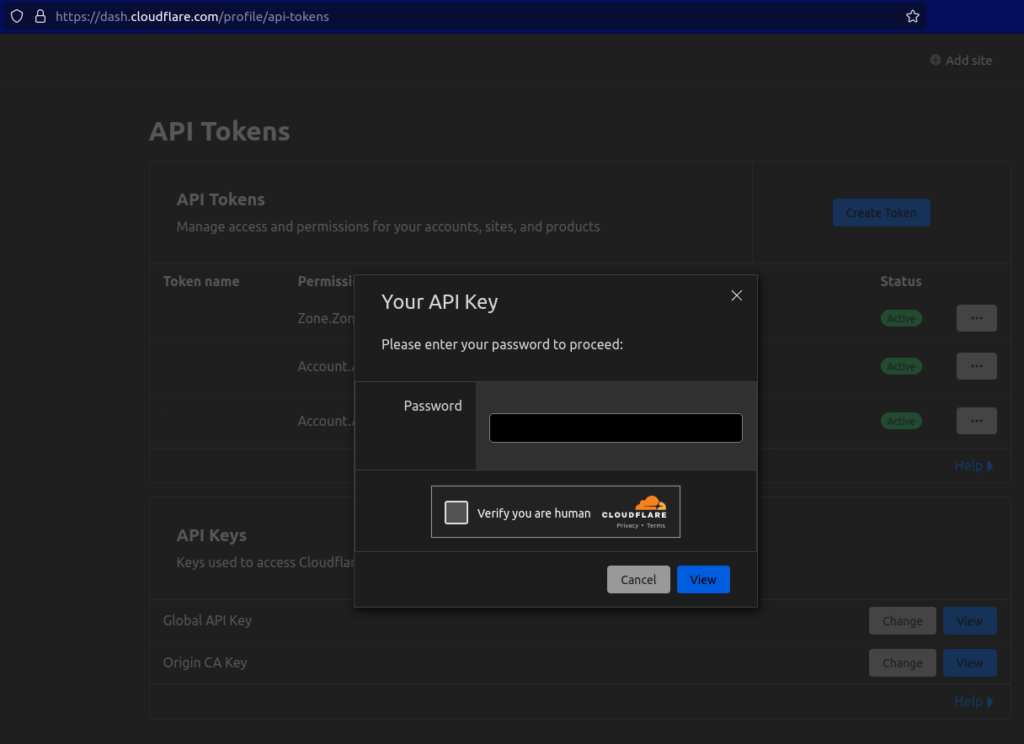
First, log in to your Cloudflare account and obtain your Global API Key. You can obtain your Global API Key by navigating to the URL: https://dash.cloudflare.com/profile/api-tokens. Once logged in, you should see a section called “API Tokens.” Click on the “View” button to see your Global API Key.
Find the Zone ID
The next step is to find the Zone ID of the domain you want to update. You can find the Zone ID by following the instructions provided in the Cloudflare documentation: https://developers.cloudflare.com/fundamentals/get-started/basic-tasks/find-account-and-zone-ids/.
- Click on the domain you want to manage.
- In the left-hand sidebar, click on “Overview.”
- Scroll to the “API” section and click “Get your API key.”
- Click on the “View” button next to the Global API Key.
- Copy the key and keep it somewhere safe.
Get the DNS Record Identifiers
Once you have obtained the Zone ID, you can use it to get the identifiers for the DNS records associated with that domain. You can do this by making a GET request to the Cloudflare API, specifying the Zone ID, and providing your email address and API key. The response will contain information about all of the DNS records associated with the domain, including their identifiers.
Here is an example command that you can use to get the DNS record identifiers:
curl --request GET \
  --url https://api.cloudflare.com/client/v4/zones/<zone_id>/dns_records \
  --header 'Content-Type: application/json' \
  --header 'X-Auth-Email: <email_address>' \
  --header 'X-Auth-Key: <api_key>'
Replace <zone_id>, <email_address>, and <api_key> with your actual values.
Update the DNS Record
Finally, you can use the DNS record identifier to update the DNS record. The following is an example bash script that you can use to update a DNS record:
#!/bin/bash

ip=`curl https://bytefreaks.net/what-is-my-ip | grep '<h1 style="text-align: center;"' | cut -d '>' -f 2 | cut -d '<' -f 1`;

ip=`echo $ip | cut -d, -f1`;

comment=`date +%Y-%m-%d\ %H:%M`;

curl --request PUT \
  --url https://api.cloudflare.com/client/v4/zones/<zone_id>/dns_records/<dns_record_id> \
  --header 'Content-Type: application/json' \
  --header 'X-Auth-Email: <email_address>' \
  --header 'X-Auth-Key: <api_key>' \
  --data '{
  "content": "'$ip'",
  "name": "www.bytefreaks.net",
  "proxied": true,
  "type": "A",
  "comment": "'"$comment"'",
  "tags": [],
  "ttl": 3600
}'
Replace <zone_id>, <dns_record_id>, <email_address>, and <api_key> with your actual values. You should also update the "name" field to match the name of the DNS record you want to update.
This script is used to update a DNS record using the Cloudflare API. It retrieves the current public IP address of the device running the script and then updates the specified DNS record on Cloudflare with the new IP address.
Here is a breakdown of each command in the script:
ip=curl https://bytefreaks.net/what-is-my-ip | grep ‘<h1 style=”text-align: center;”‘ | cut -d ‘>’ -f 2 | cut -d ‘<‘ -f 1“: This command uses thecurlcommand to retrieve the public IP address of the device running the script from the websitehttps://bytefreaks.net/what-is-my-ip. The output of this command is then piped throughgrepto find the line that contains the IP address. Thecutcommand is then used to extract the IP address from the line.ip=echo $ip | cut -d, -f1“: This command removes any commas from the IP address, which may be present if the IP address is in a format that includes additional information.comment=date +%Y-%m-%d\ %H:%M“: This command generates a comment for the DNS record update. The comment includes the current date and time in the formatYYYY-MM-DD HH:MM.curl --request PUT \: This command sends an HTTP PUT request to update the specified DNS record.--url https://api.cloudflare.com/client/v4/zones/<zone_id>/dns_records/<dns_record_id> \: This specifies the URL for the Cloudflare API endpoint for updating a DNS record. The<zone_id>and<dns_record_id>placeholders should be replaced with the actual zone ID and DNS record ID, respectively.--header 'Content-Type: application/json' \: This specifies that the content type of the request is JSON.--header 'X-Auth-Email: <email_address>' \: This specifies the Cloudflare account email address associated with the API key. The<email_address>placeholder should be replaced with the actual email address.--header 'X-Auth-Key: <api_key>' \: This specifies the Cloudflare API key for the account. The<api_key>placeholder should be replaced with the actual API key.--data '{ ... }': This specifies the JSON data to be sent in the request body. This includes the new IP address in thecontentfield, the domain name in thenamefield, the record type in thetypefield, the comment in thecommentfield, and other optional parameters like thettl. Note that the domain nameat.put.cyis hardcoded in the script, and should be replaced with the actual domain name to be updated.


